OWC Thunderbay 4 Mini review: 20TB, RAID, Thunderbolt 3 for less than €800
- Design and dimensions
- Shucking 2.5’’ hard drives for the RAID array
- Choosing between RAID 10 (1+0) or 01 (0+1)
- Why I chose Apple Disk Utility instead of SoftRAID
- Setting up RAID 10 array using Apple Disk Utility
- Performance
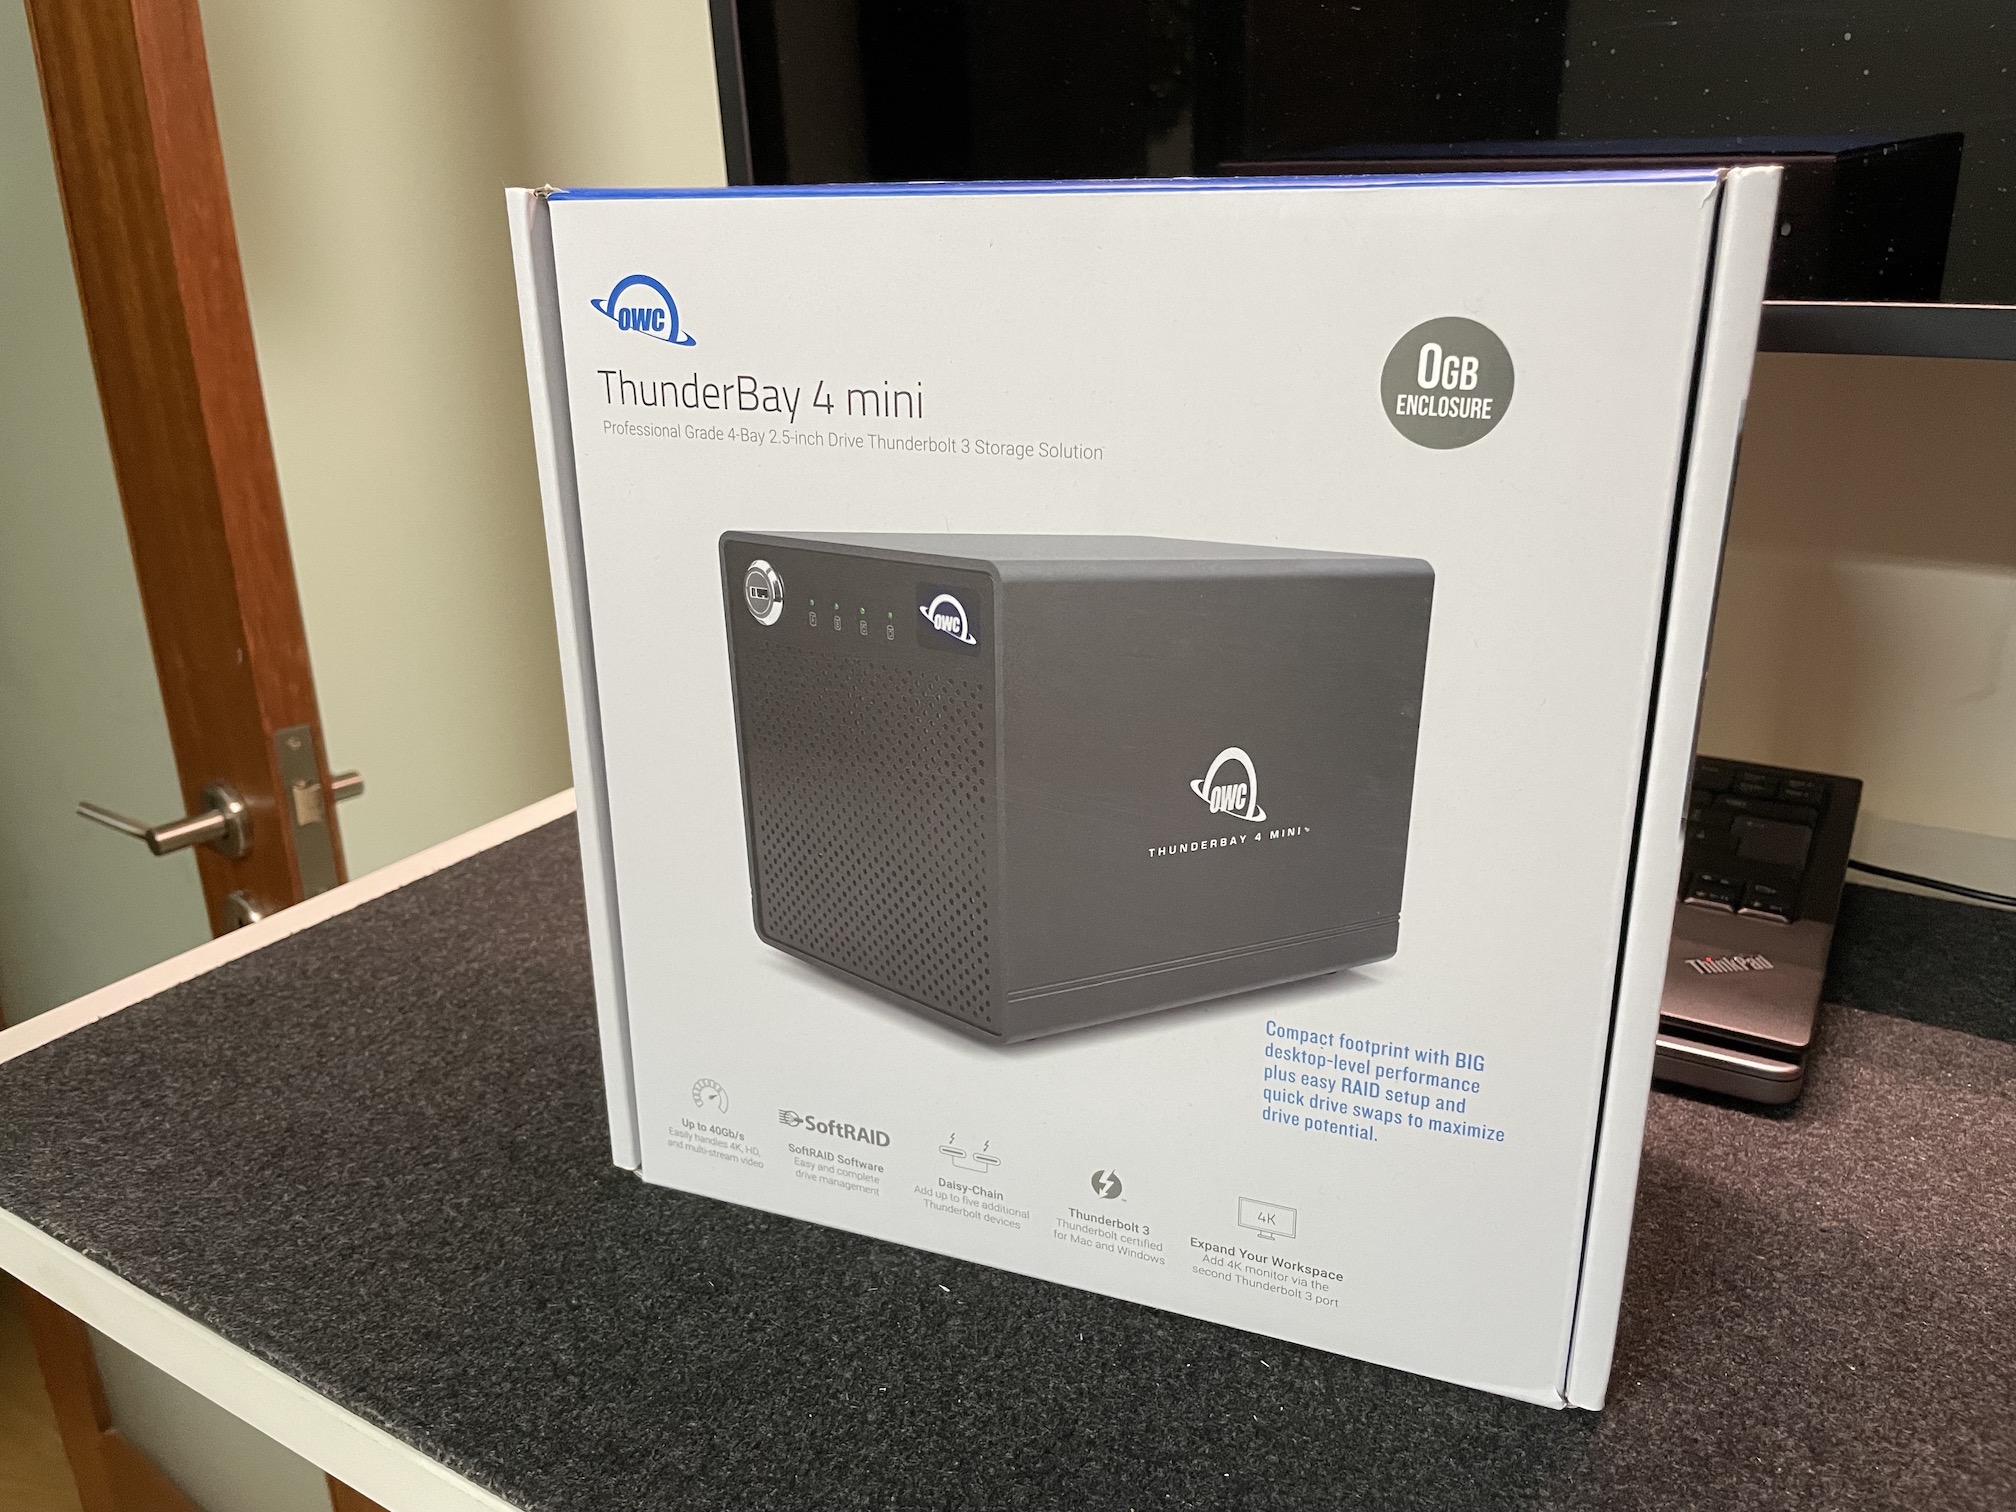
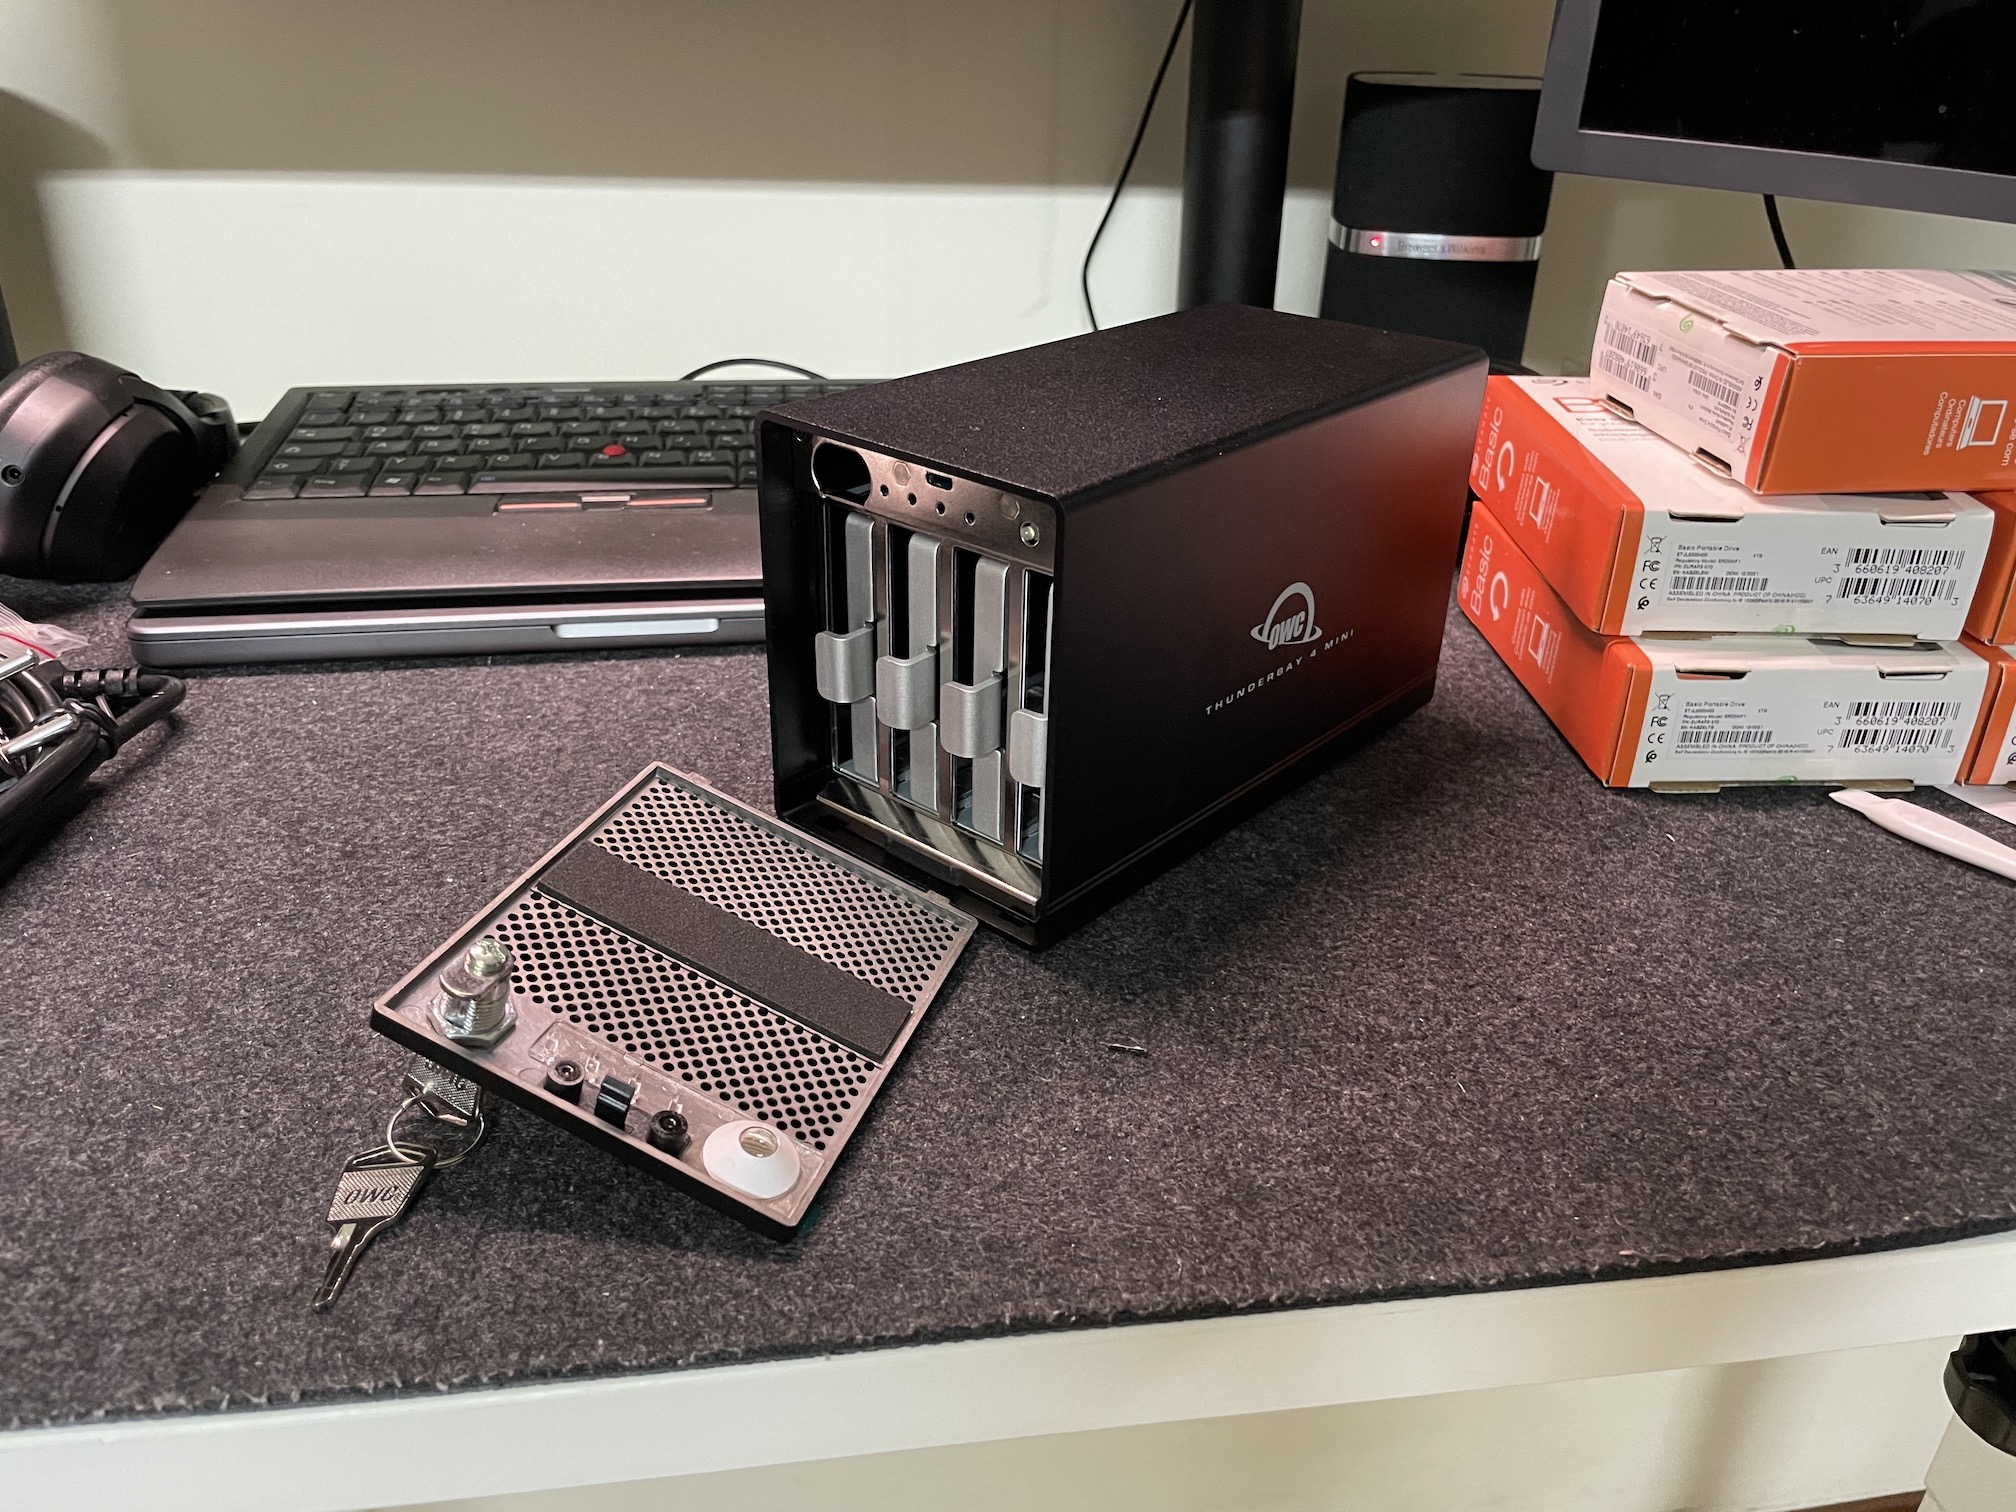
The Thunderbay 4 Mini Packaging
The OWC Thunderbay 4 Mini is a pretty unique value proposition due to its dimensions and flexibility. It sports a tiny footprint, fitting perfectly in a minimalistic desktop, and achieves it by using 2.5’’ hard drives instead of 3.5’’.
Despite being quite expensive for an enclosure at around €350, its Thunderbolt 4 interface makes it very fast, and the 4 SATA bays make it very flexible: you can use SSDs for maximum speed, allowing you to edit video straight off the Thunderbay, or HDDs to cope with some big storage needs. When combined with some hard drive shucking it can become an attractive proposal from a cost/benefit perspective.
Design and dimensions
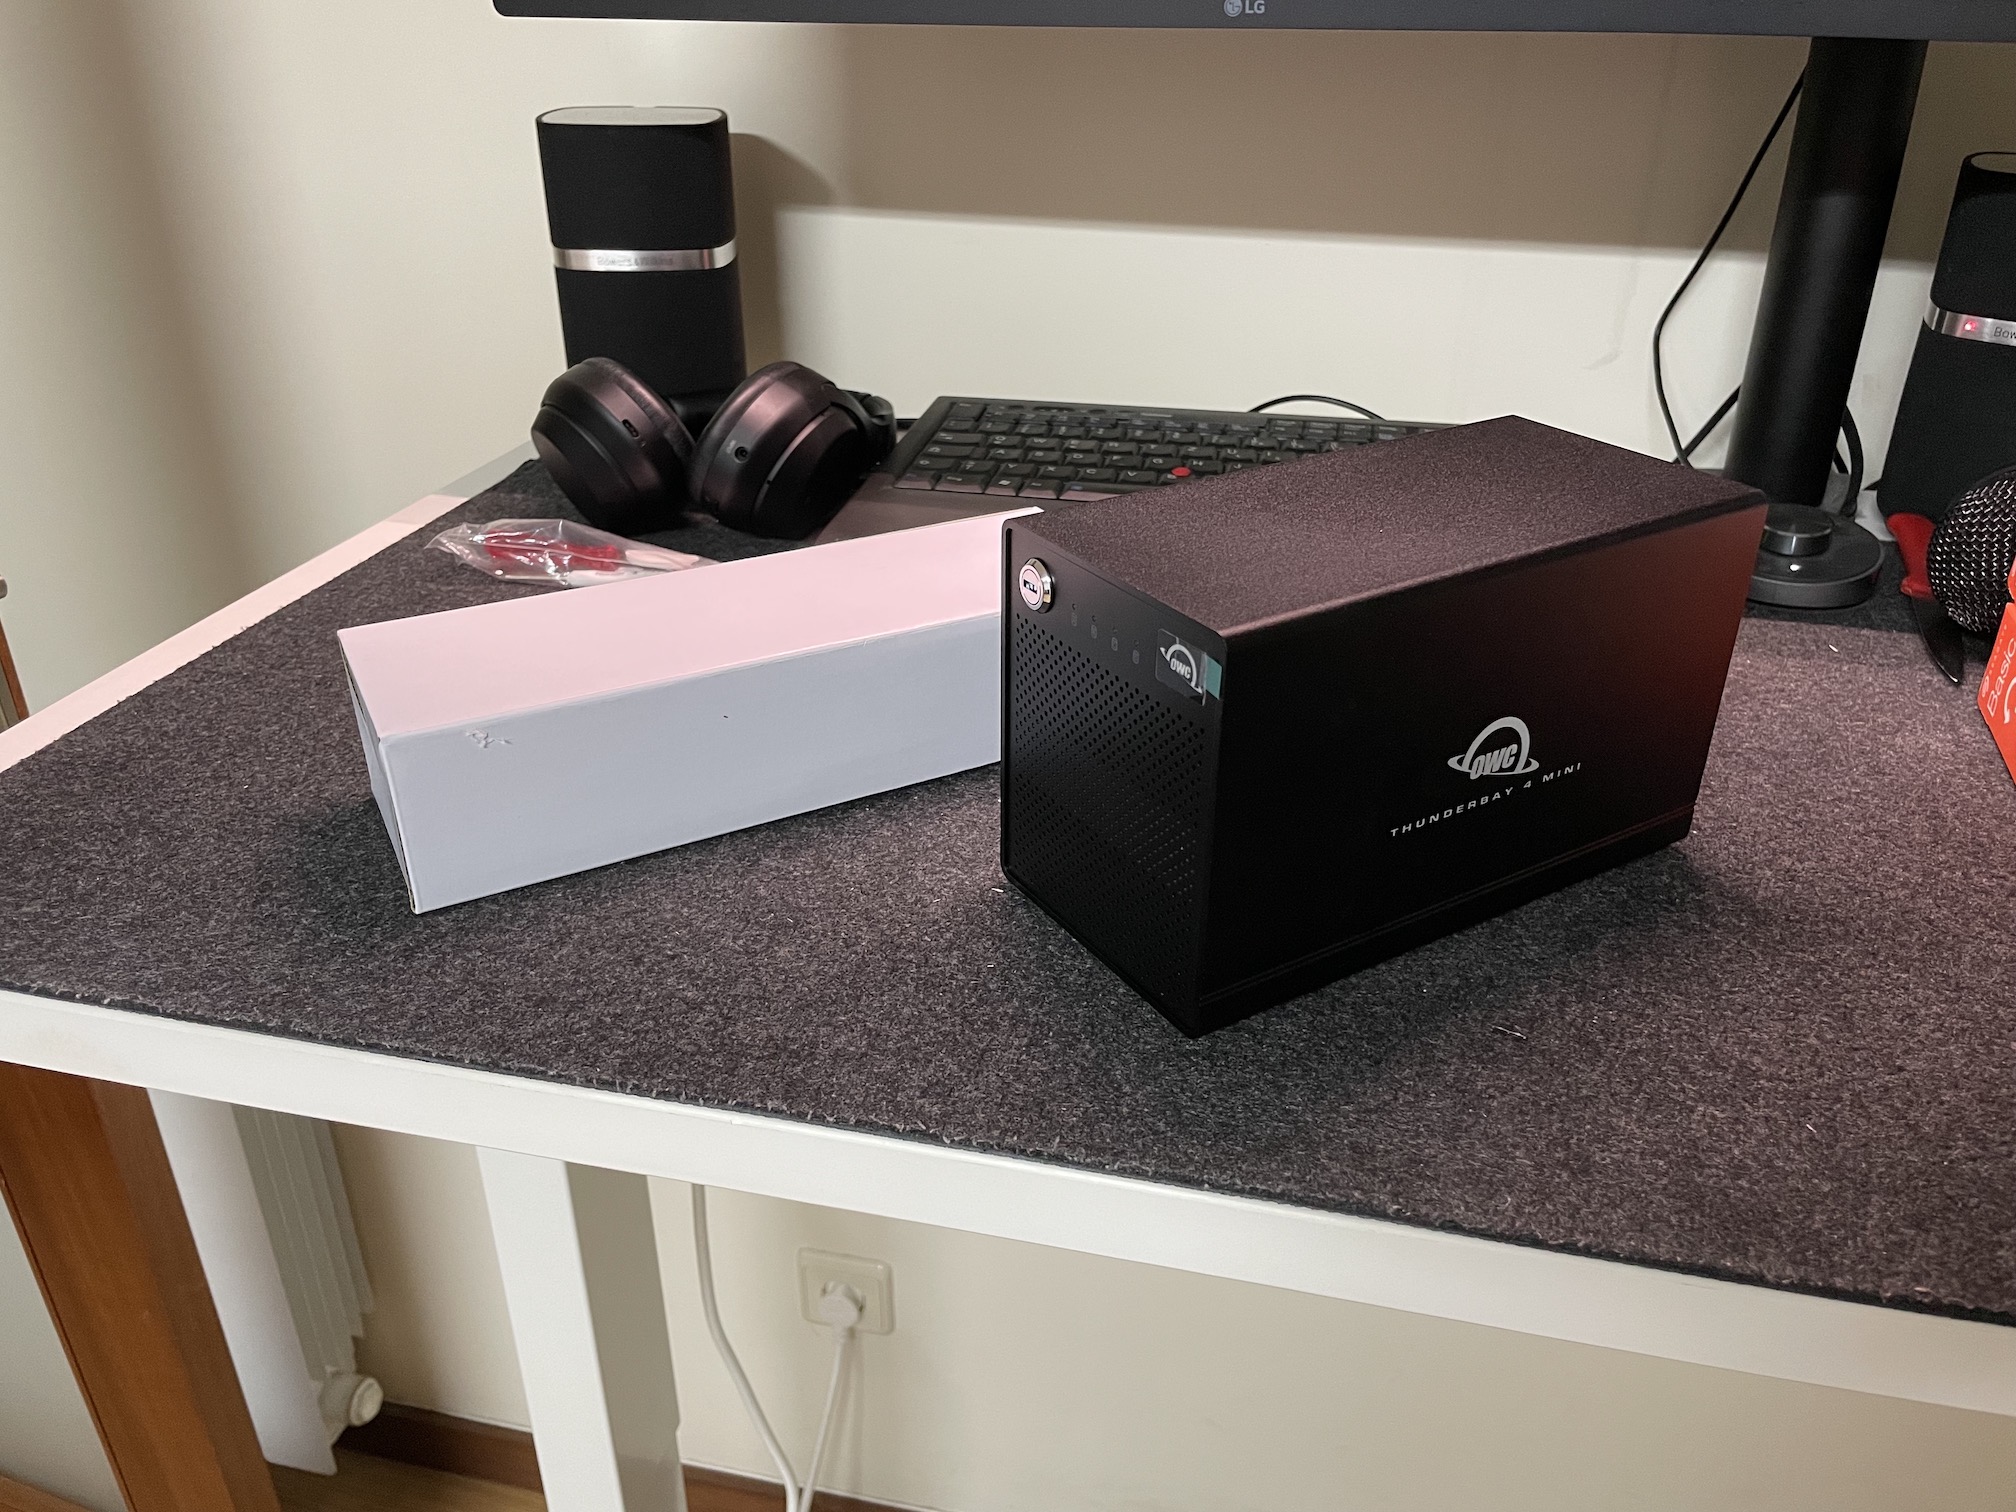
Thunderbay 4 Mini Design.
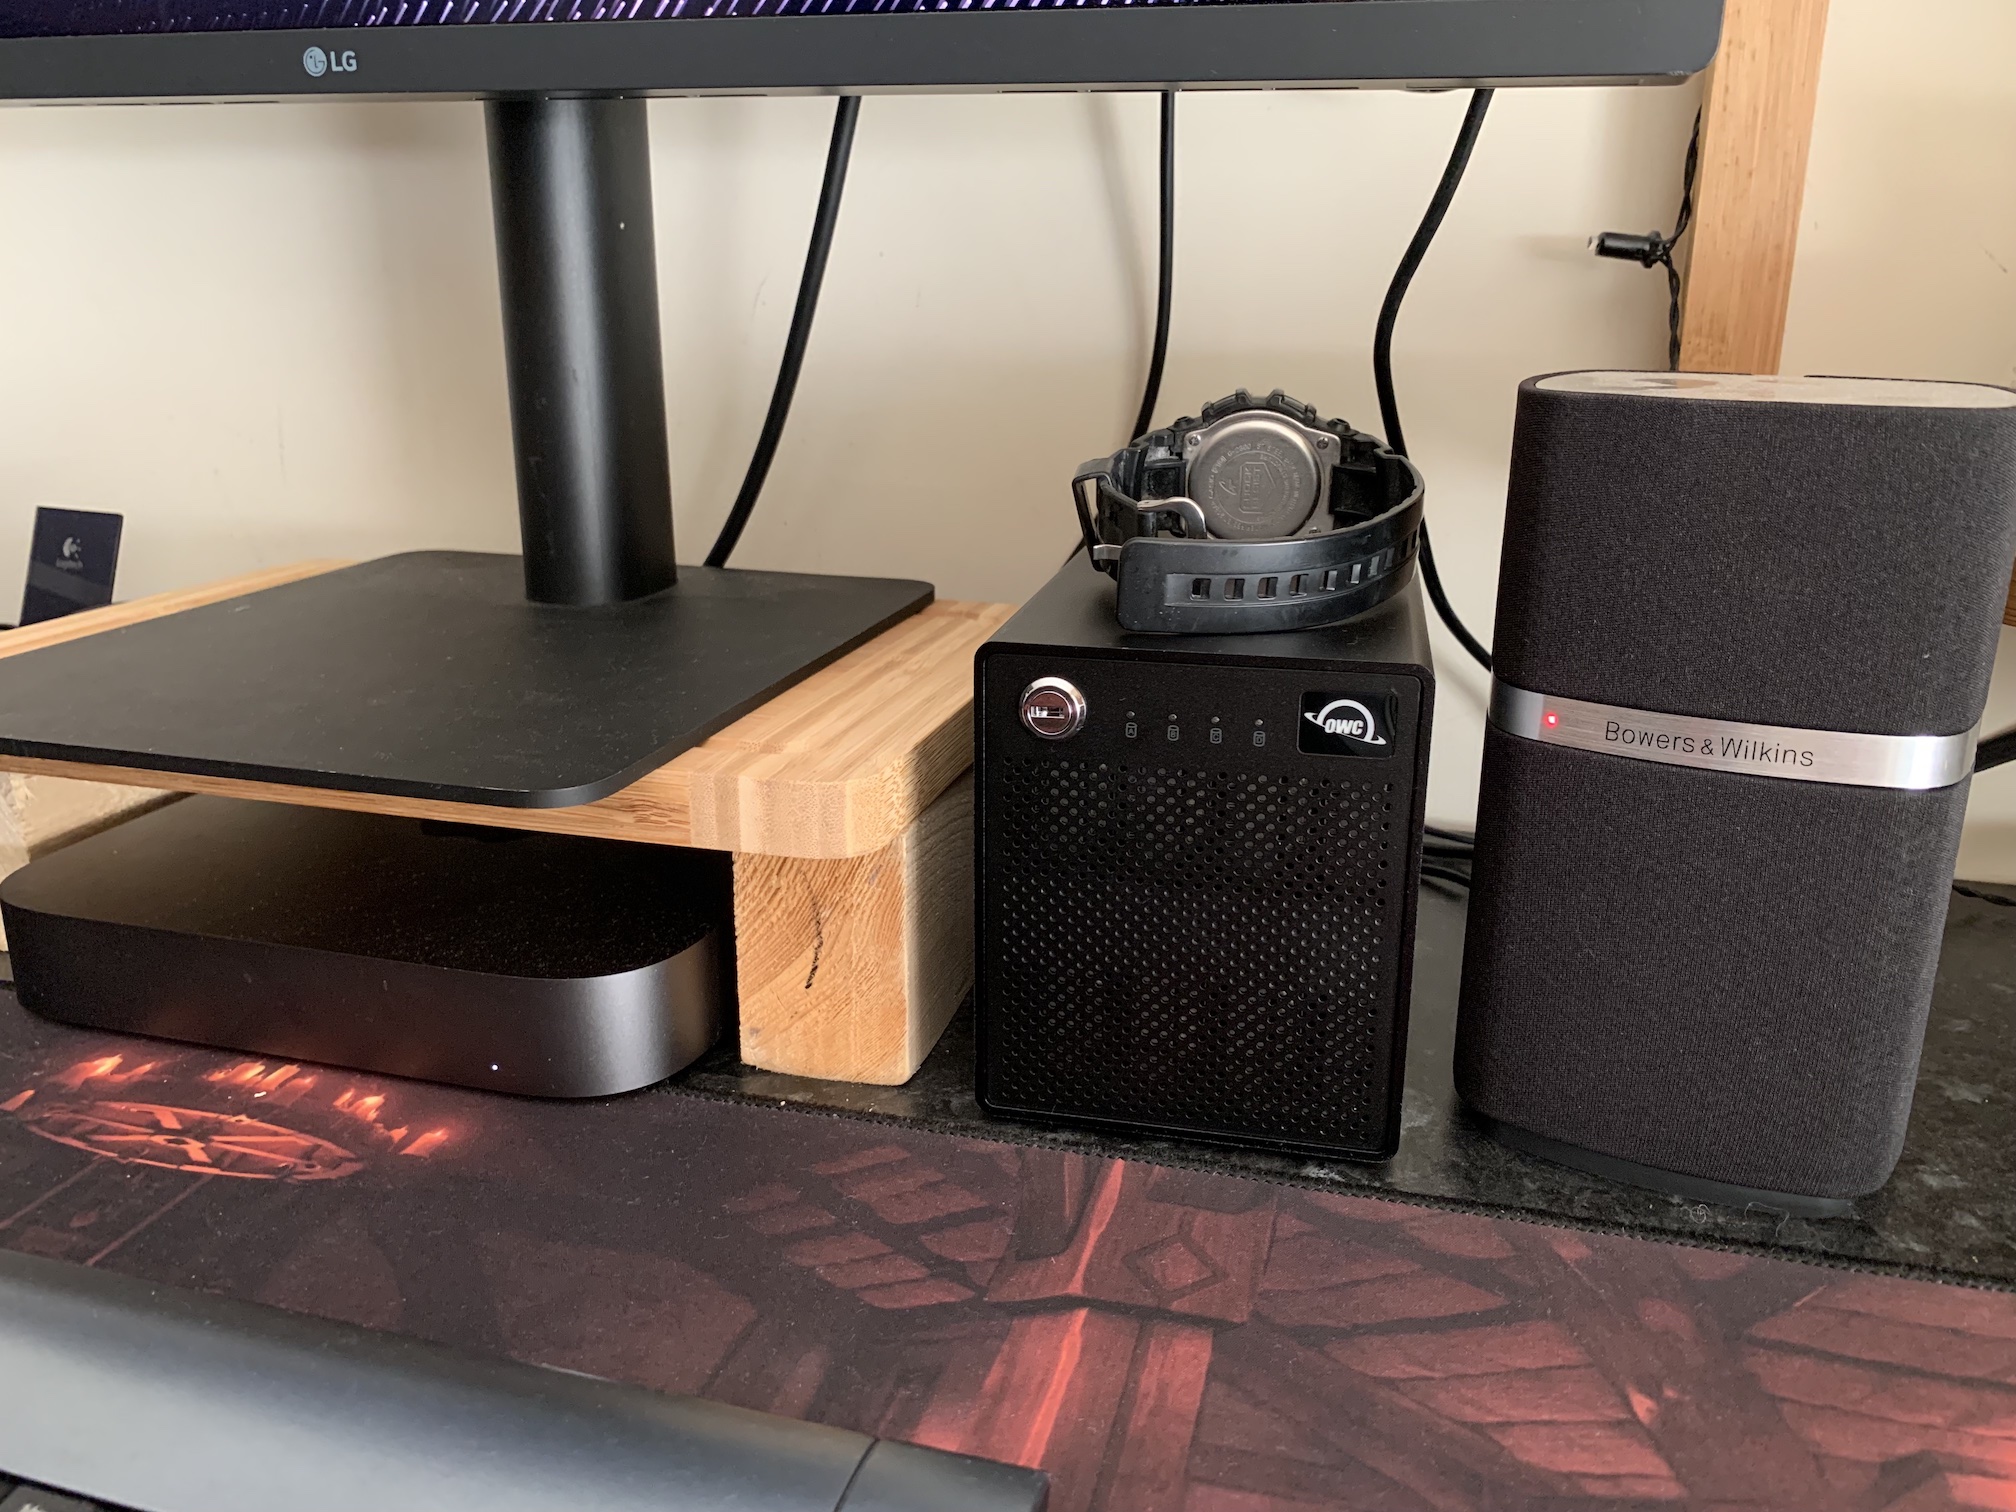
Several objects around for size comparison.
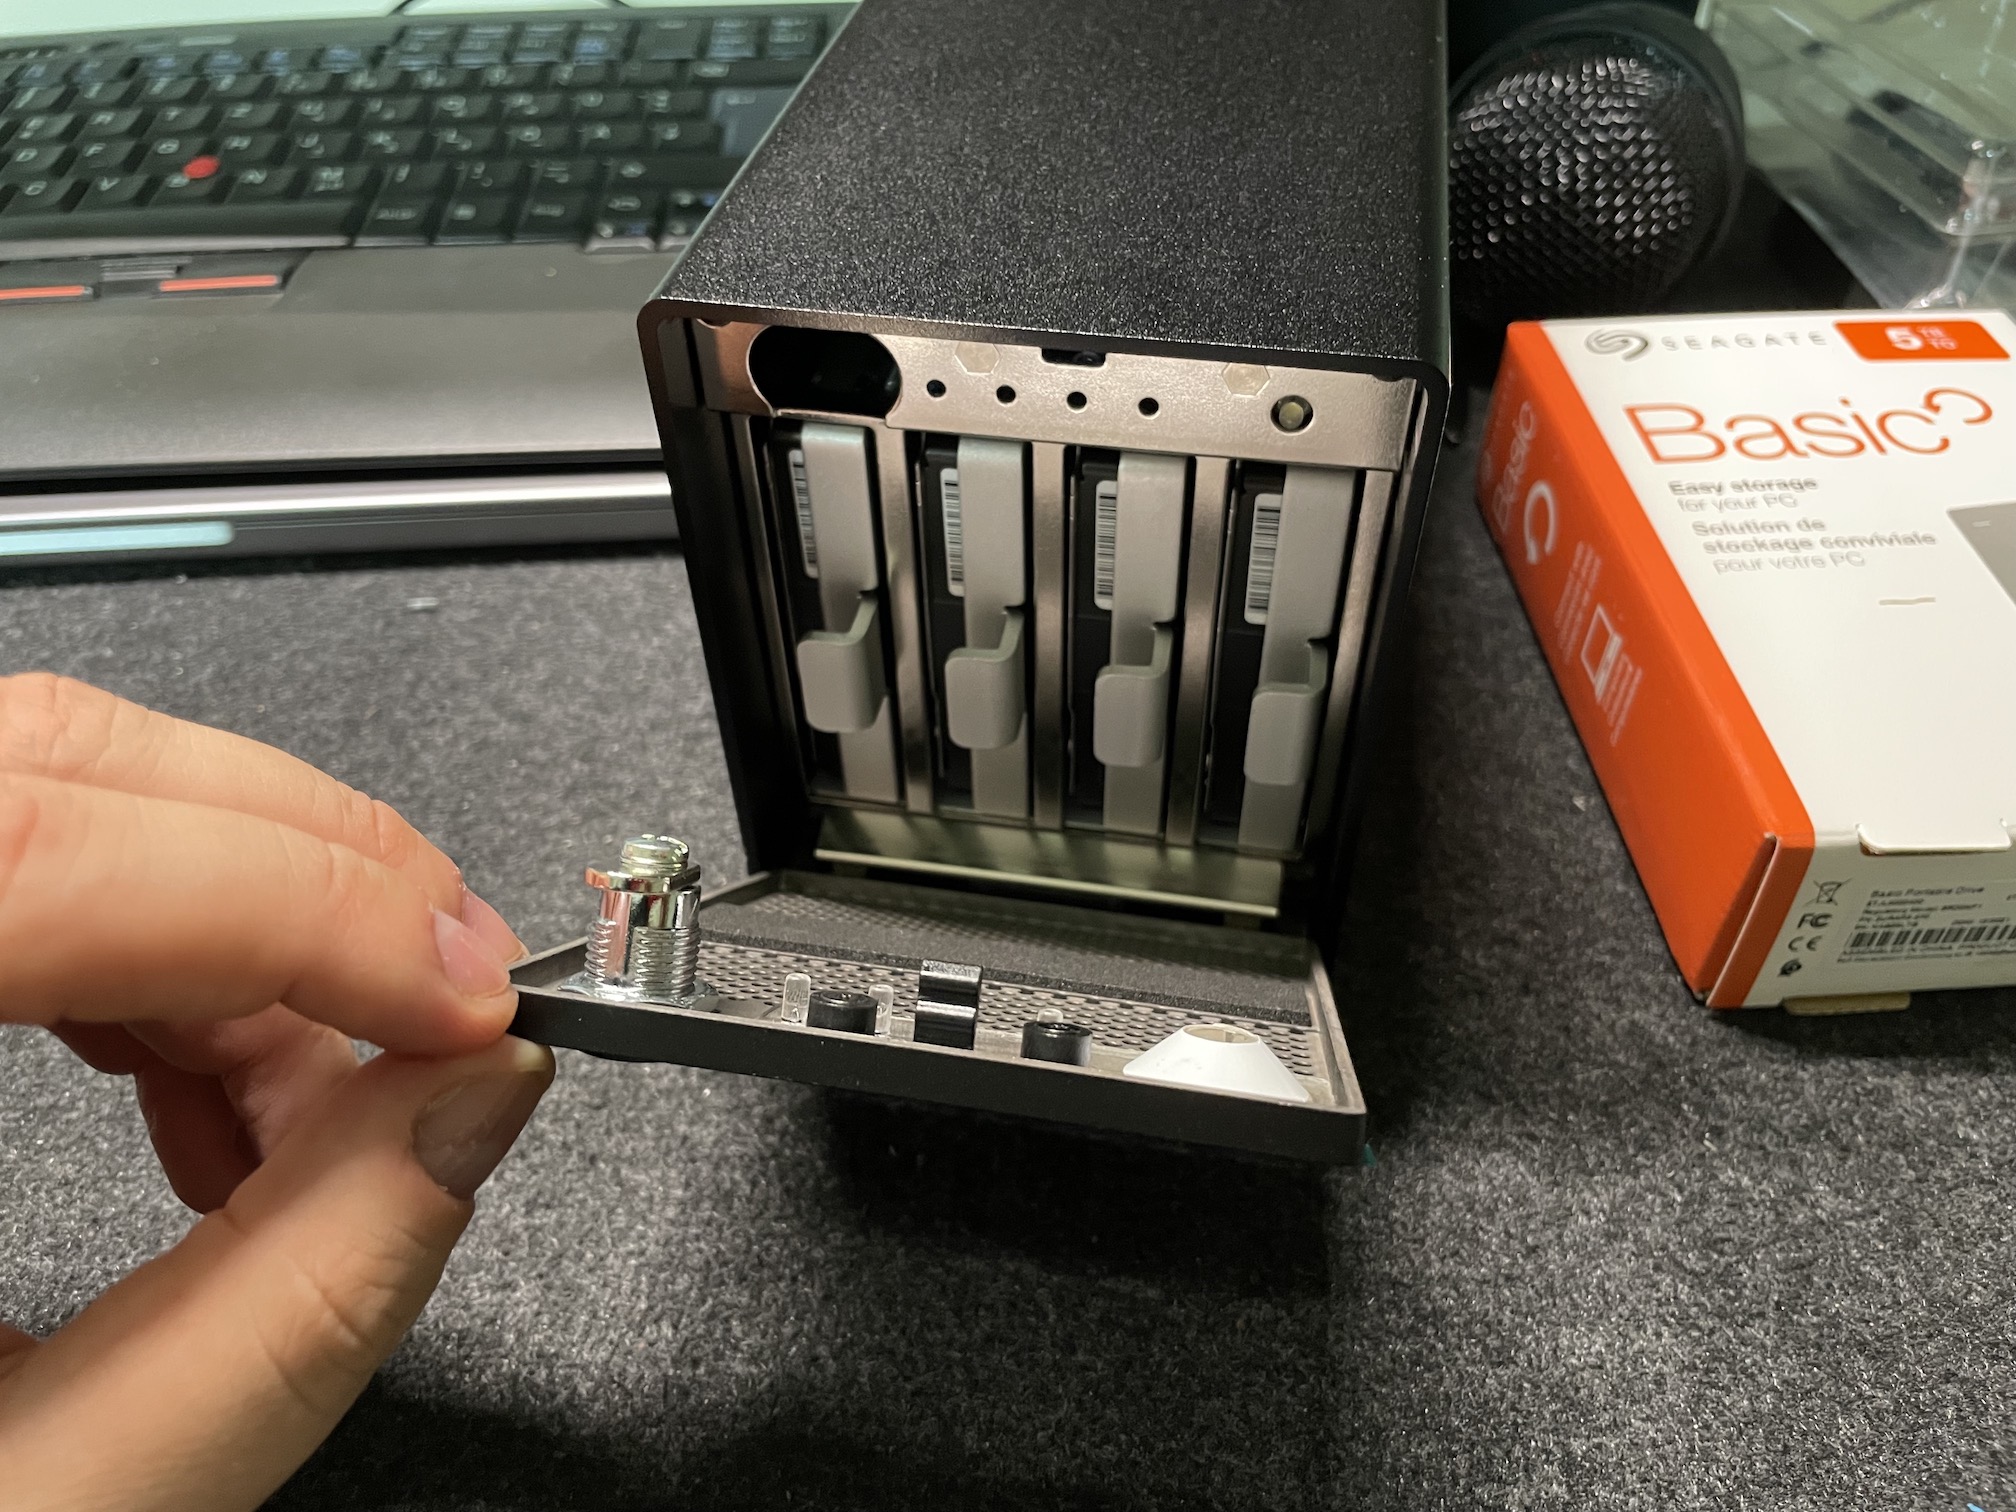
The Thunderbay is an all-aluminium enclosure design. It is appealing and matches the aesthetic that people come to associate with Apple computers. It is minimal and looks great on the desk, with a grill on the front that is somewhat reminiscent of the Classic Mac Pro (“Cheese Grater”). It makes for a timeless industrial look and lets in a sufficient amount of air for cooling the hard drives. The front has a lock, which you need to place in the open position to pull out the front door that covers the hard drives. The key does not come off in the unlocked position, as the front cover would just fall to the front if they did.
The fan noise (and several solutions)
The enclosure has a 60mm fan at the back that cools the hard drives inside by pulling air through the front air intake, through the whole enclosure and exhausting it out the back. My unit came with a Noctua fan, which runs at 100% all the time, making it quite noisy at idle. After cracking open the unit, I saw that there are only two wires (one black and one red) that connect the fan to the PCB. I guess there is no RPM reporting, so the PCB just runs it at 12 volts all the time.
It seems not all units come with a Noctua NF-A6x25 FLX fan. Some carry a Sunon one, which seems to be even more noisy. It is disappointing that OWC does not provide any way to regulate the fan speed, as Mac desktops like my Mac Mini tend to be quite silent at idle.
There are several options to solve this:
- Unplugging the fan altogether since I am not using SSDs but instead external rotational hard drives, which by design do not need any active cooling.
- Solder a 2 kΩ potentiometer to the red wire that runs from the fan to the PCB. I could then drill a tiny hole in the back of the case for the shaft of the potentiometer and fine tune the speed of the fan as I see fit.
- Replace the fan with a Noiseblocker XL1, which runs at a much lower speed. I would lose overall cooling capacity but would require fewer modifications than the potentiometer option.
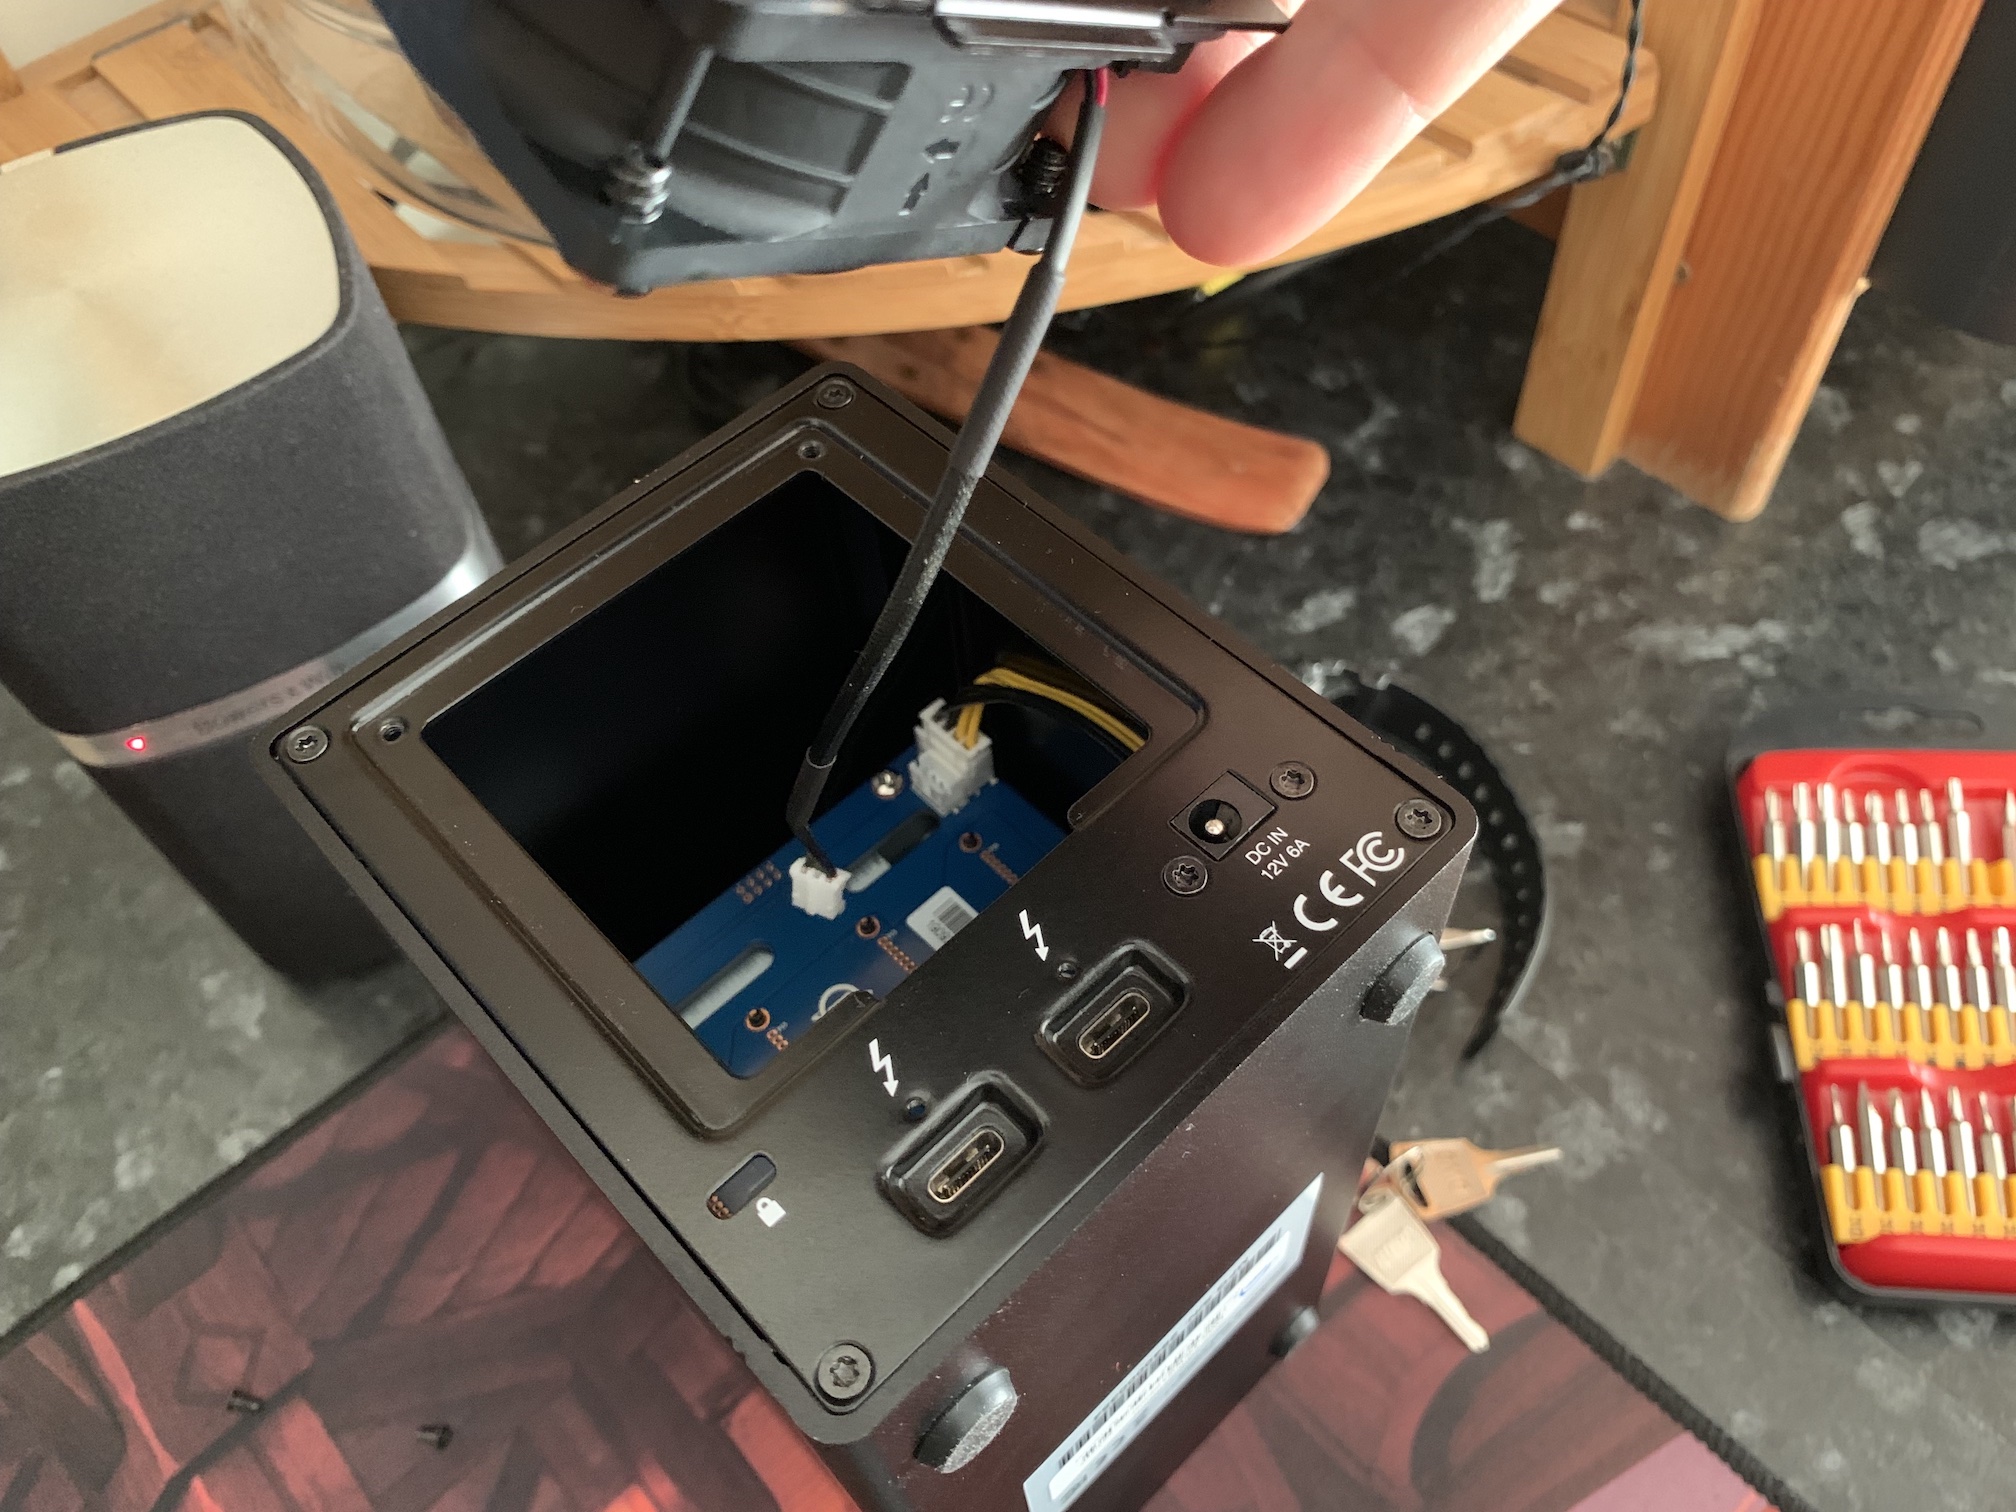
Cracking open the rear hatch to unplug the fan at the back
Unplugging the fan as easy as removing the two small Torx screws in the back and (gently) pulling the connector from its socket. The enclosure only gets slightly warm to the touch, even after performing several copies of hundreds of thousands of small files—the 2018 Mac Mini i7 by its side is always toasty by comparison! The Thunderbay is also silent when the RAID volume is unmounted (disks spin down), and the seek/write noise level when operating the unit is very reasonable.
Shucking 2.5’’ hard drives for the RAID array
Hard drive shucking is the process of buying an external (USB) hard drive and cracking open the enclosure to extract the hard drive inside and use it as an internal hard drive. The main advantage is a much lesser cost per drive (internals are approximately 37% more expensive for the same capacity in my particular case) and you get a free enclosure + USB 3 cable. This can be useful for when you finally decide to retire the drives from active use by putting them back in their case.
A very important aspect to take into consideration is that 2.5’’ drives used in external hard drives are 15mm thick, so they will not fit into a laptop, for example. However, they are perfect for the Thunderbay Mini, since the enclosure supports hard drives up to 15mm thick. I initially found this detail in the Thunderbay 4 Mini with Thunderbolt 2 manual, and it remains the same for the newer TB3 model.
Drives that can be shucked are rarer and rarer though; you need to do some research before buying your drives.
Selecting a shuckable hard drive
Manufacturers are wise to the fact that people shuck their drives. Practically all external drives in the market are now built with a direct connection between the USB port and the hard drive controller, without a SATA port in between. Western Digital and Toshiba now adopt such a practice, with a notable exception being Seagate. Many Seagate drives still sport a USB-to-SATA adapter board that you can detach, converting the drive back to its ‘internal’ form.
I chose the Seagate Basic Portable 5TB external hard drive (STJL5000400), which inside holds a standard Seagate Barracuda hard drive at 5400rpm. No fancy finishing, simple plastic case (easy to crack open) and, most importantly, uses a SATA-to-USB3 adapter board. I bought 5 of them to have one in reserve, while 4 are in use inside the Thunderbay. While RAID does not require identical disks, I like to have them. It is better to buy them now than be looking for one some years down the road when one drive fails.
Shucking the Seagate 5TB Basic Portable
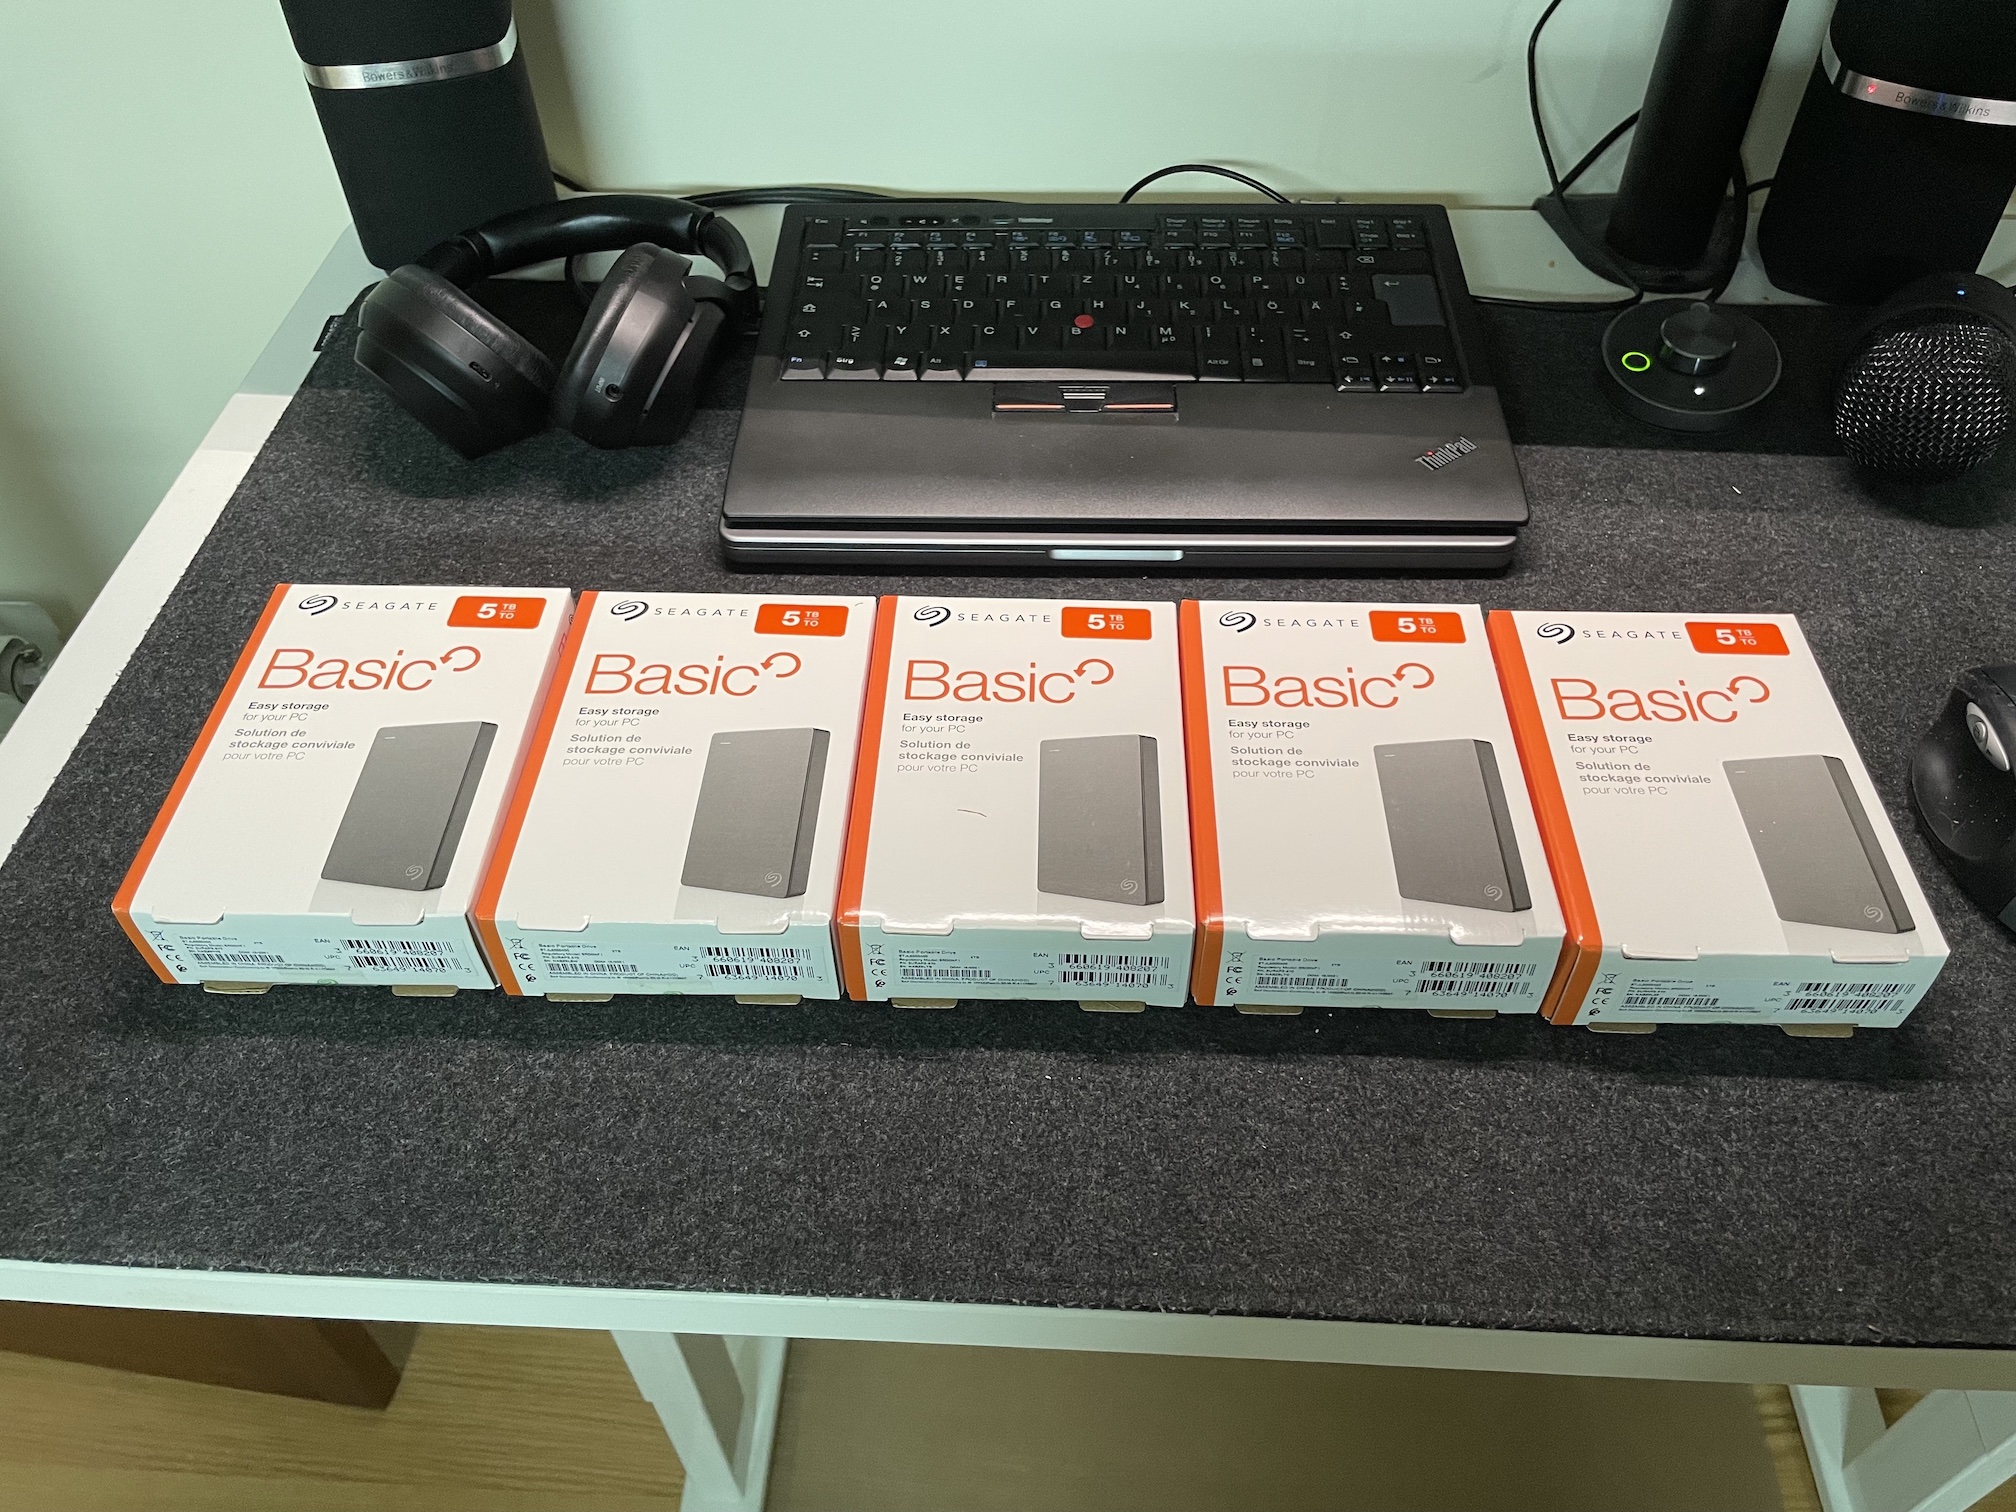
Seagate Basic Portable 5TB external drives
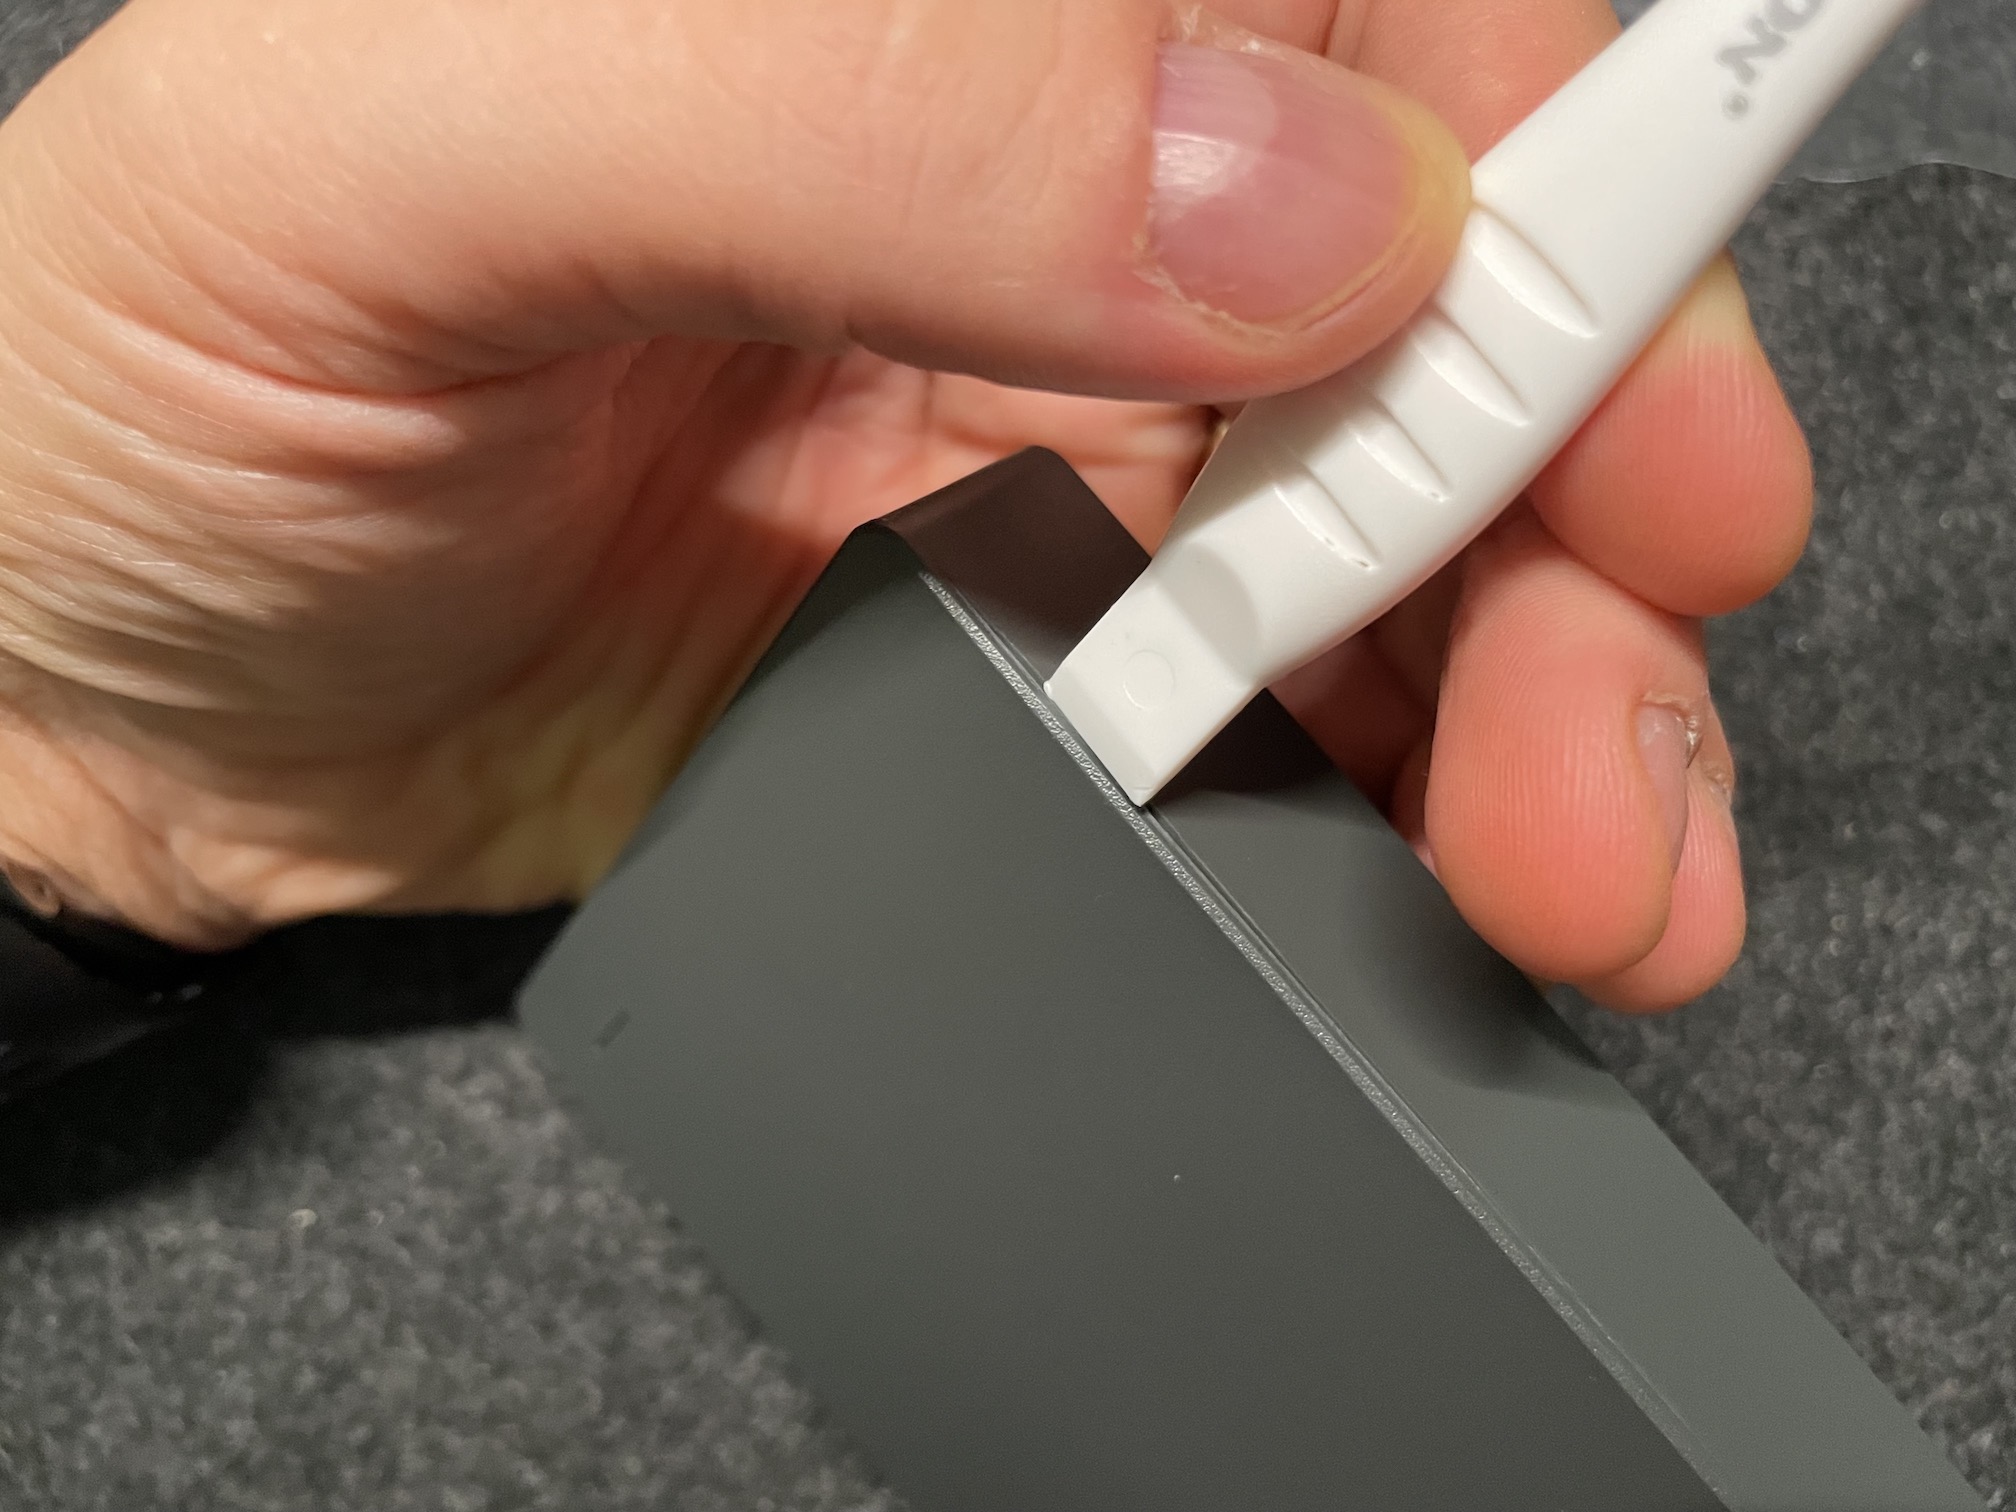
Stick a spudger in the edge to crack open the enclosure
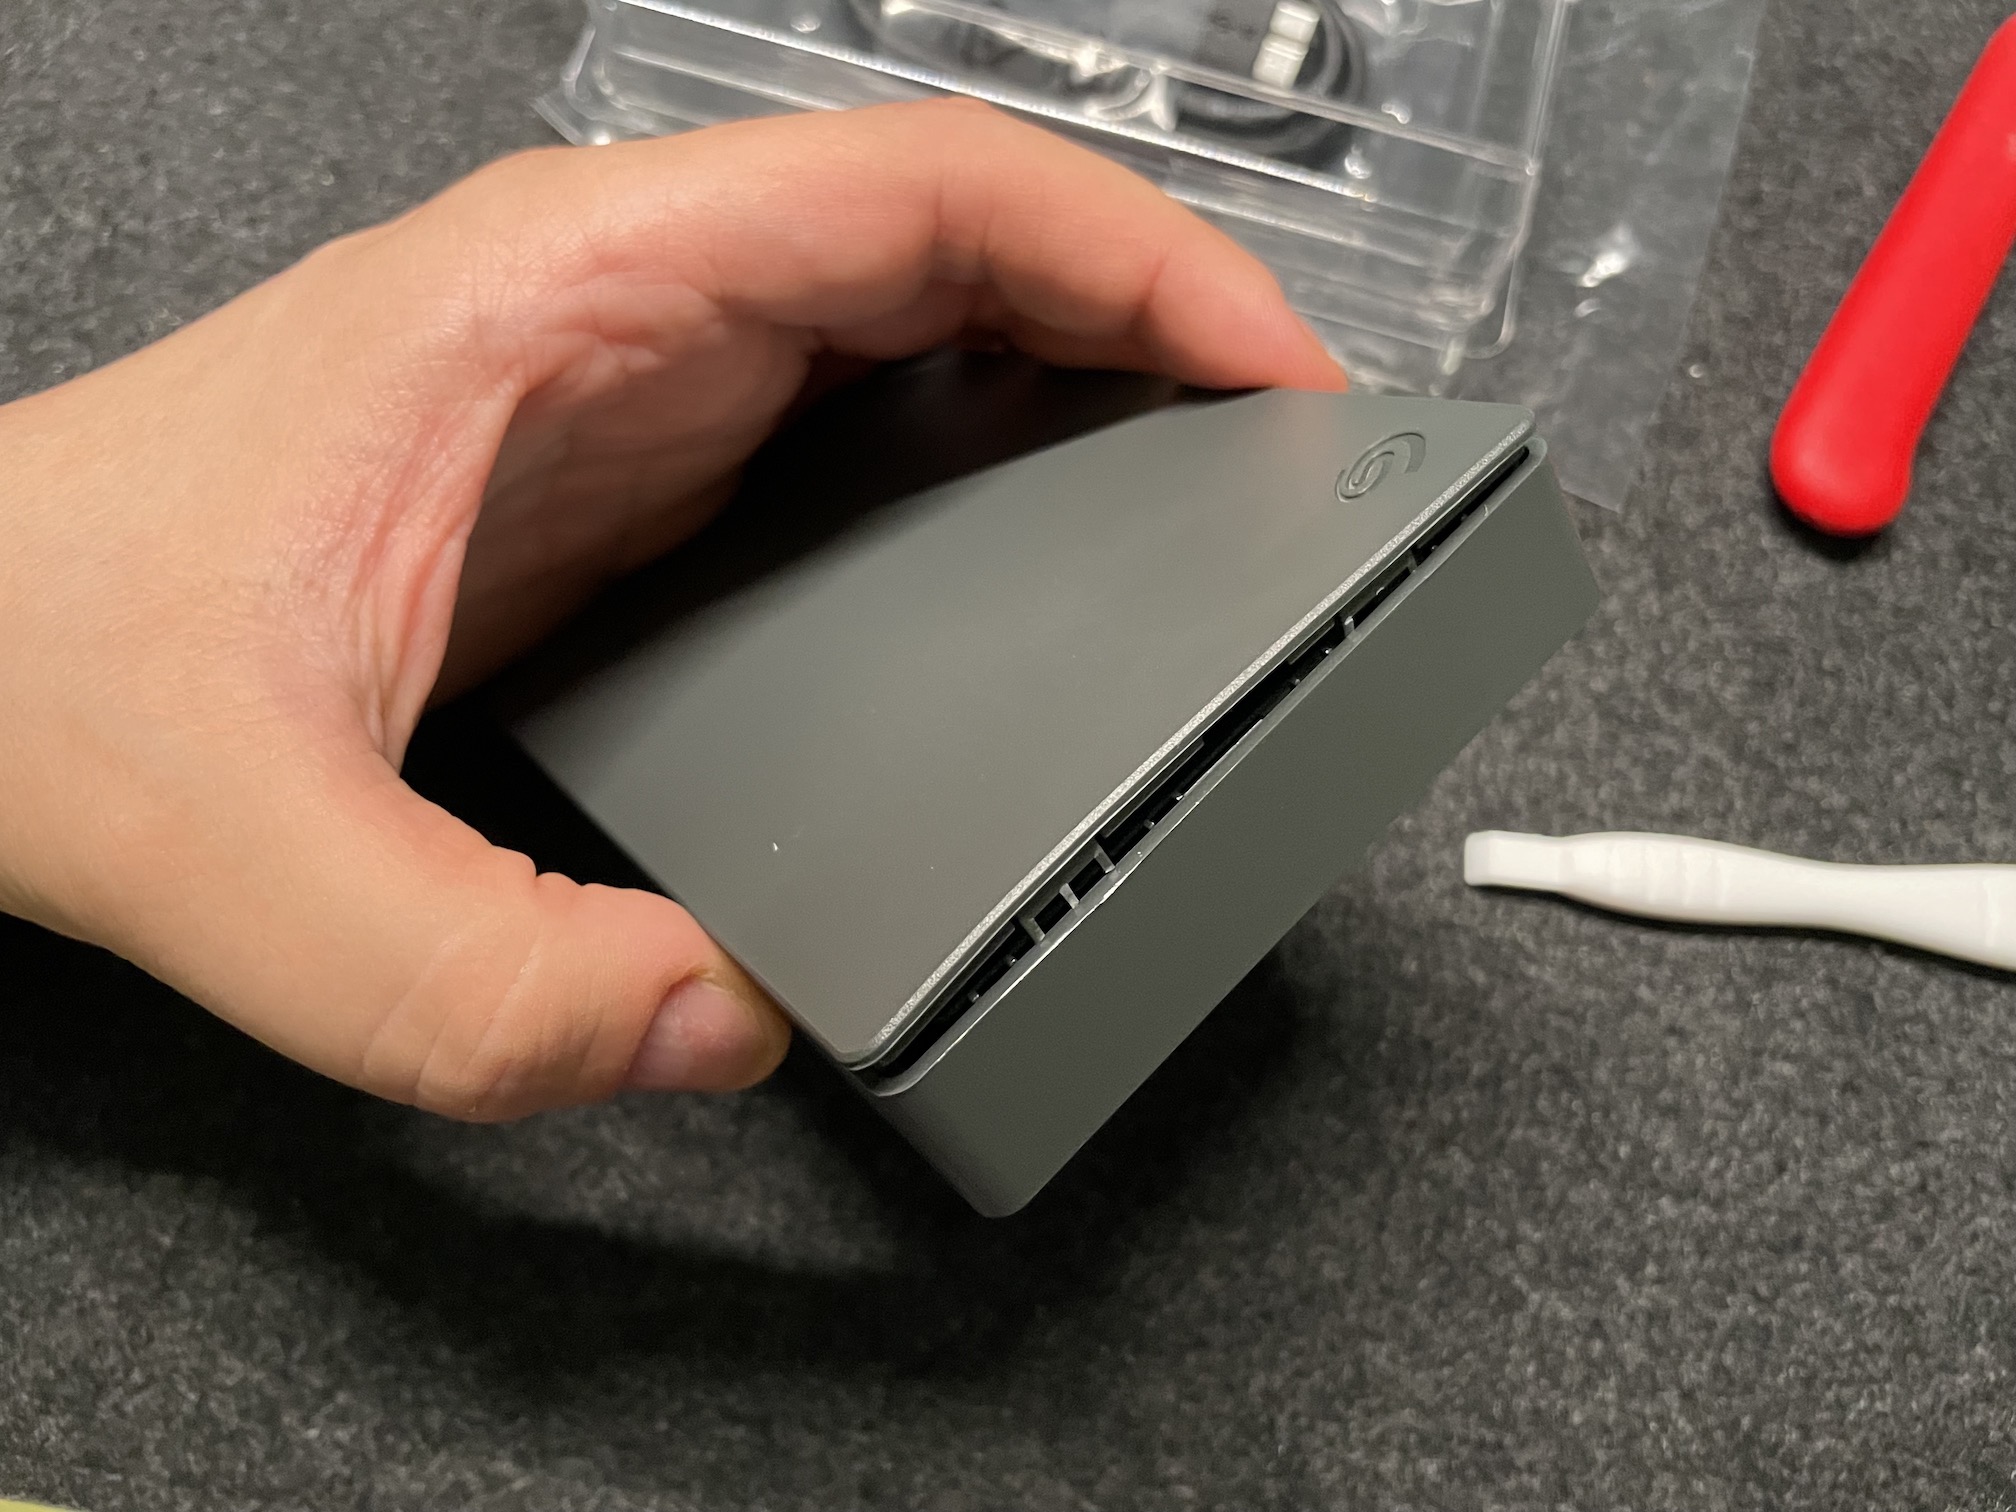
Enclosure open
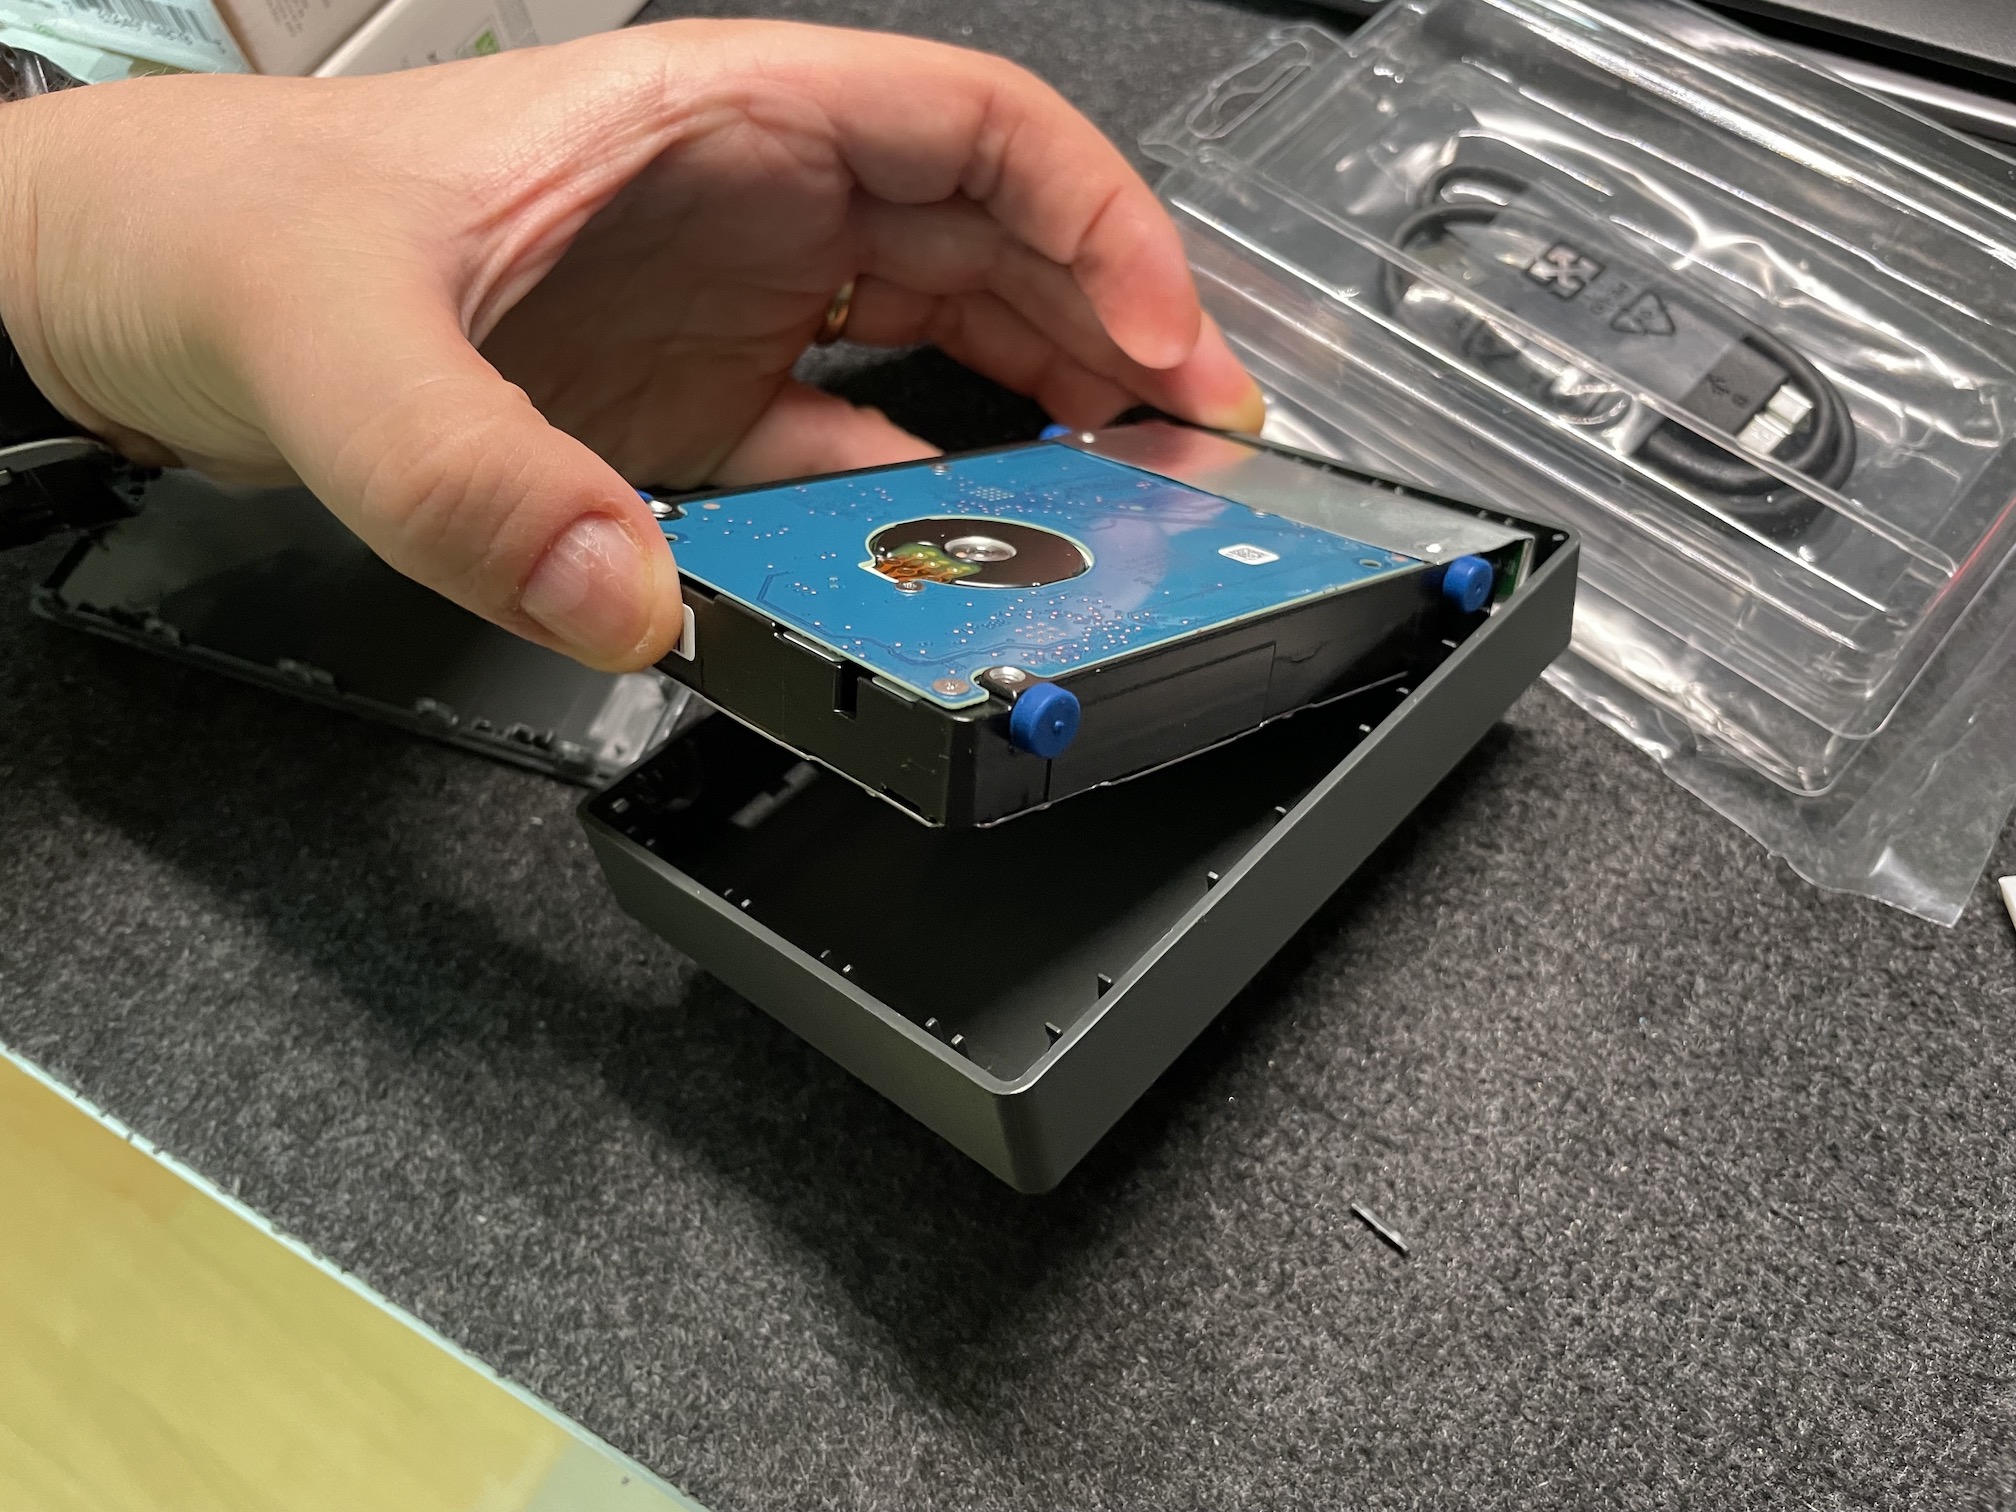
Hard drive revealed
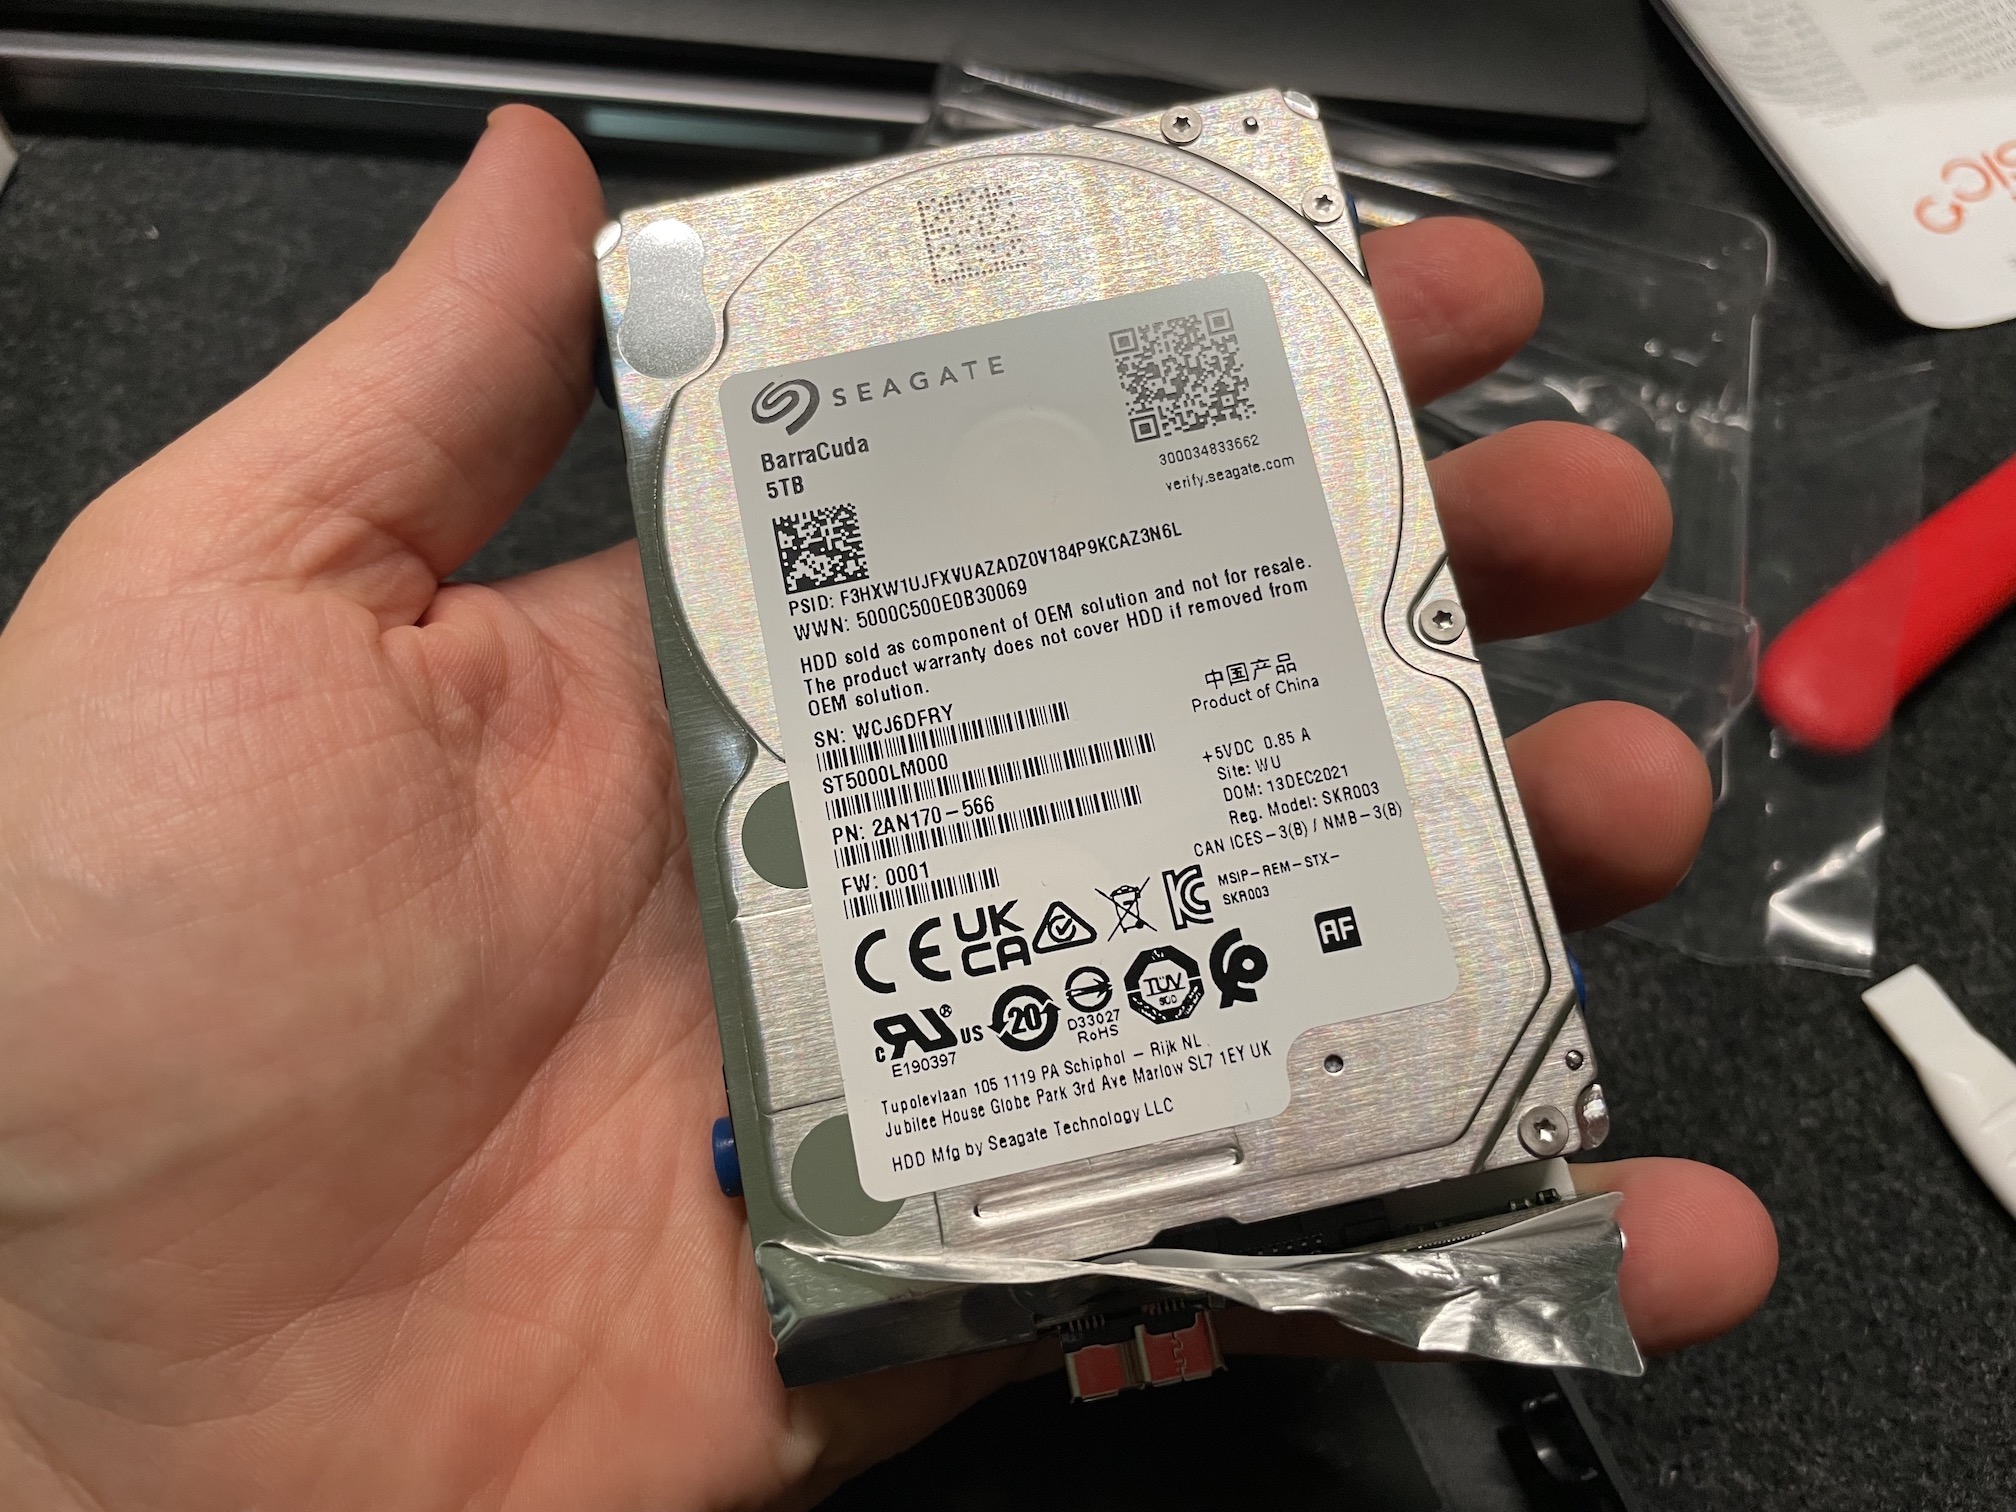
Hard drive model and part number
Peeling off the sticker
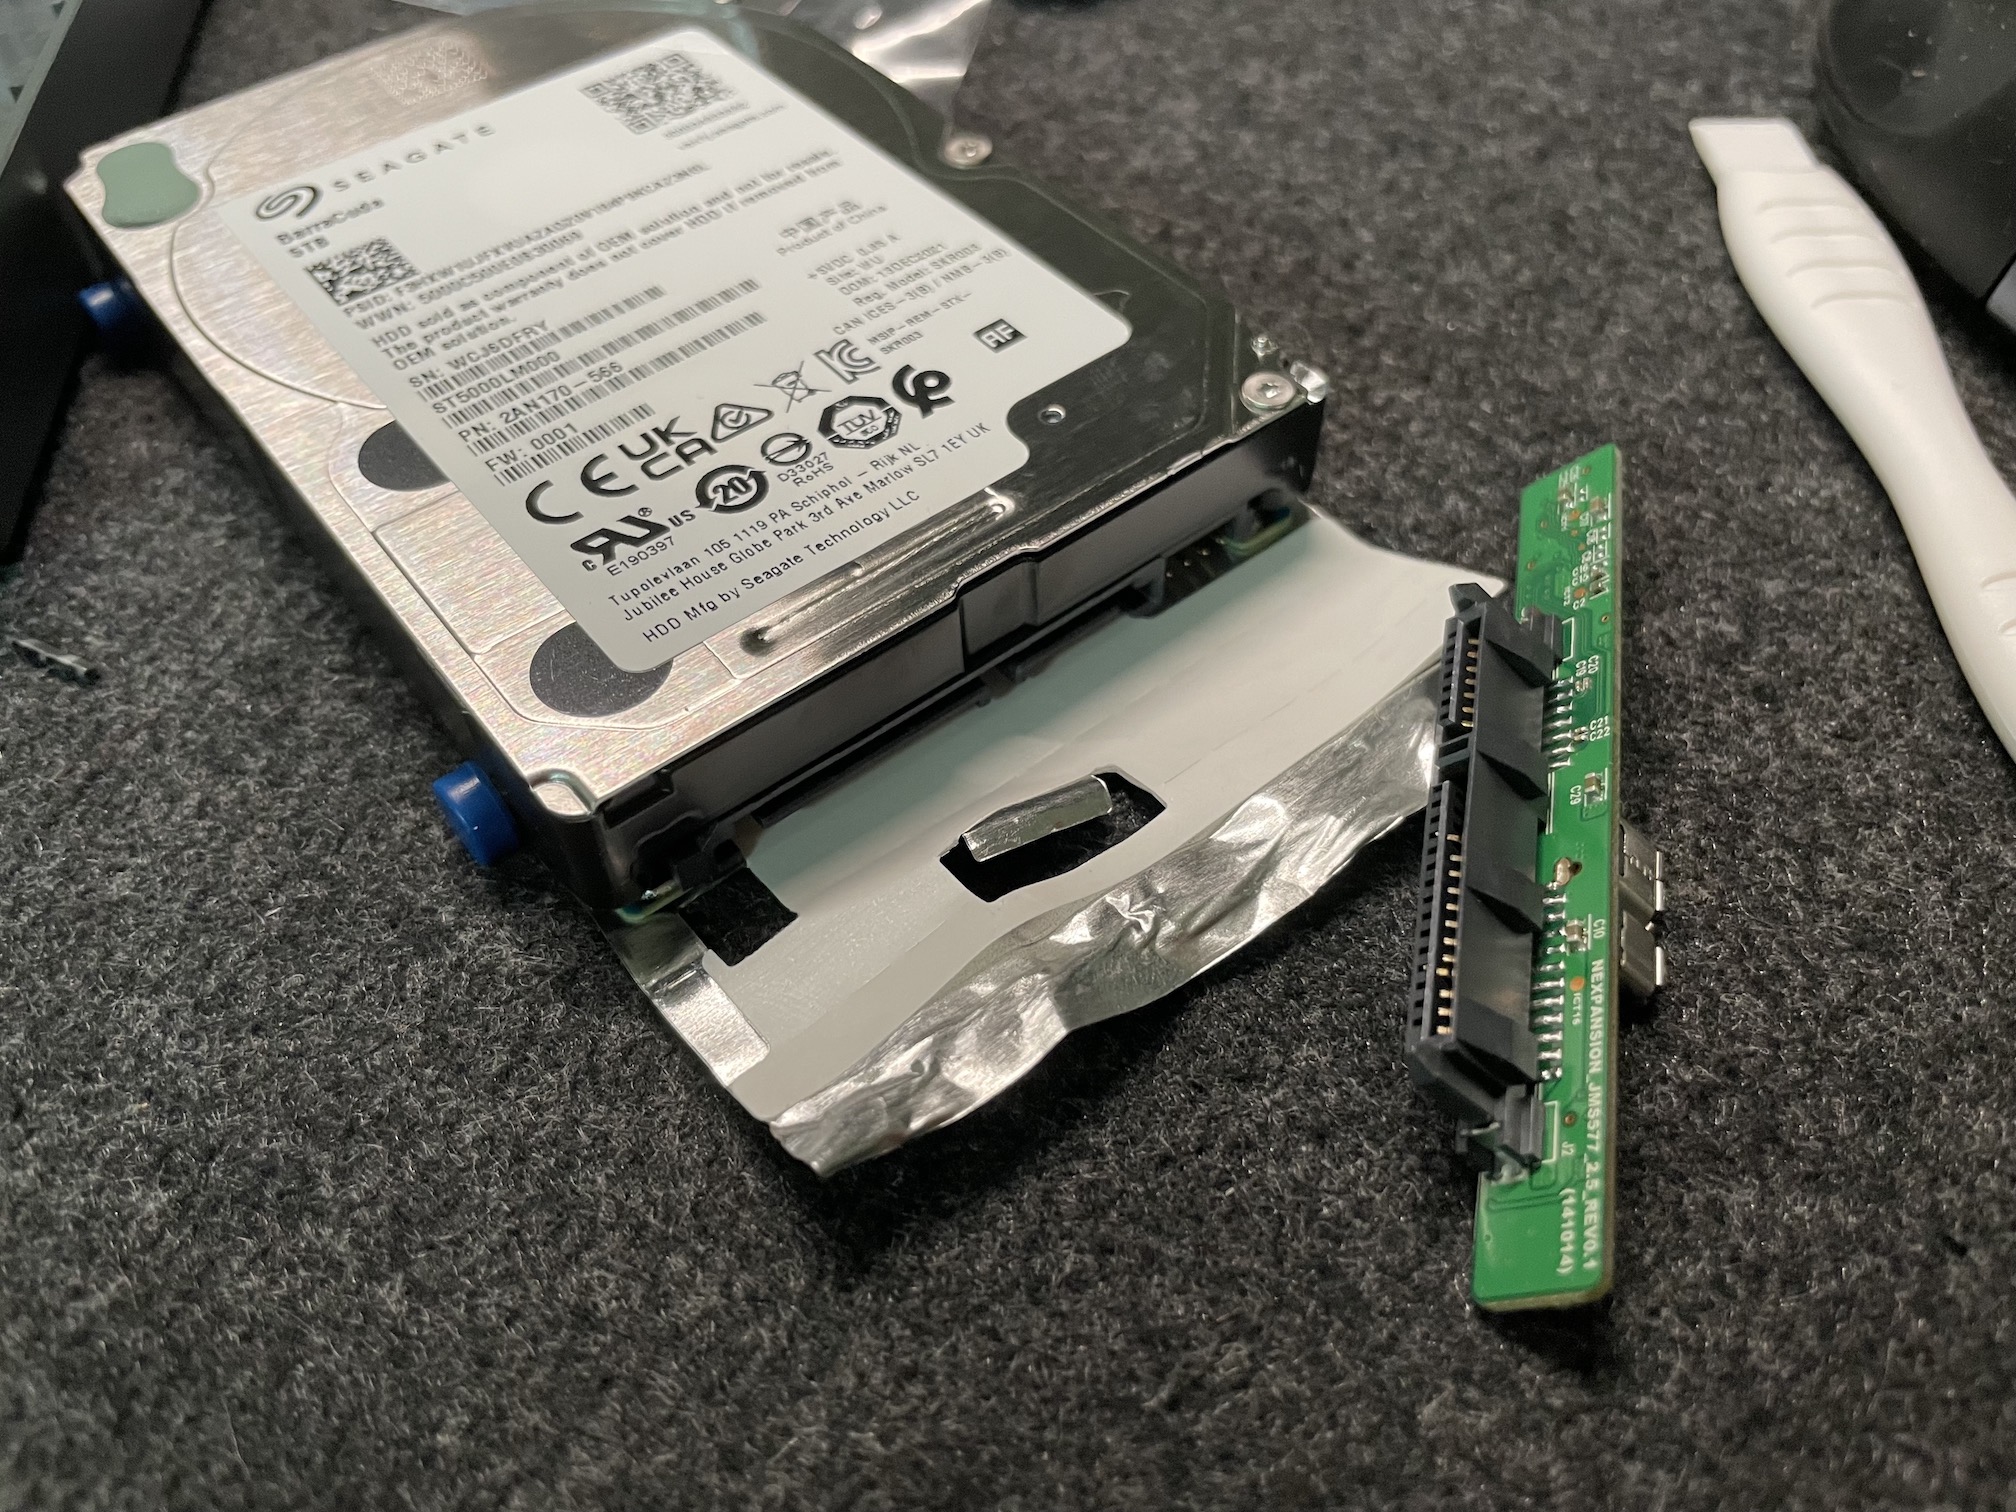
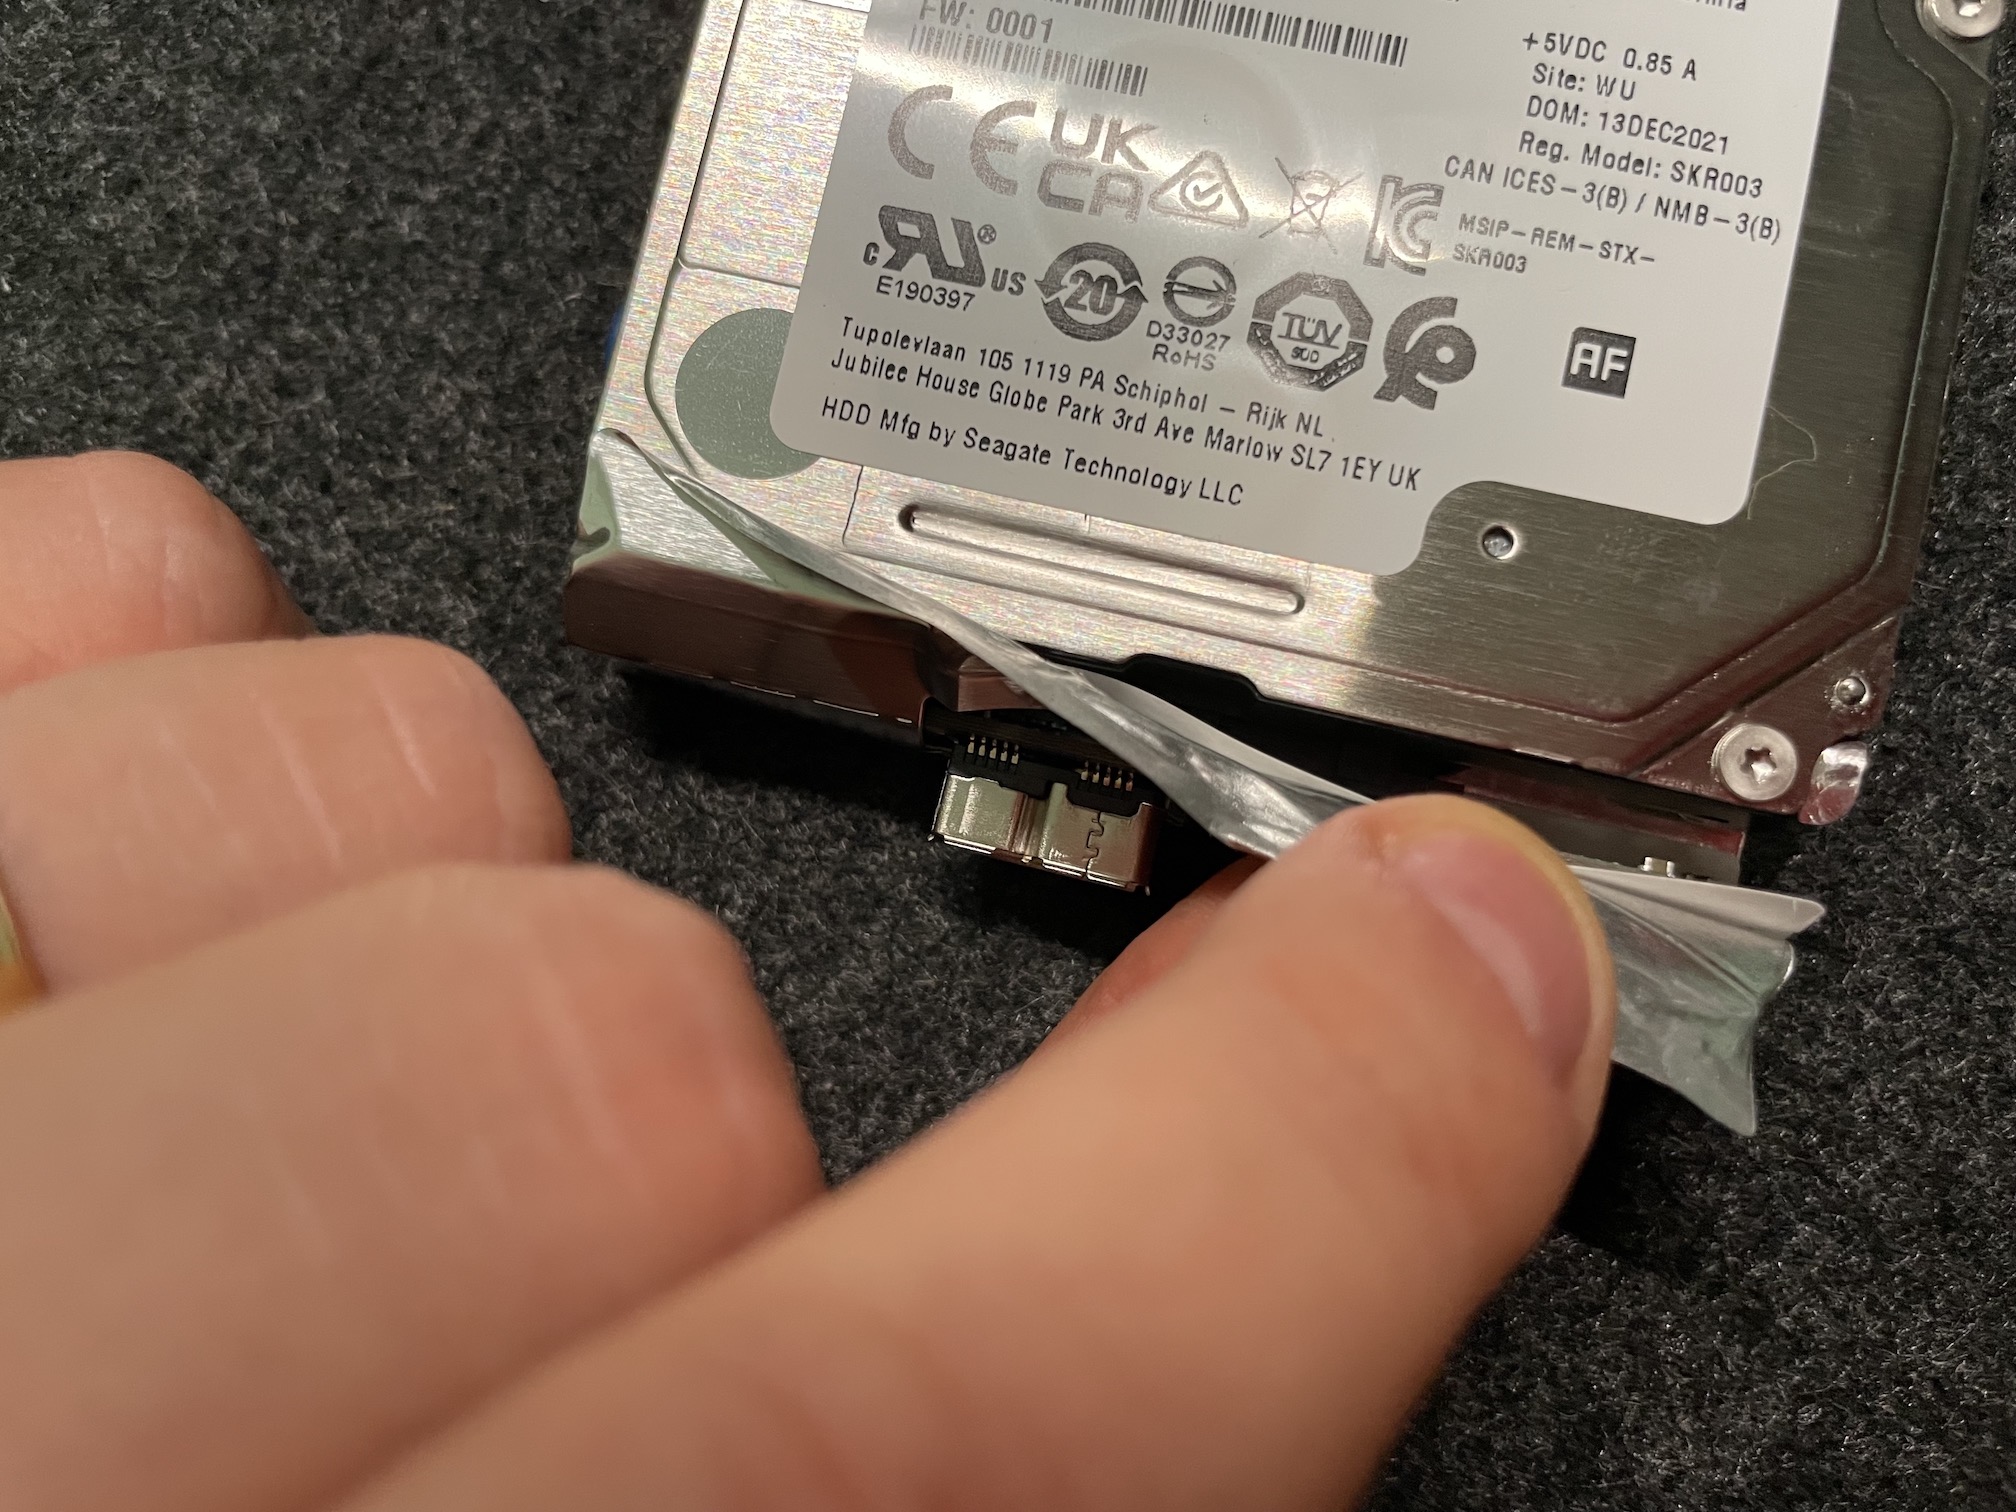
Removing SATA to USB3 adapter board
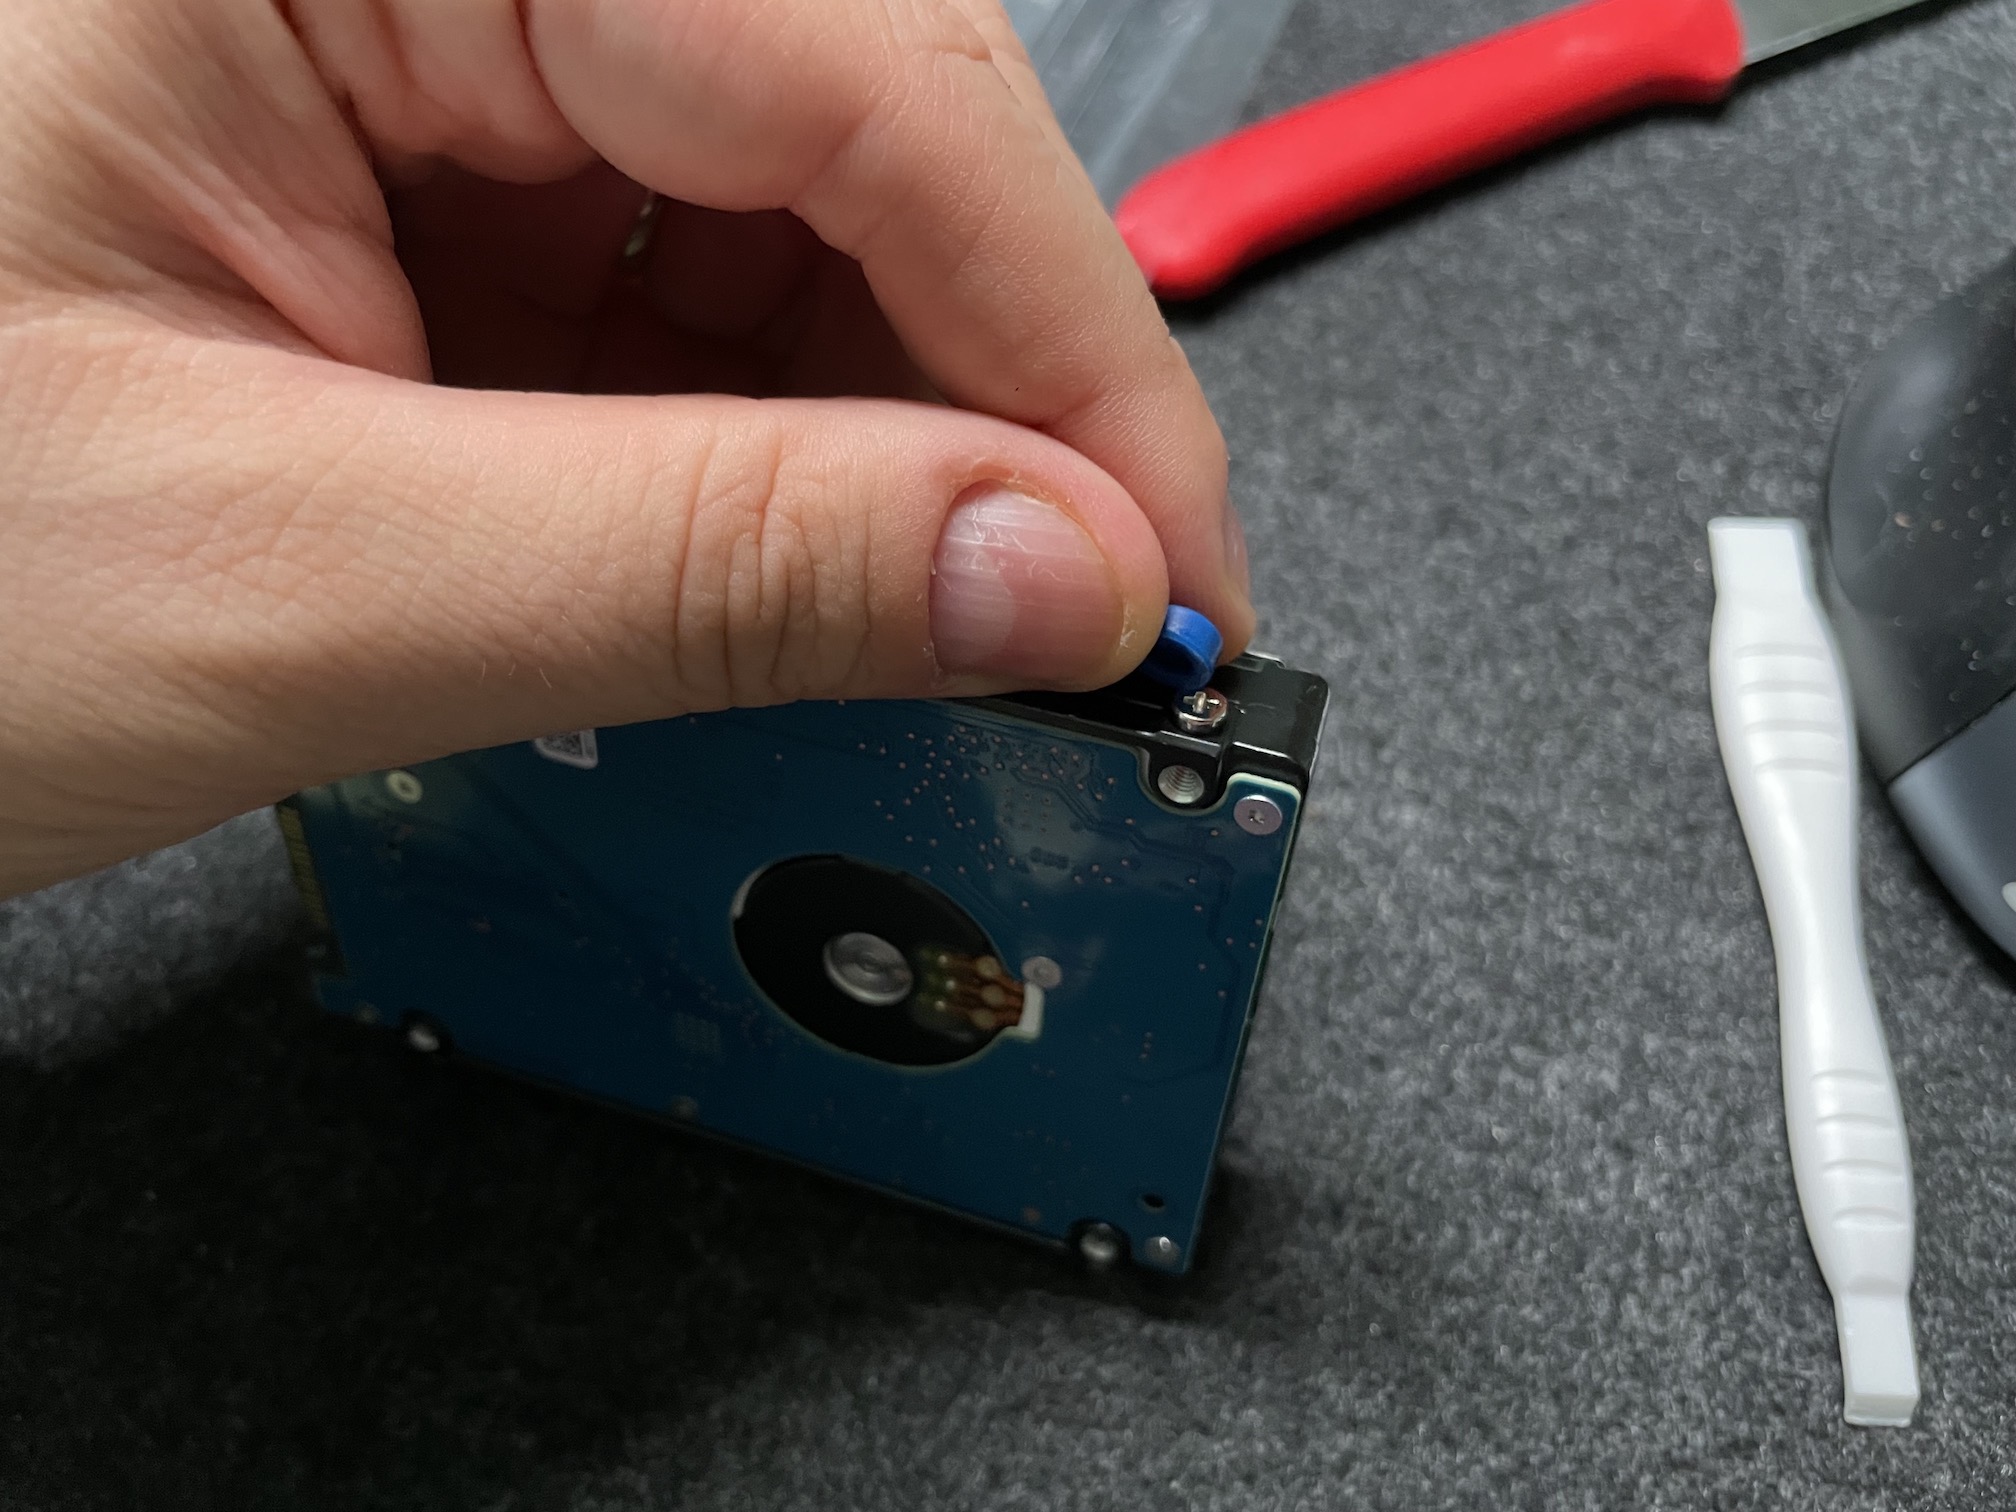
Removing anti-vibration feet
Assembling the hard drives inside the Thunderbay enclosure
Open up the Thunderbay to expose the 4 hard drive trays...
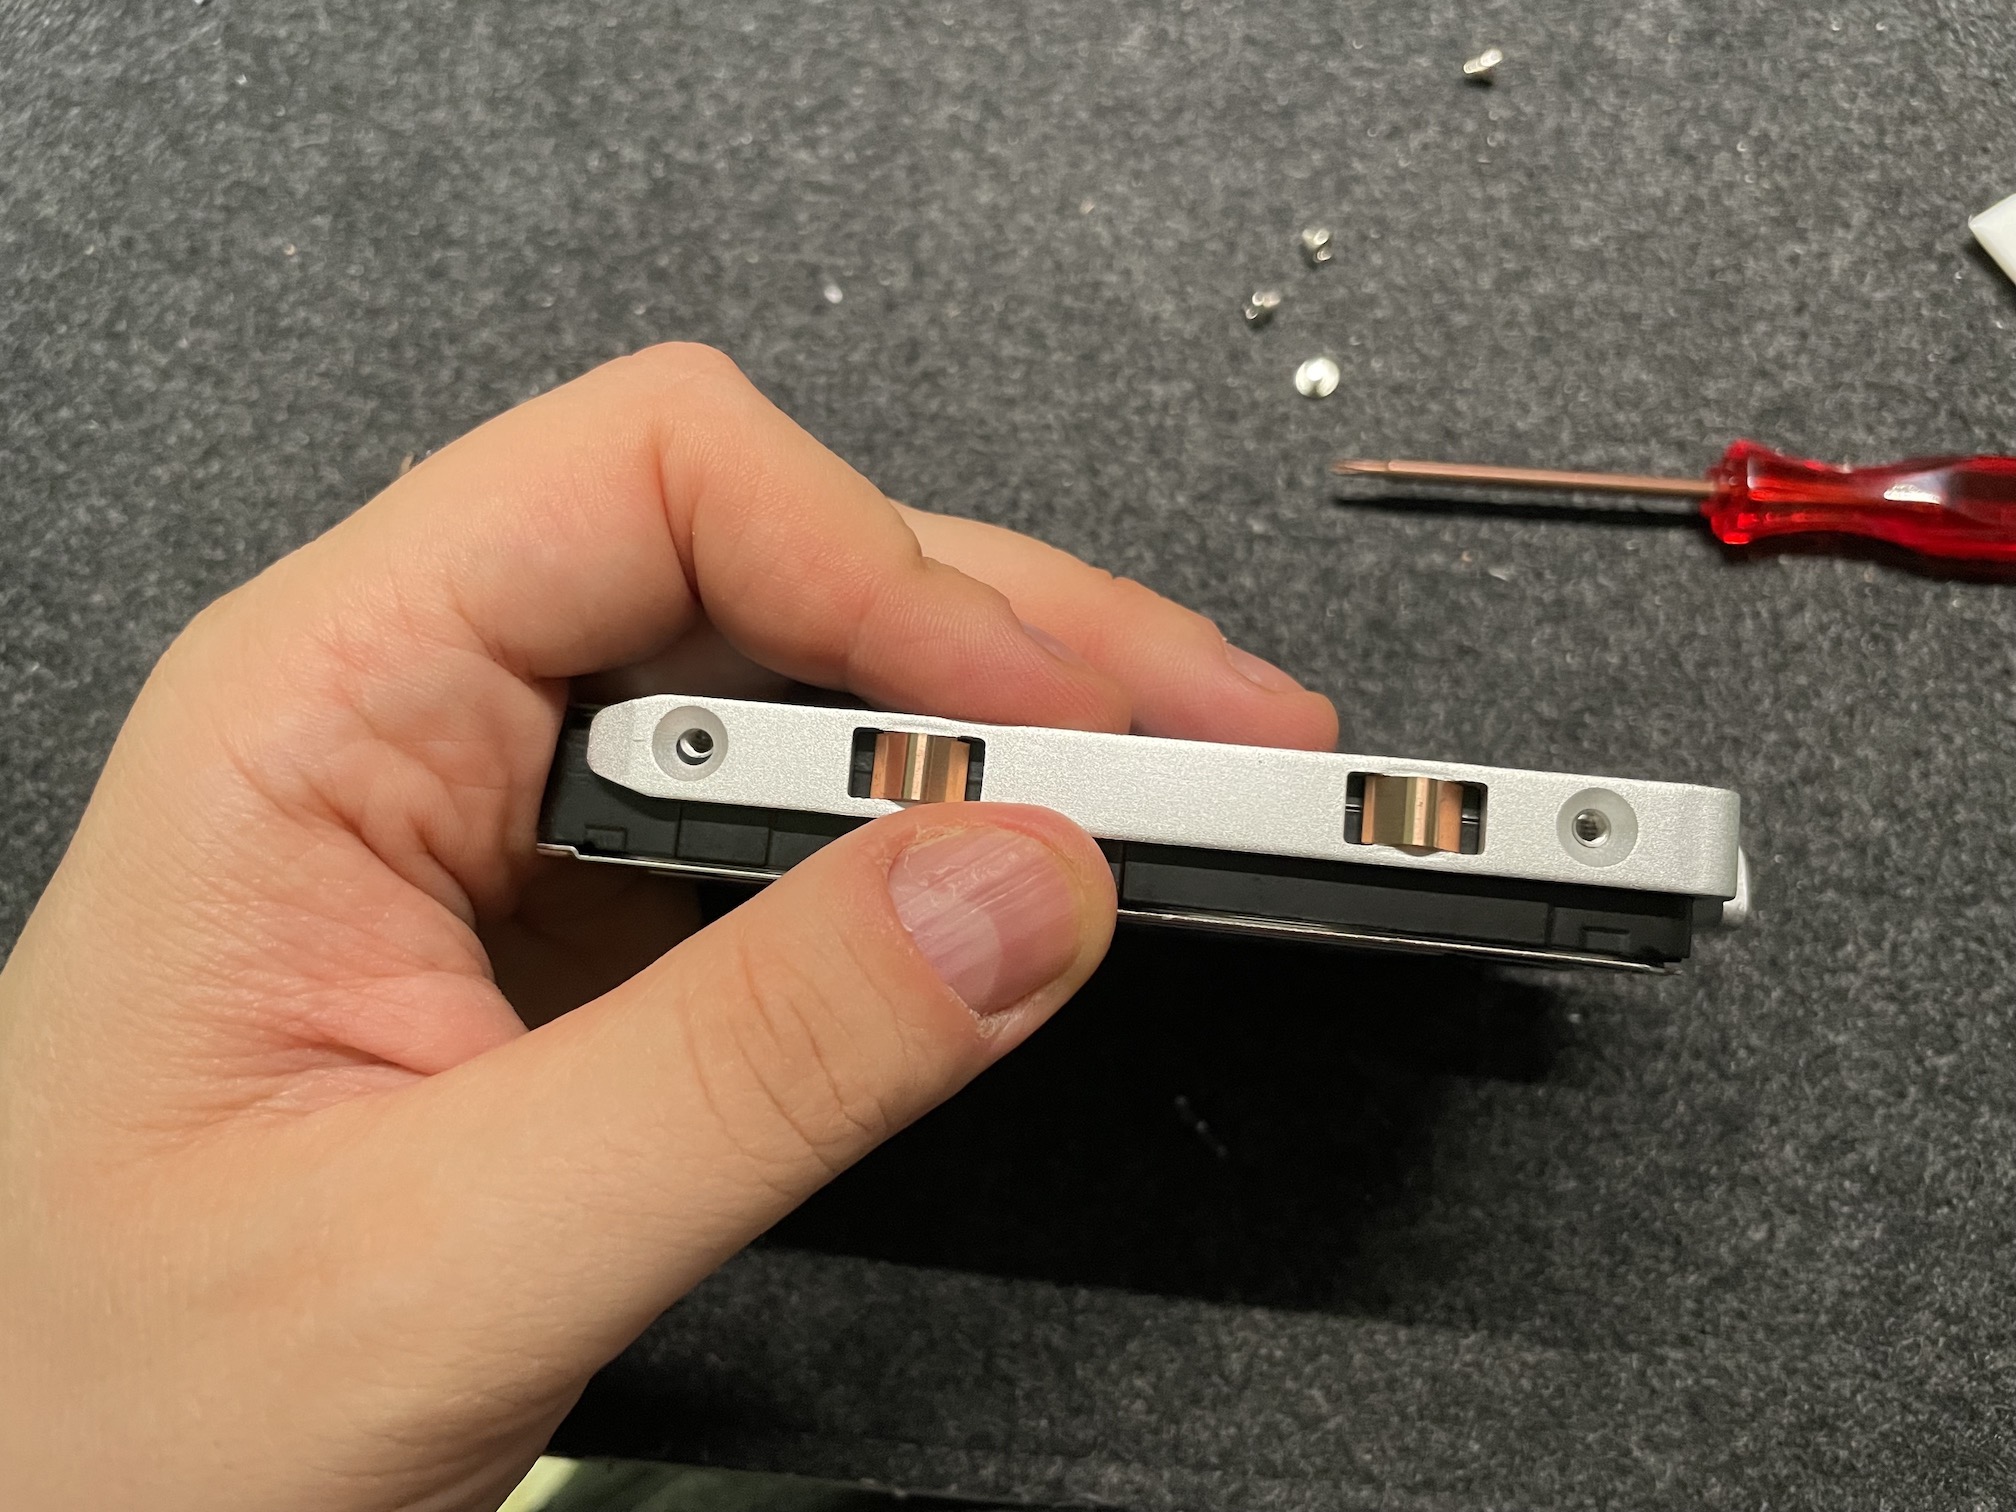
Attach a sliding tray to the drive using the 4 screws already on the drive
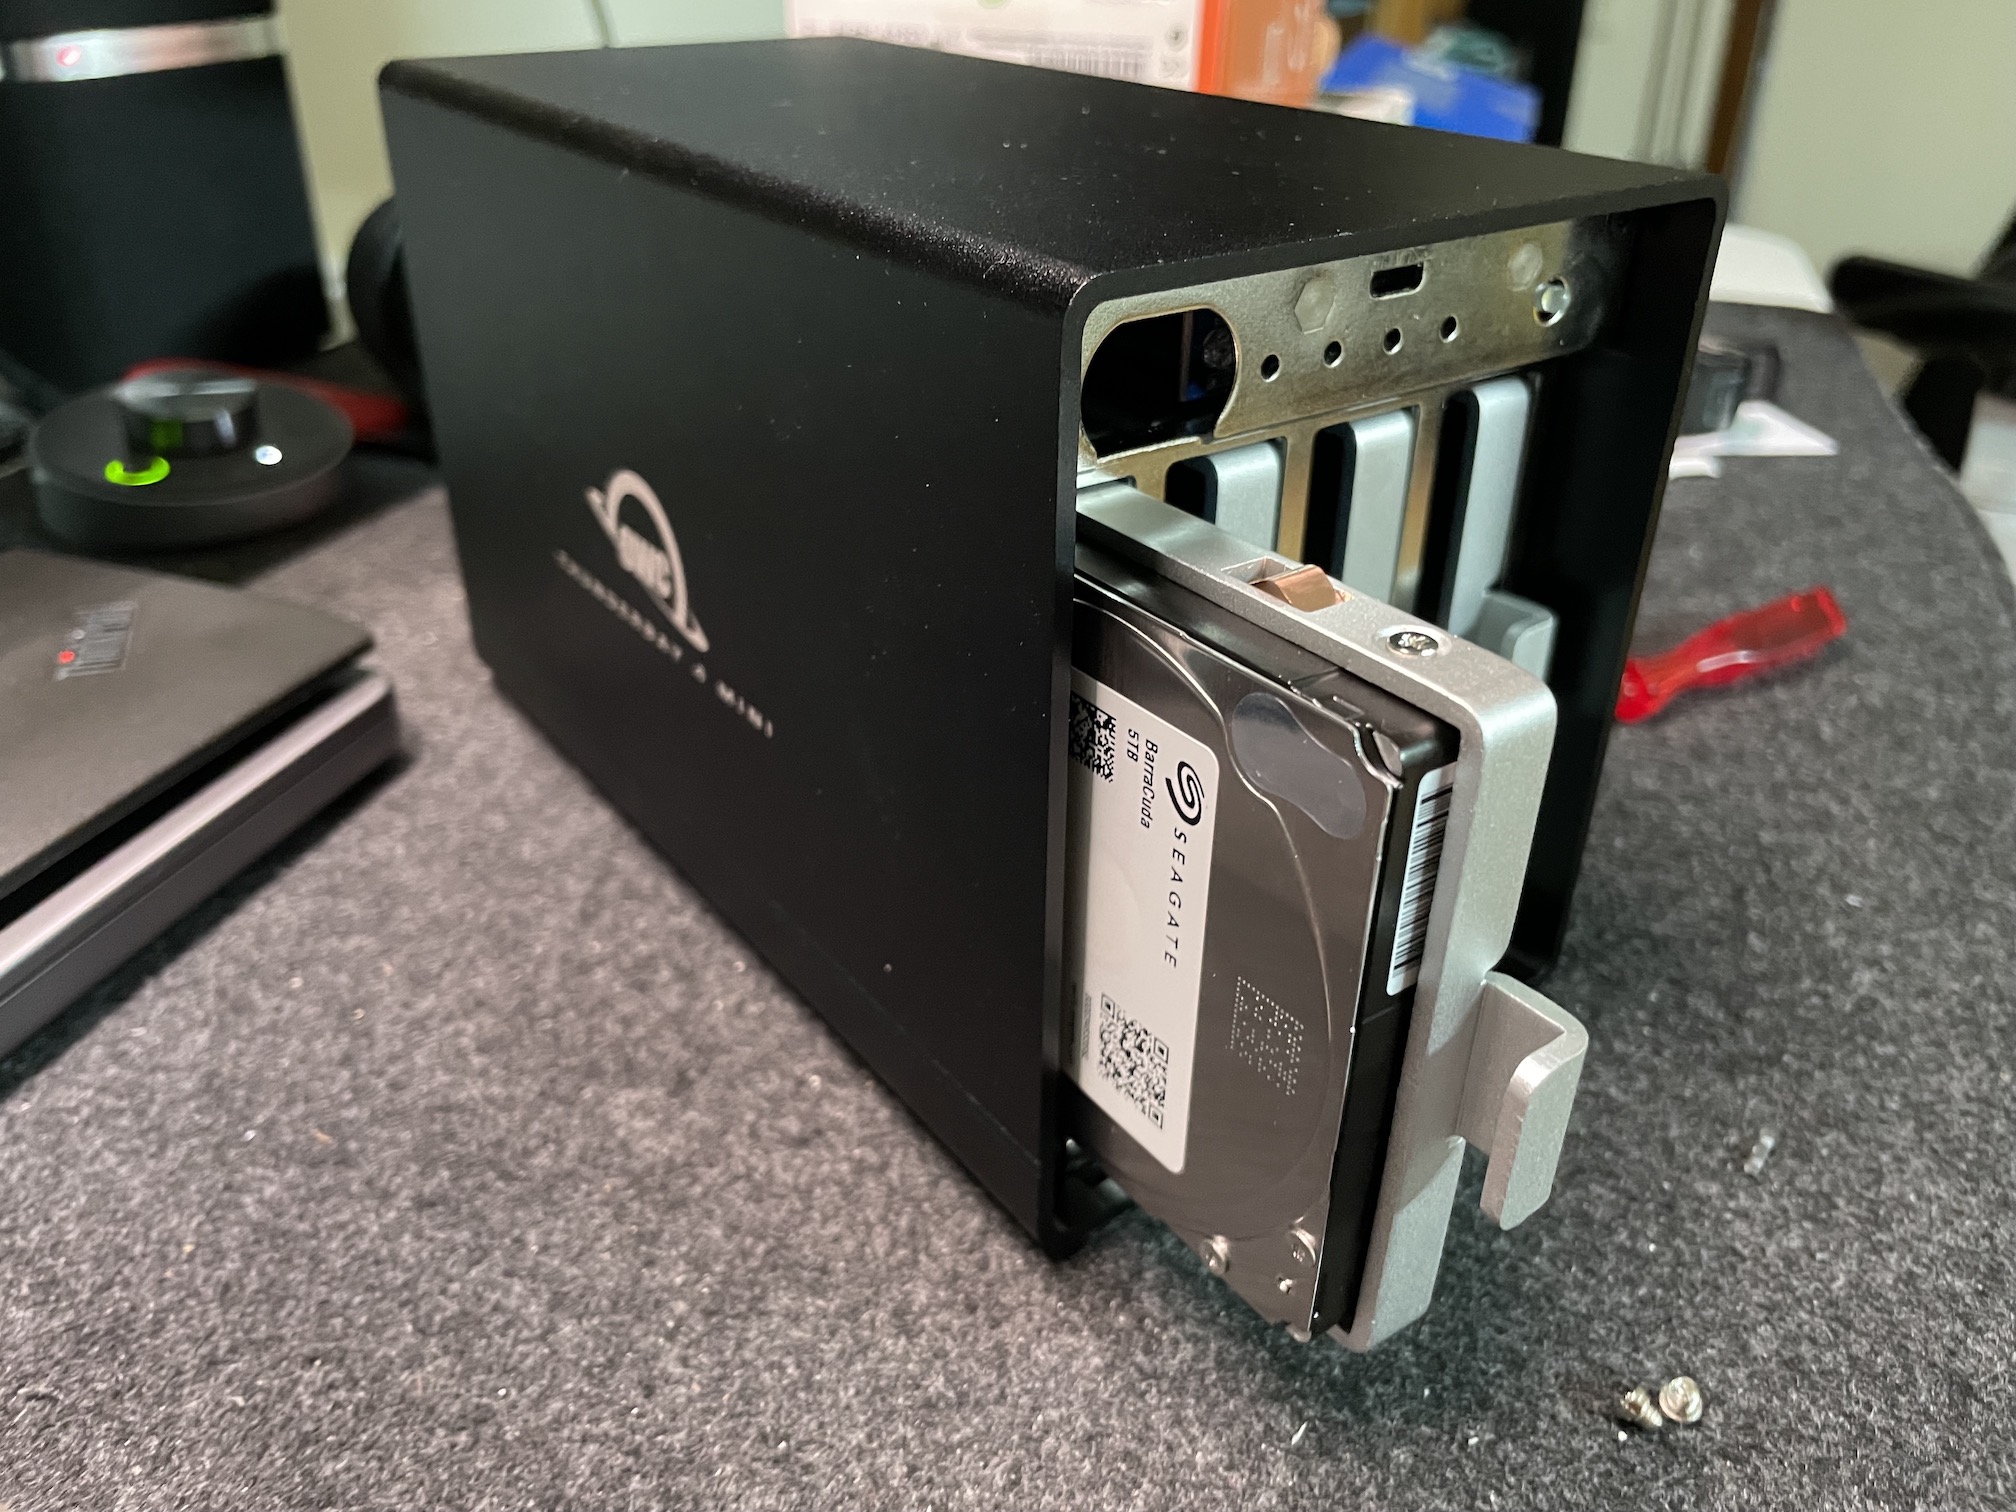
Slide the drive into the slot
Repeat for all 4 drives
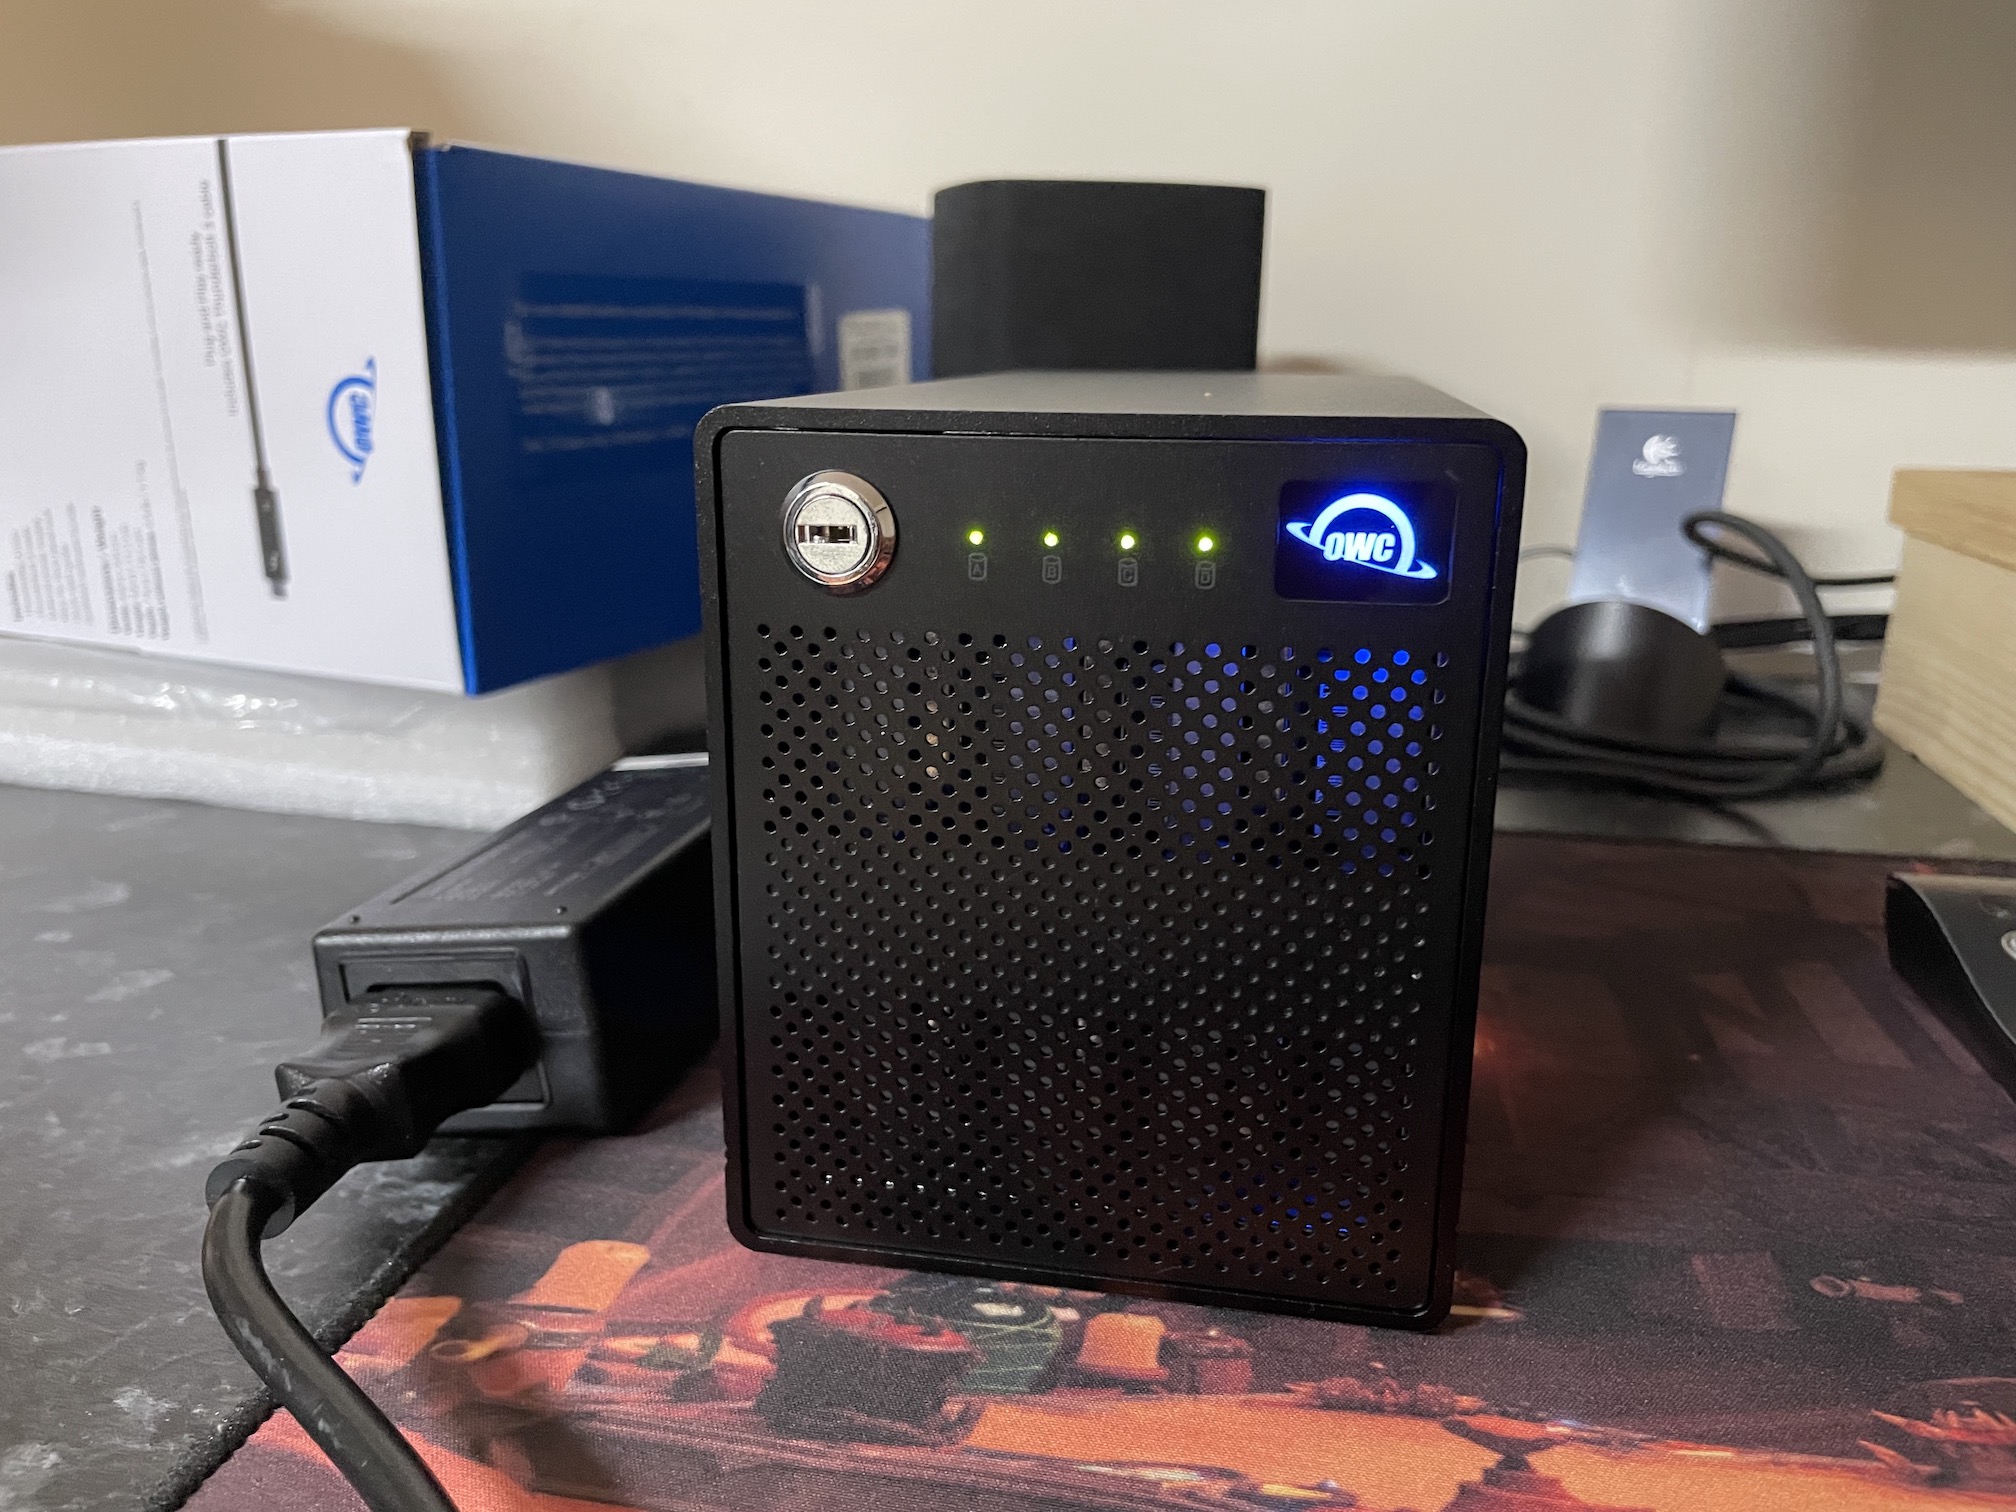
Connect and start up the drive. All status LEDs should light up
Choosing between RAID 10 (1+0) or 01 (0+1)
Given that this is a 4-disk configuration, we can go for a number of RAID configurations. The most simple of the nested configurations that do not rely on splitting parity information among different disks are RAID 10 and RAID 01.
From these there is really only one choice (RAID 10) since the probability of failure of a RAID 10 array with 4 disks is 33%, while for a RAID 01 that is 66%. Moreover, the probability of failure for a RAID 10 array will tend to 0 as more disks are added, while it will always be at least 50% in a RAID 01 array 1.
In a 4-drive RAID 10 array you first create a RAID 1 array with 2 of the 4 hard drives. You then do the same for the other pair. Then, you build a RAID 0 array from the two RAID 0 arrays. This is also known as RAID 1+0, mnemonic that tells you the order of the building of the array (first RAID 1 arrays and then you RAID 0 those RAID 1 arrays) 2.
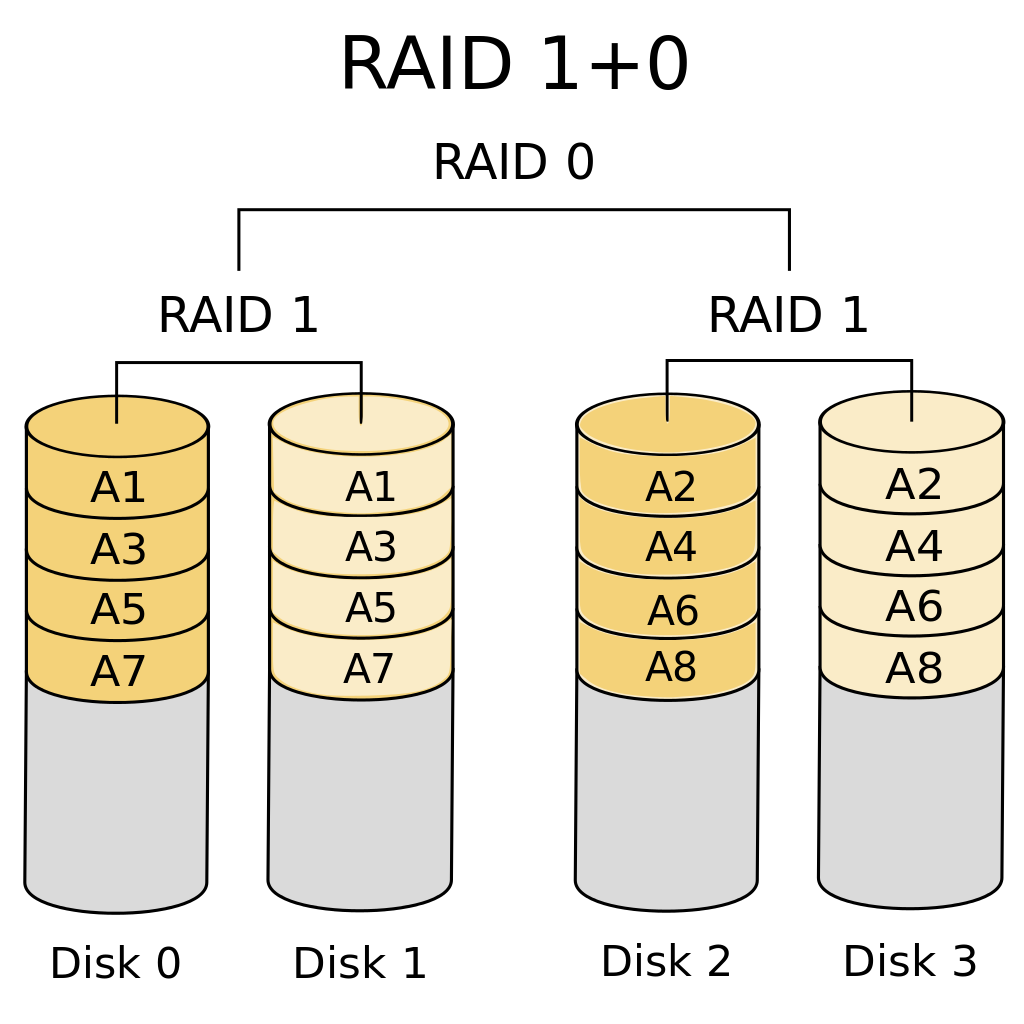
Representation of a `RAID 10` array
Why I chose Apple Disk Utility instead of SoftRAID
The enclosure includes a license of OWC’s software RAID solution, SoftRAID XT. After some investigation, and even though I paid for the software as a part of the bundle, I decided against using it even before I bought the unit. Instead, I had already opted for Apple’s built-in software RAID instead. Here are the pros and cons of SoftRAID:
✅ Pros
- Windows + Mac compatibility. You can use your drives on both operating systems, provided SoftRAID is installed.
- Nice UI that is easy to use for everyone
- Drive status monitoring + alerts
❌ Cons
- Should you opt for using SoftRAID, you are stuck with it forever. All data in the Thunderbay will only be readable and writeable with the software installed. It works as a macOS Kernel Extension, meaning that it is flaky as they come, and it working or not will depend on Apple’s whim. Should Apple decide to implement changes to the OS that break SoftRAID’s Kernel Extension, you are left stuck on an older operating system while you wait for OWC to update the software, if at all possible. This has happened when Apple released macOS Big Sur. For Catalina it was even worse, with similar issues and a nasty fix provided at the time requiring you to disable System Integrity Protection. At least OWC seem to be committed to good customer service, providing not only a list of known issues with SoftRAID, but also continuing to support the software. Long story short, I worry about using such software to keep valuable data, even if OWC are not to blame.
- Although touted as a selling point of SoftRAID, support for Windows seems flaky and buggy. For me in particular, this is a non-issue since I only use macOS, but be aware if you plan to use Windows with your Thunderbay.
- The SoftRAID license is single-machine only, meaning that if you own several Macs and need to alternate your Thunderbay between more than one machine, you have to deactivate SoftRAID on the first and activate it on the second machine. Every. Single. Time. Not for me, sorry.
- SoftRAID comes in several flavours (Lite, XT, Pro). The XT version (bundled with the Thunderbay 4 Mini) only allows you to use the software with OWC enclosures. In the event that the enclosure itself fails, I have to buy another one from OWC to get my data out of the hard drives, or spend $ 249 on the Pro version of SoftRAID. By using Apple’s software RAID, it is possible to take out the drives from the dead enclosure, connect them all to a another Mac using USB docks, or to a Hackintosh (which has enough SATA ports, unlike Apple’s modern computers), and get my data out.
- I am not interested in RAID 5 (offered by SoftRAID but not by Apple’s Disk Utility). When compared to RAID 5, RAID 10 offers you more usable storage, but its working principle seem less robust to me. Requiring a minimum of N hard drives,
RAID 5reserves, 1/N of the storage of each drive for parity information. More importantly, it allows a single drive to fail. The problems come when a single drive does fail, since the volume rebuild process can take a long time and will put high strain on all the remaining drives. As a rule of thumb, if you have a drive fail, it is reasonable to assume that at least one of the others could be close to failure. Stressing them all for tens of hours to rebuild the volume through SoftRAID does not seem healthy, since if any of the other drives fail, you lose all data in all the drives. - You need SoftRAID to rebuild the volumes in case a drive fails. Using Apple’s software RAID, you can use the command line or the Disk Utility. I like command-line stuff because although ugly, you know it’s going to work and come OOB with every single Mac for years to come.
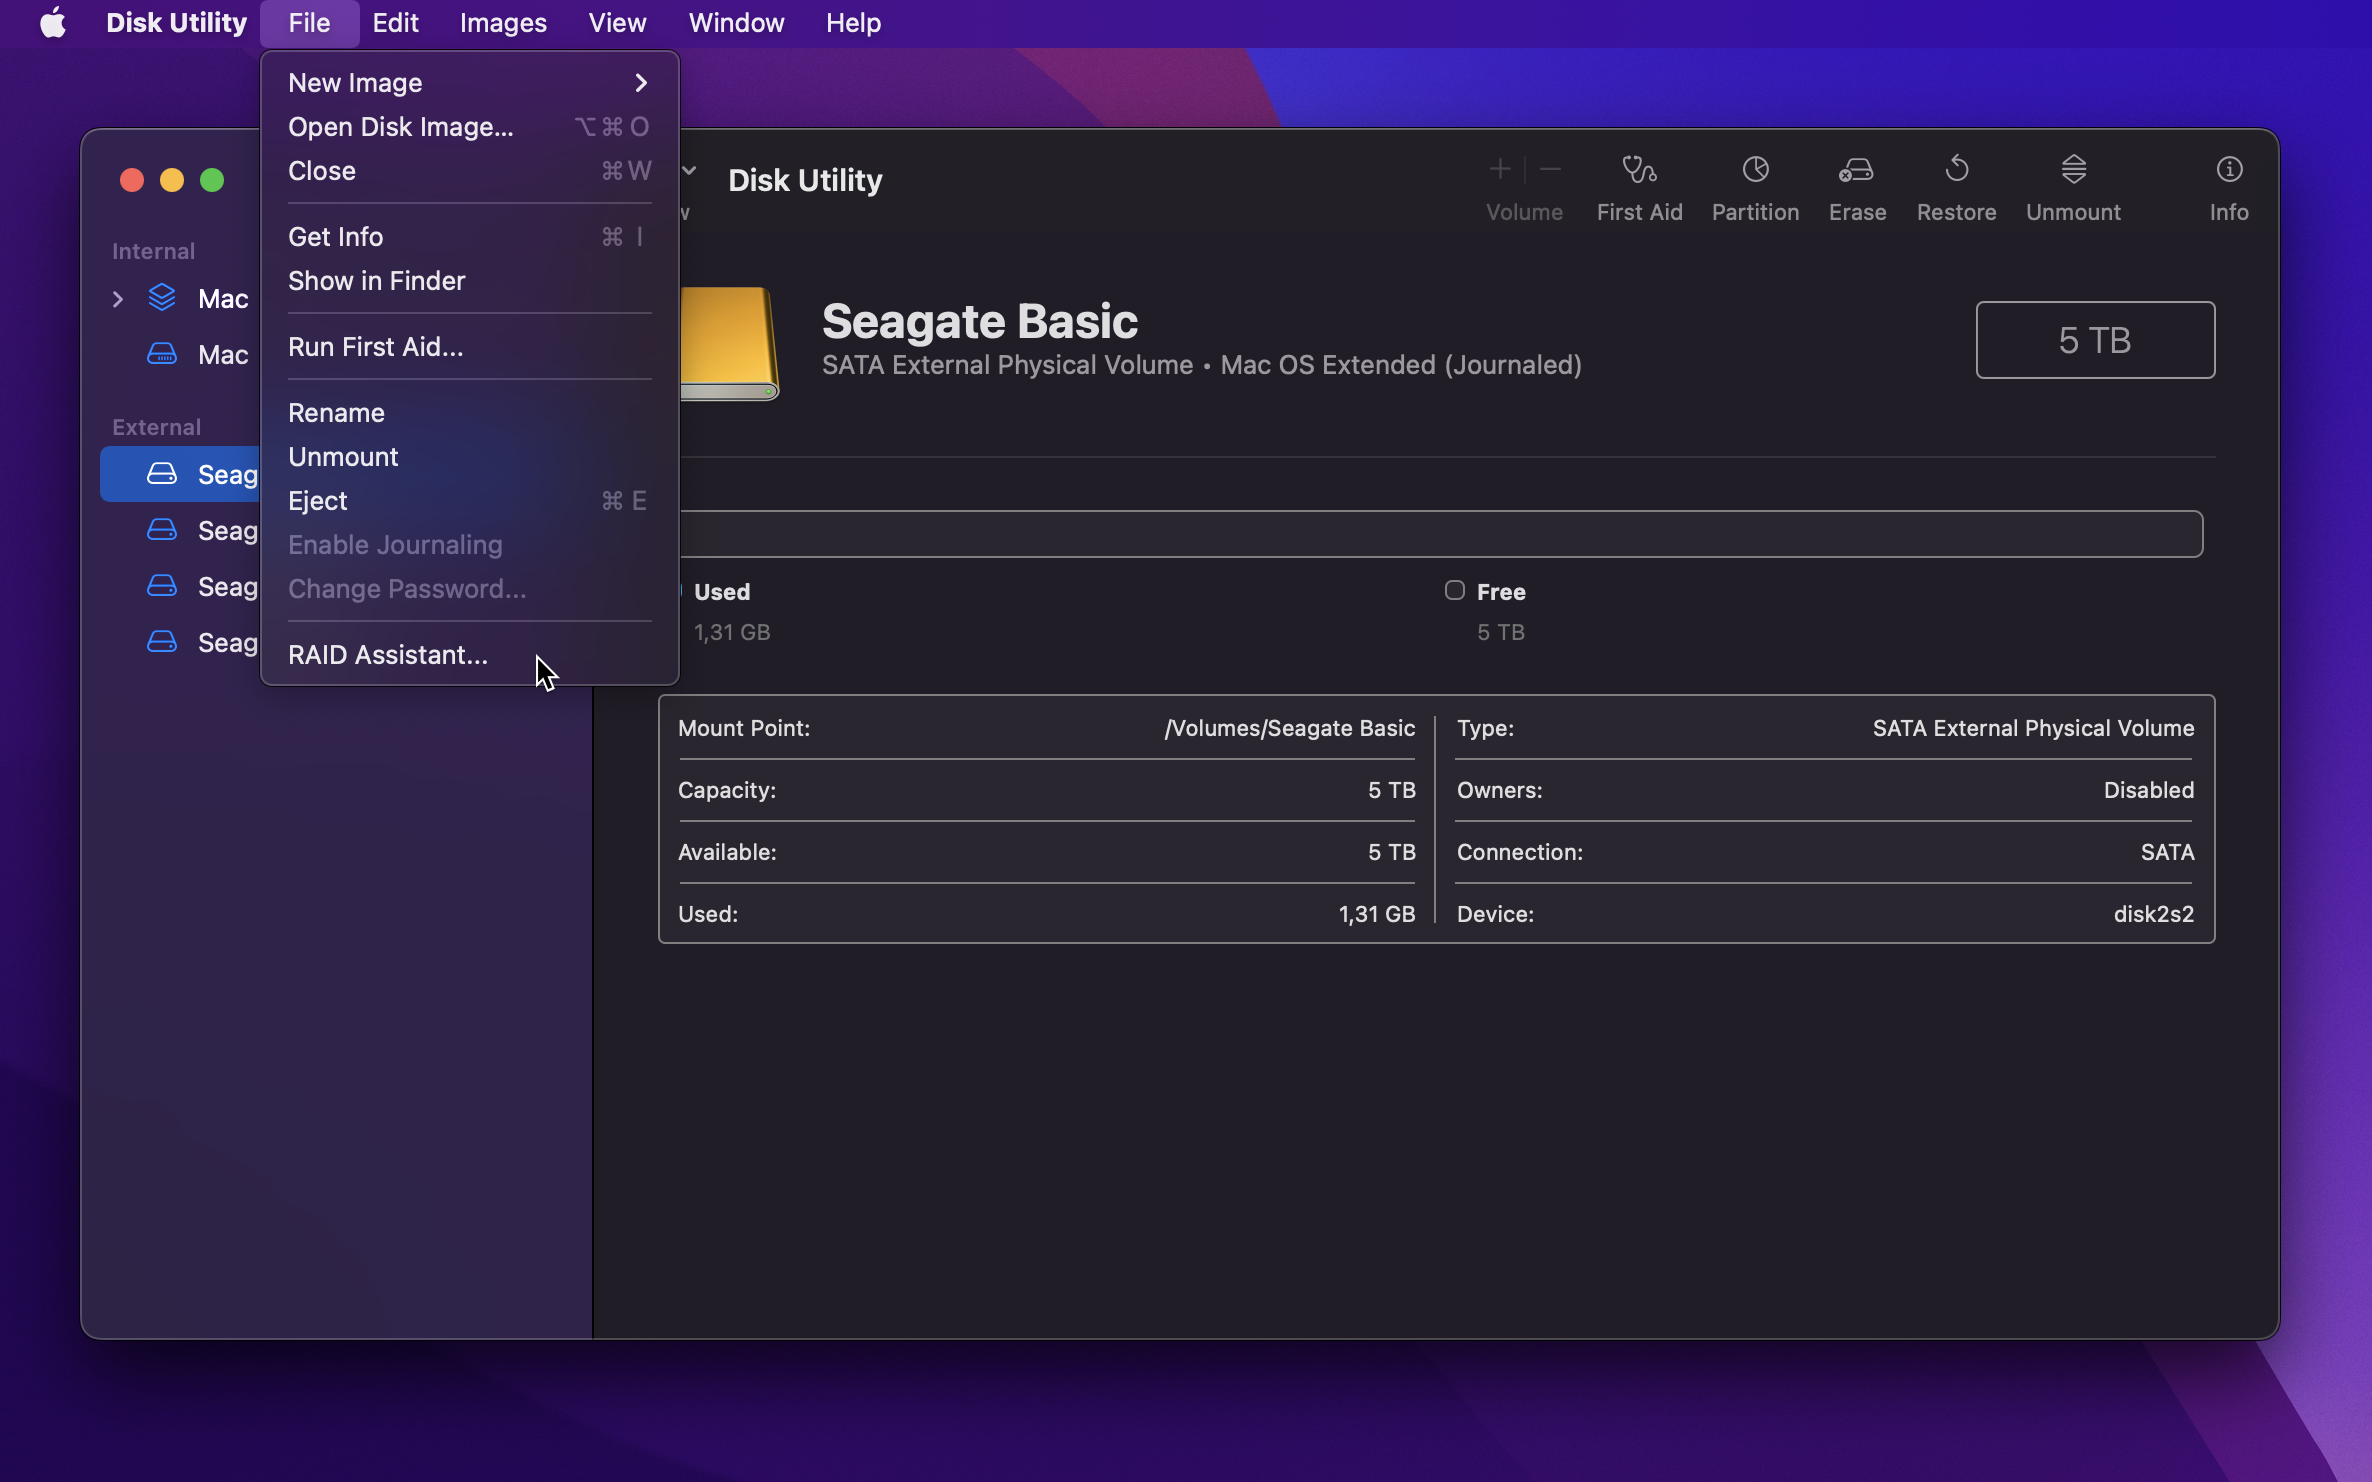
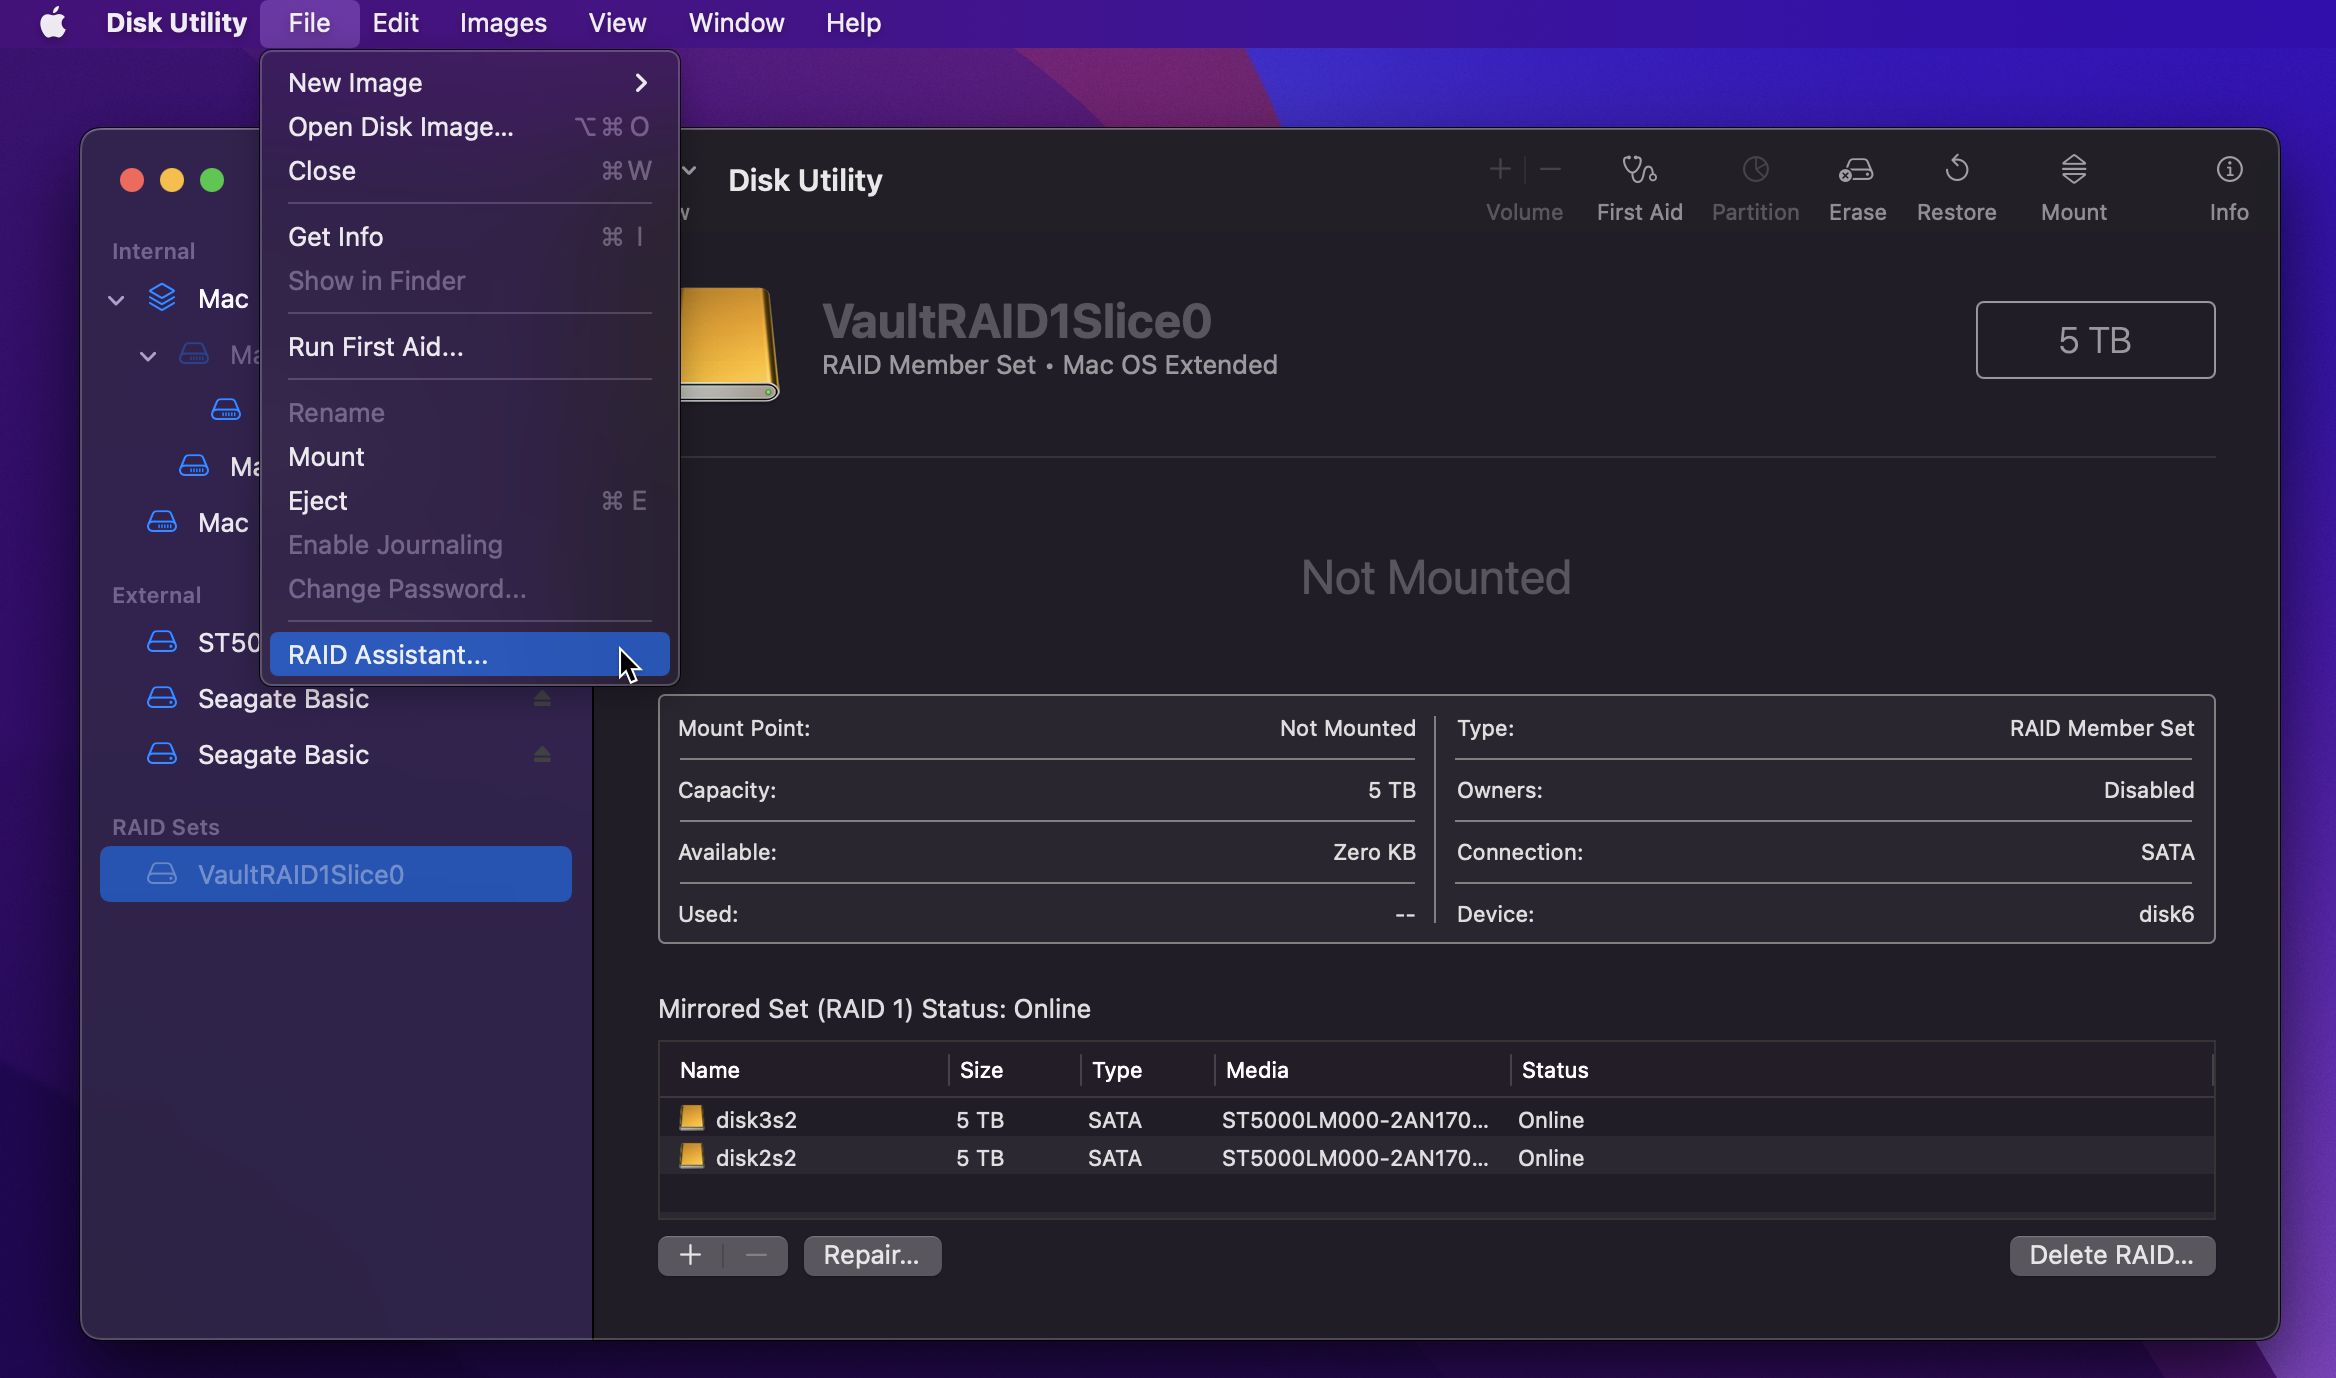
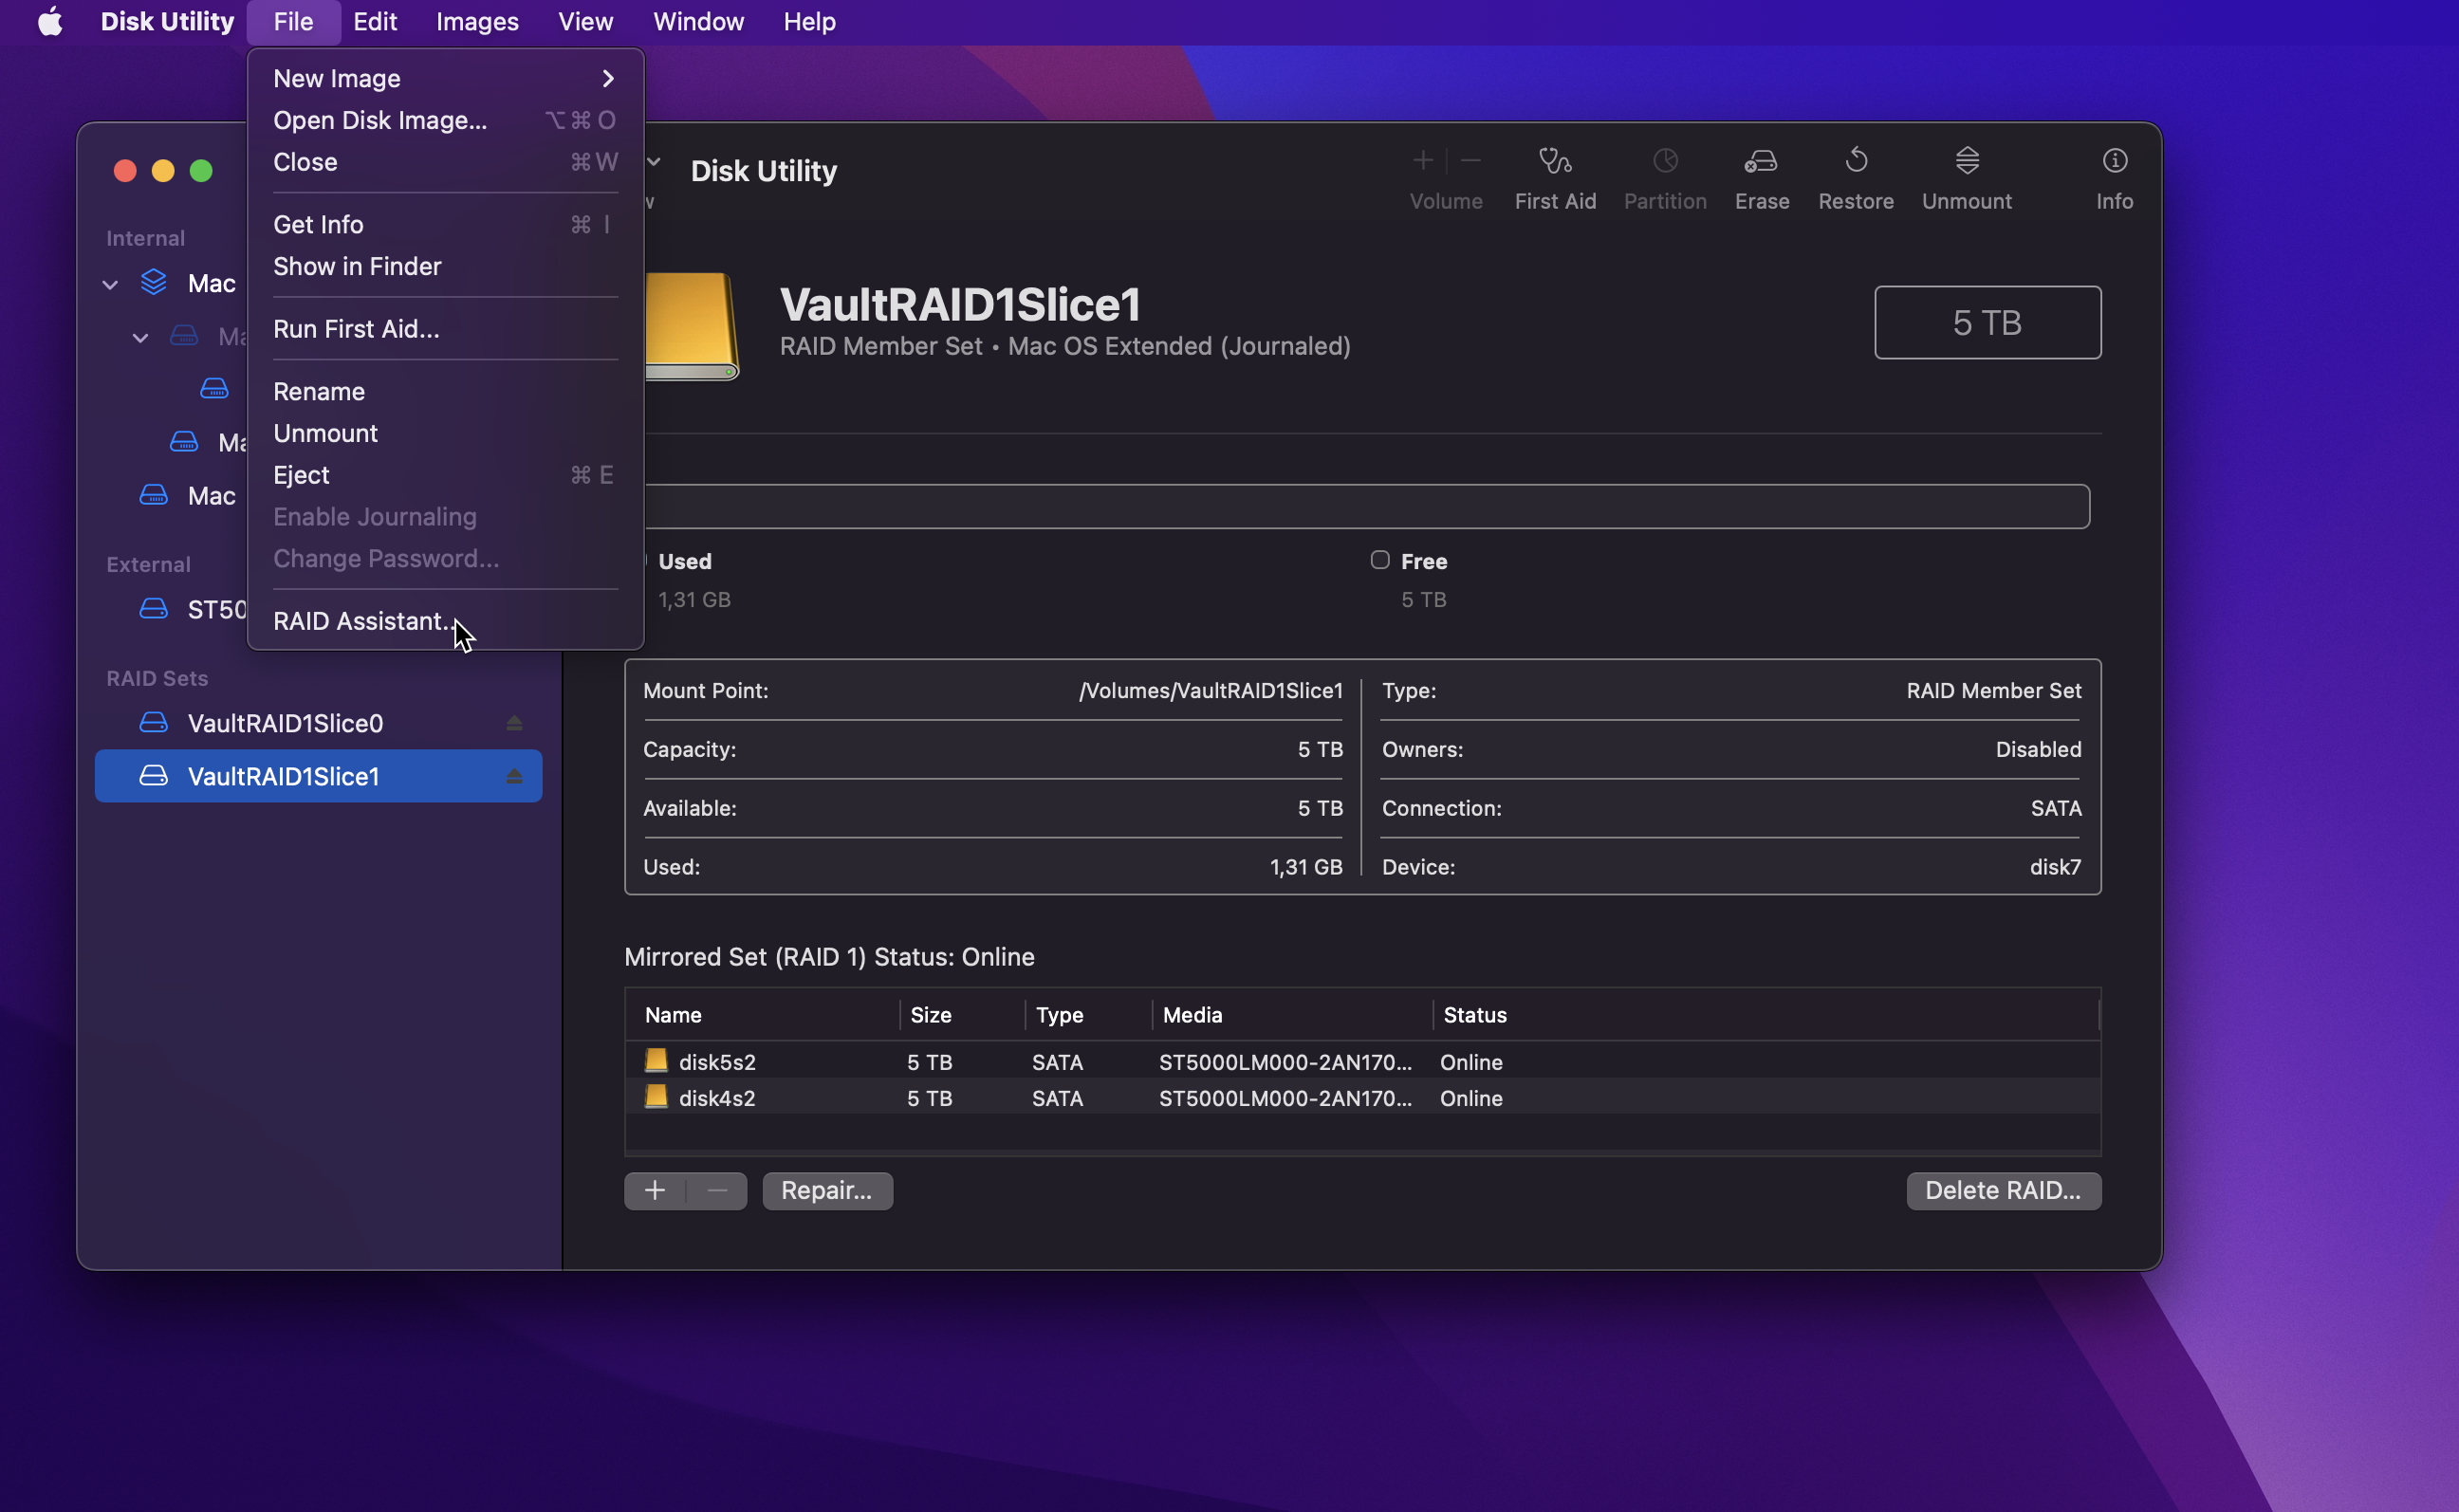
Setting up RAID 10 array using Apple Disk Utility
I will be using Apple Disk Utility. Follow along:
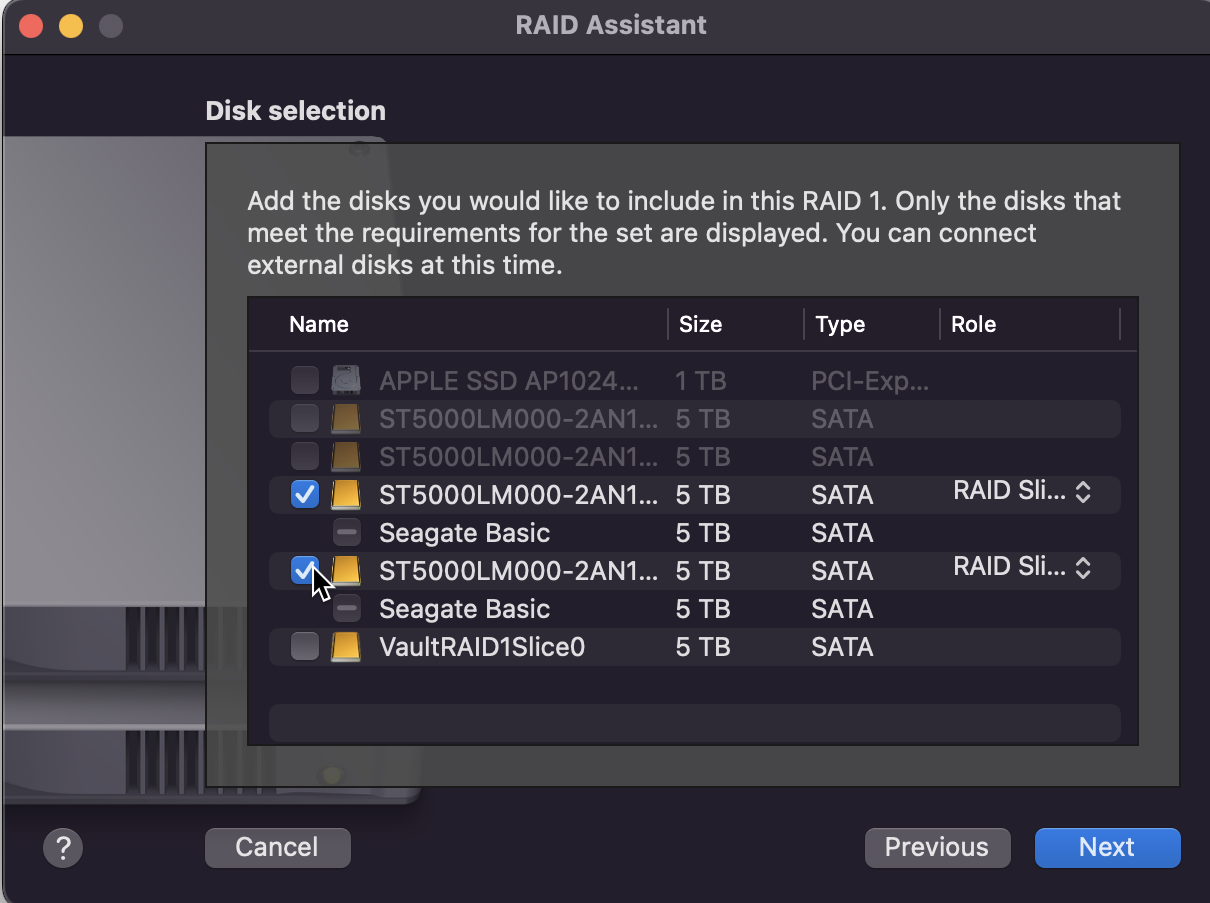
Set up first RAID 1 array with a pair of disks
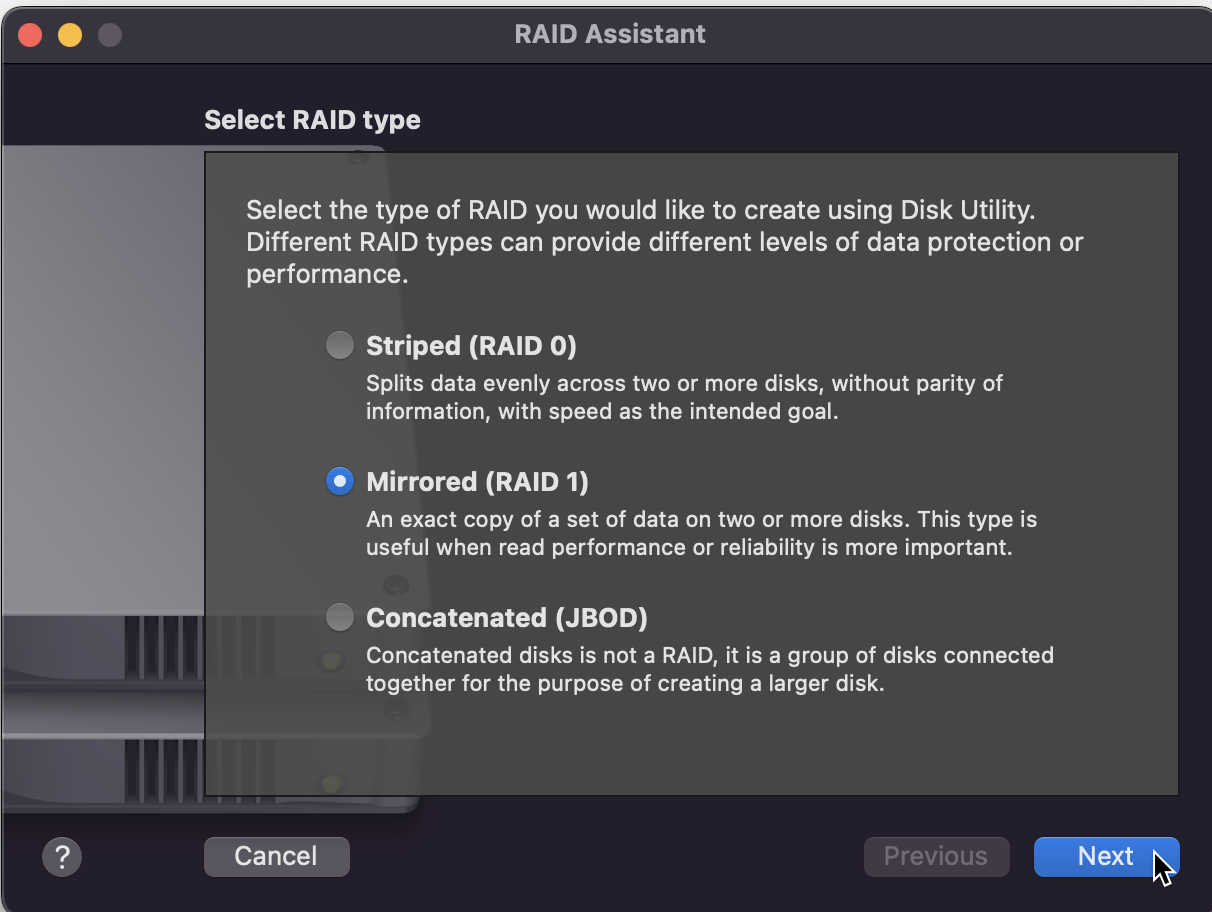
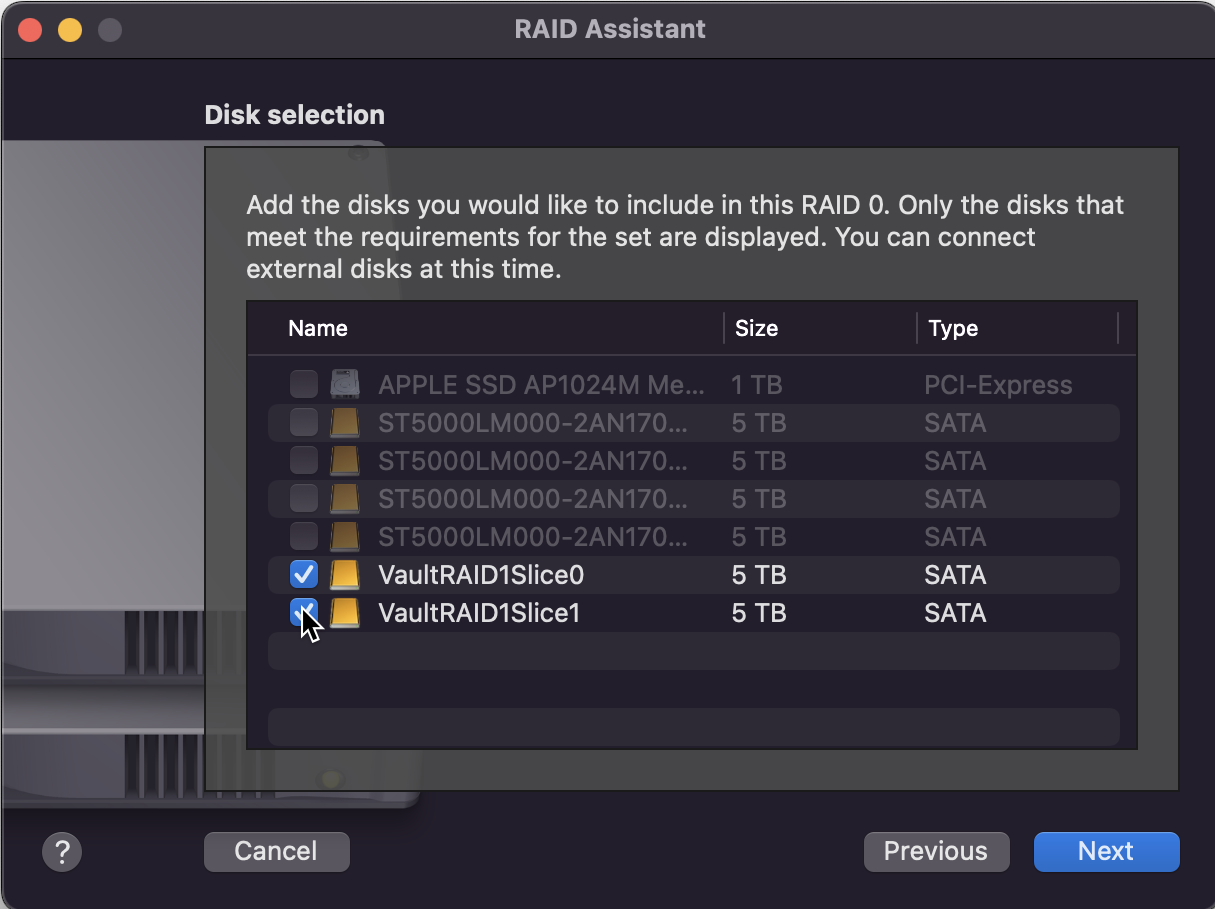
Select two of the drives:
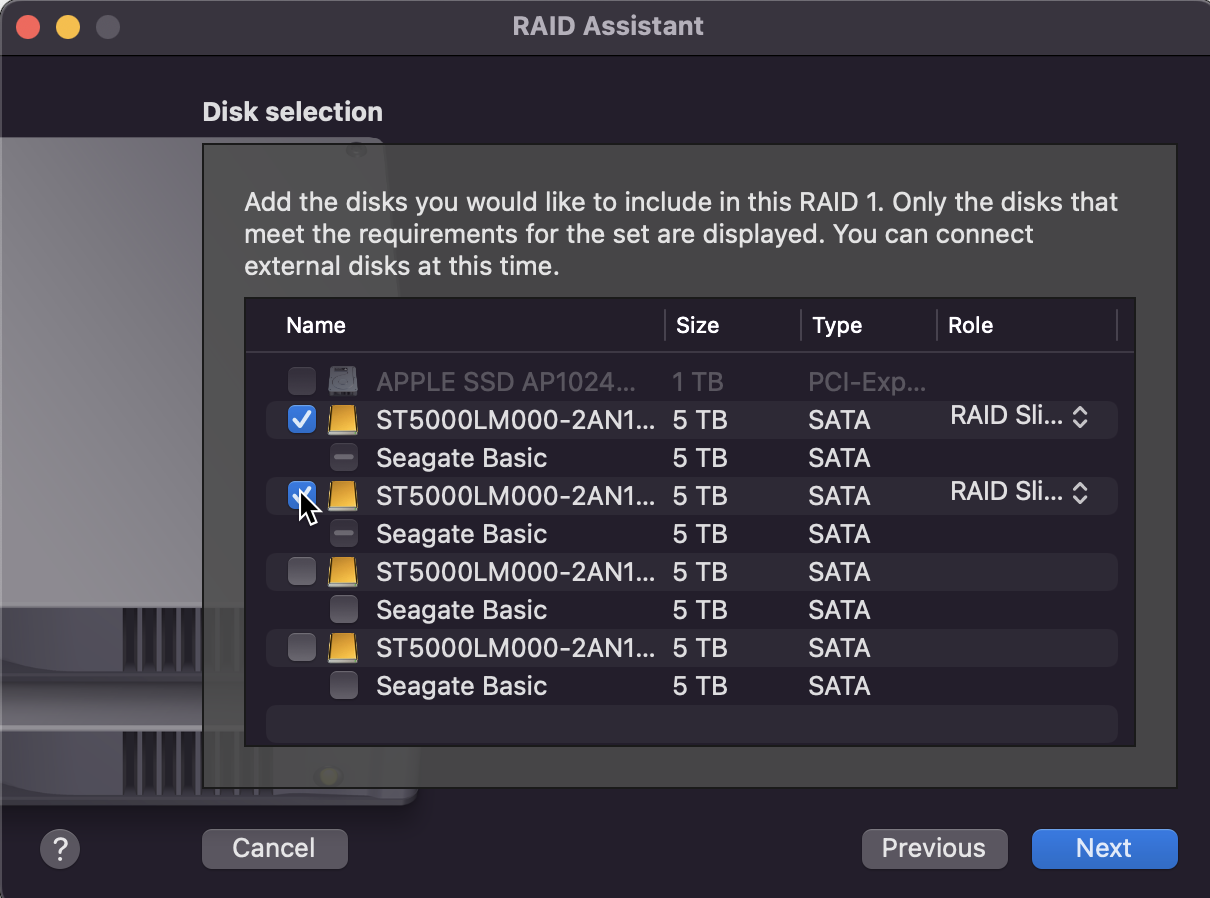
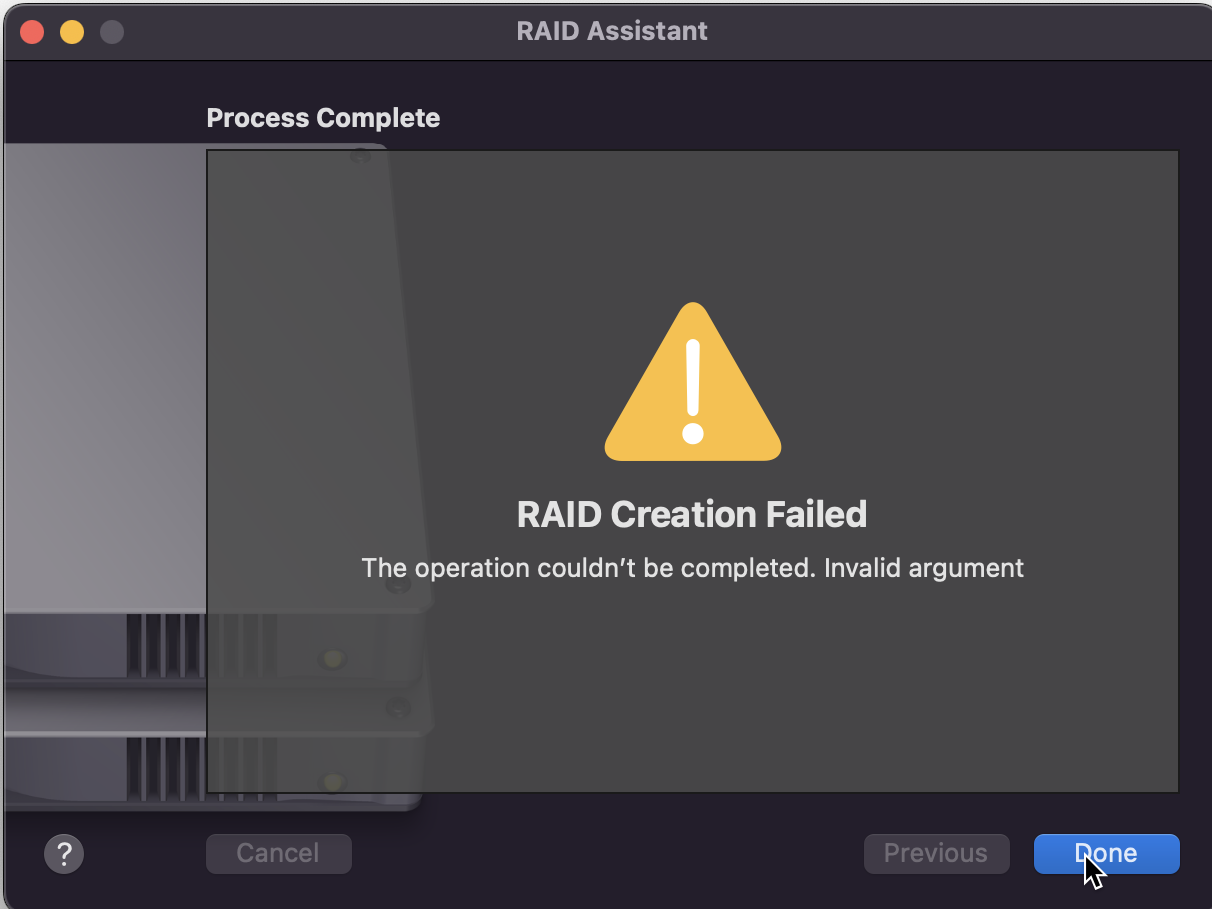
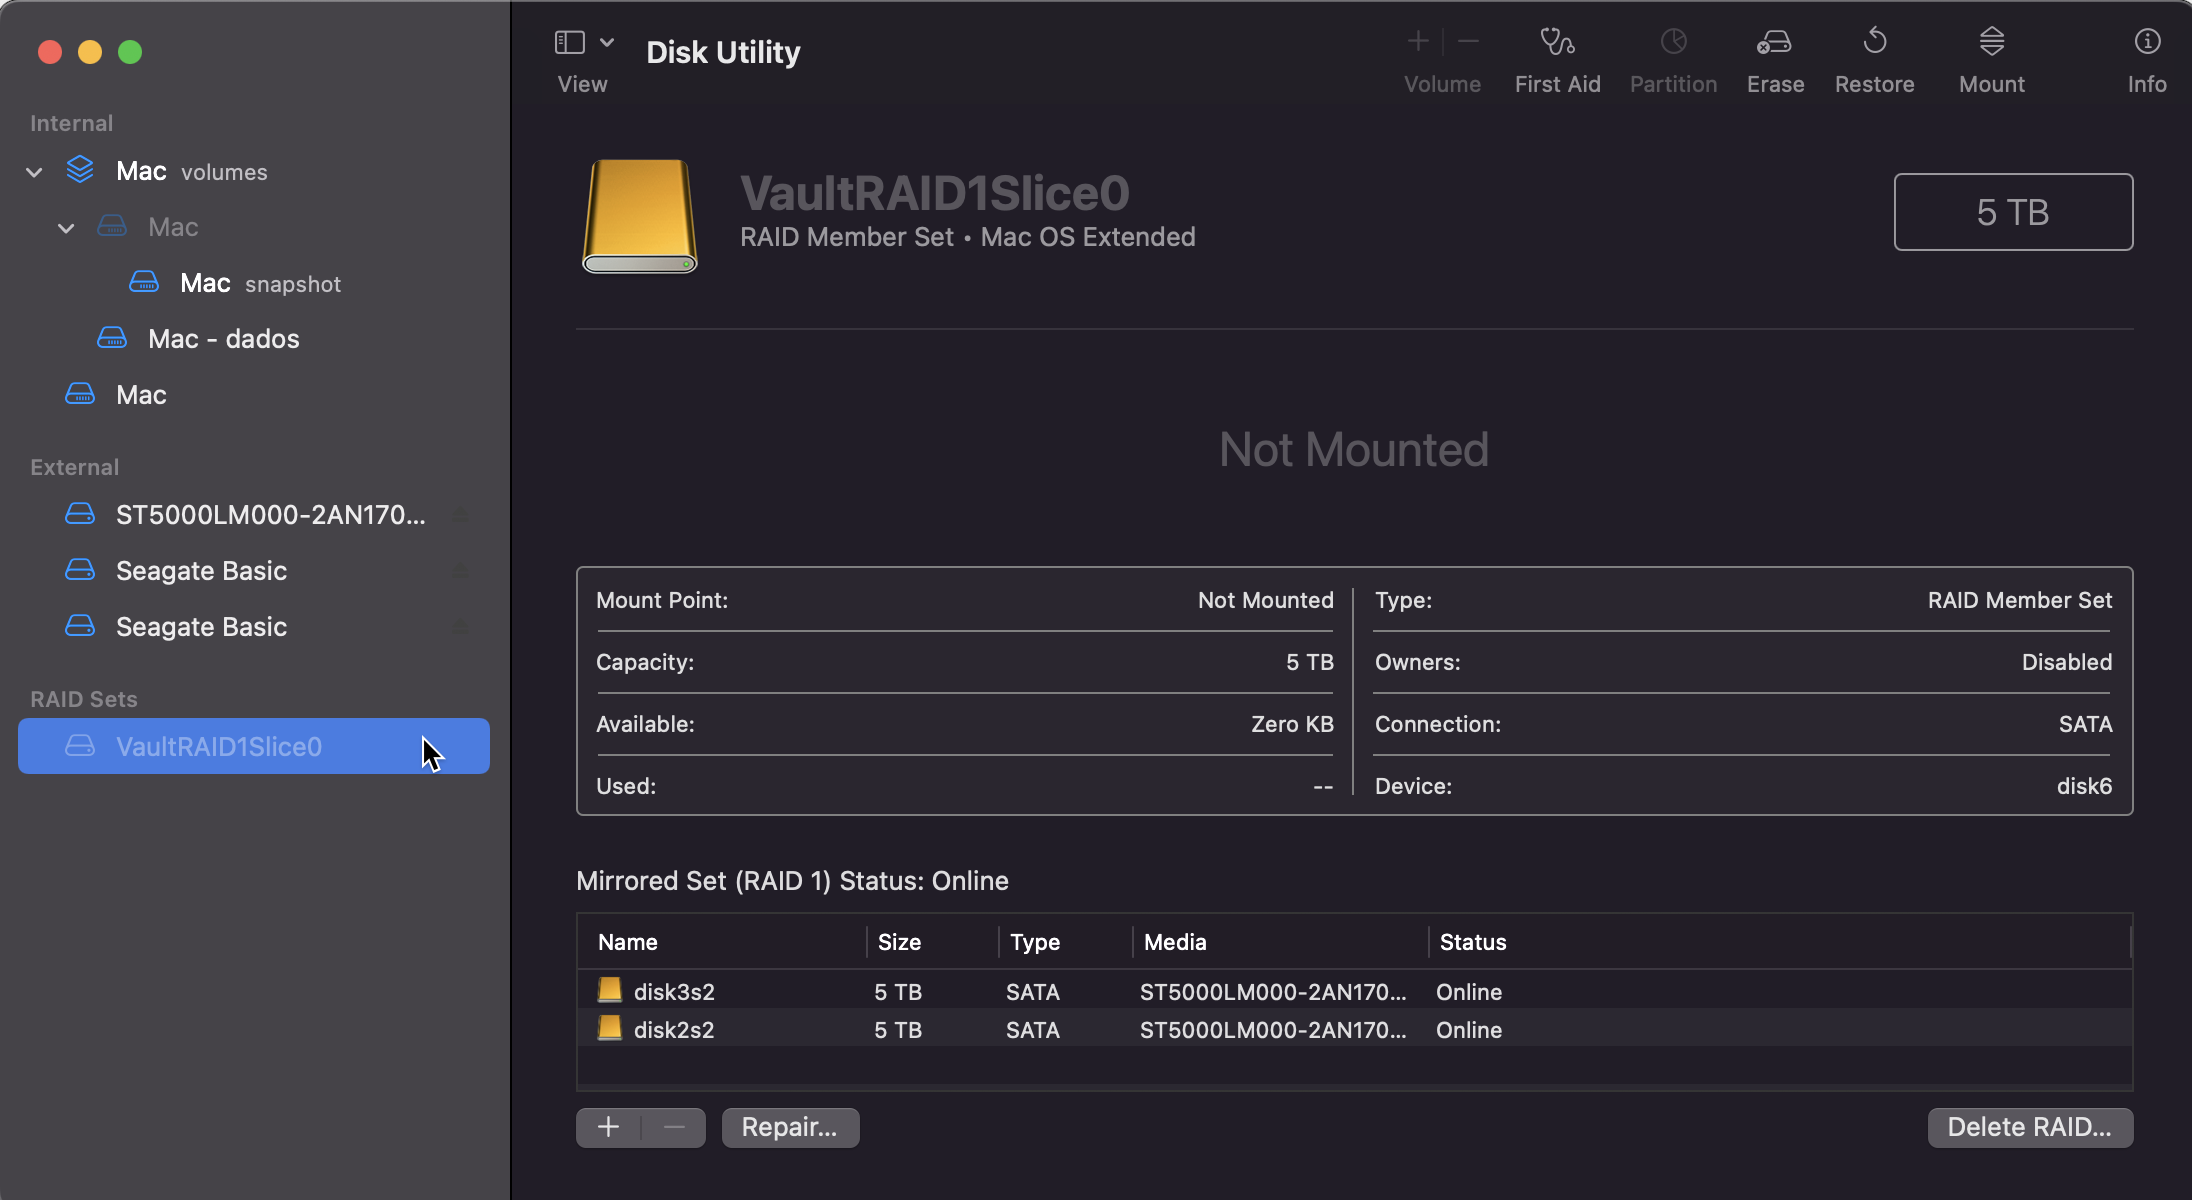
The operation will seem to fail, but if you wait some time you will see the array first appear as grayed out in the list of disks and then go online.
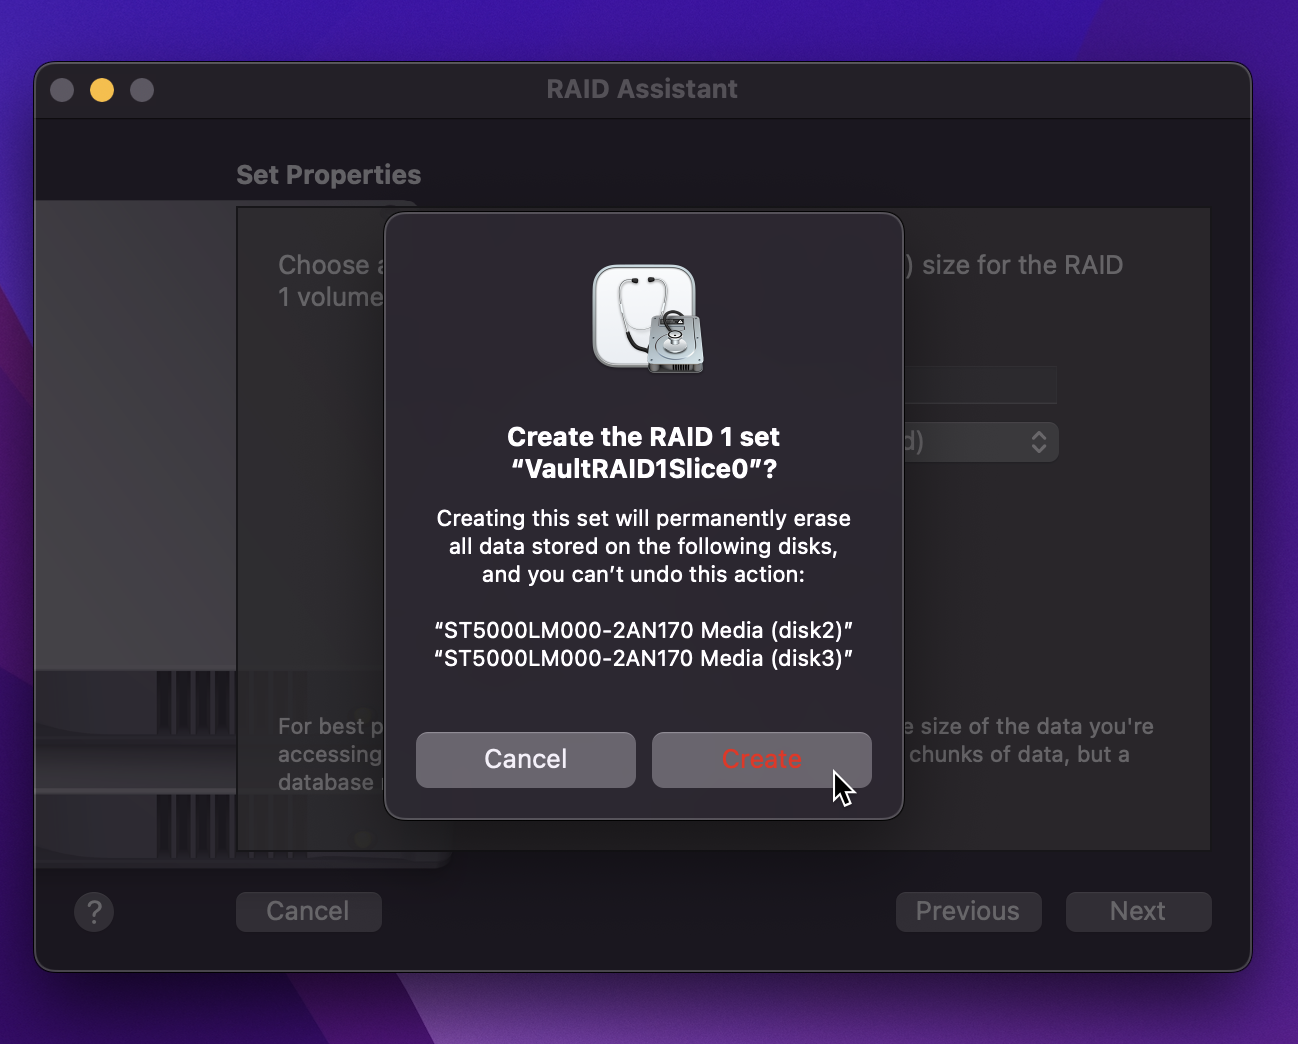
We repeat the process for the remaining two drives:
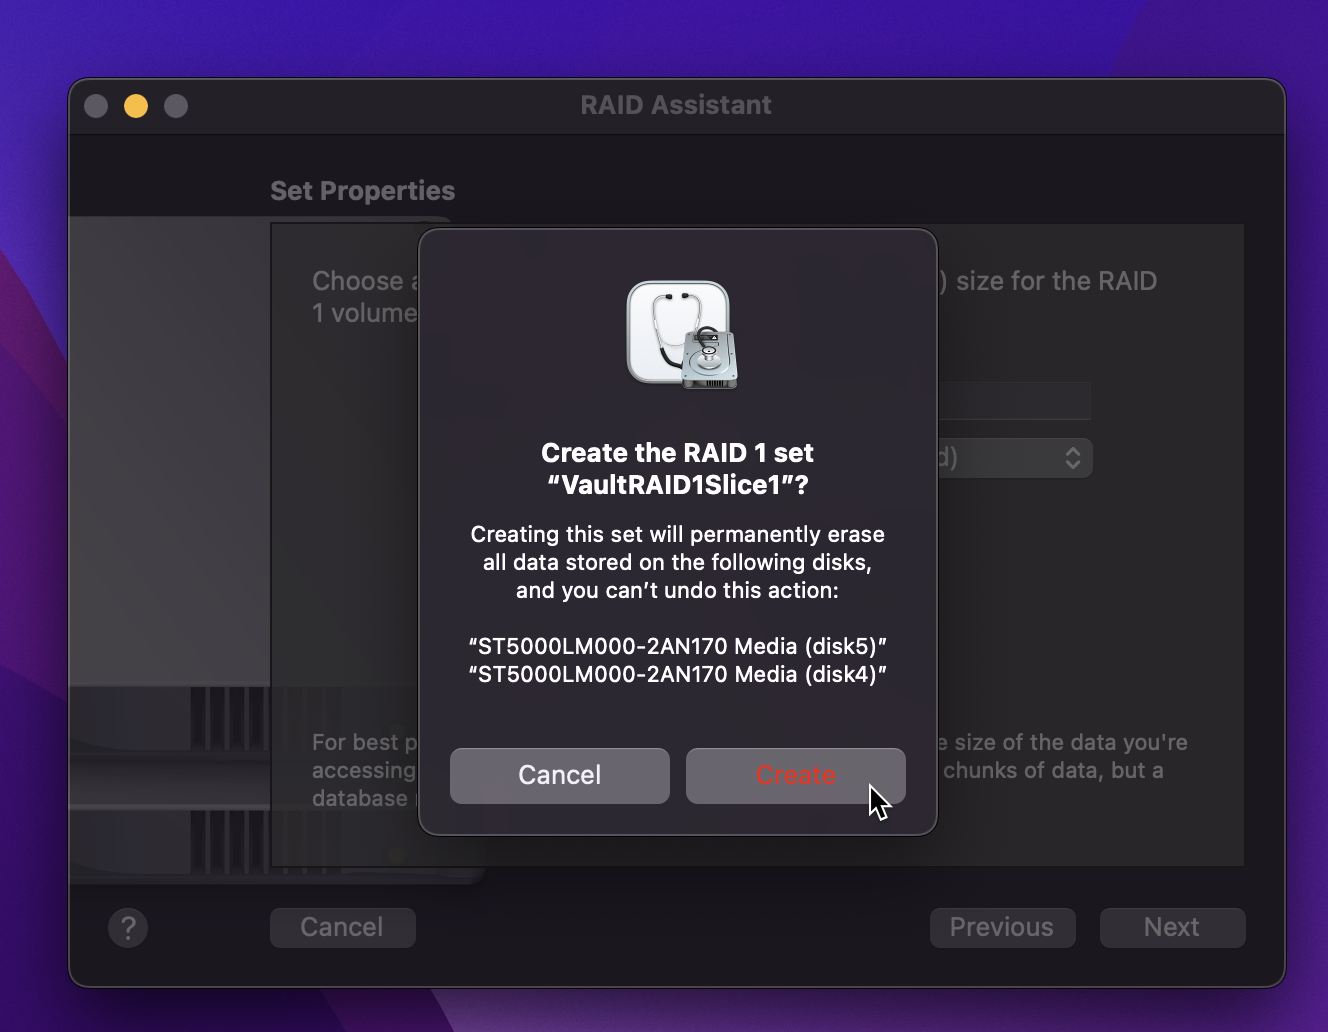
Again we get the same error message, ignore it. After the lights blink in alternating fashion in the Thunderbay, you will see the RAID array come online:
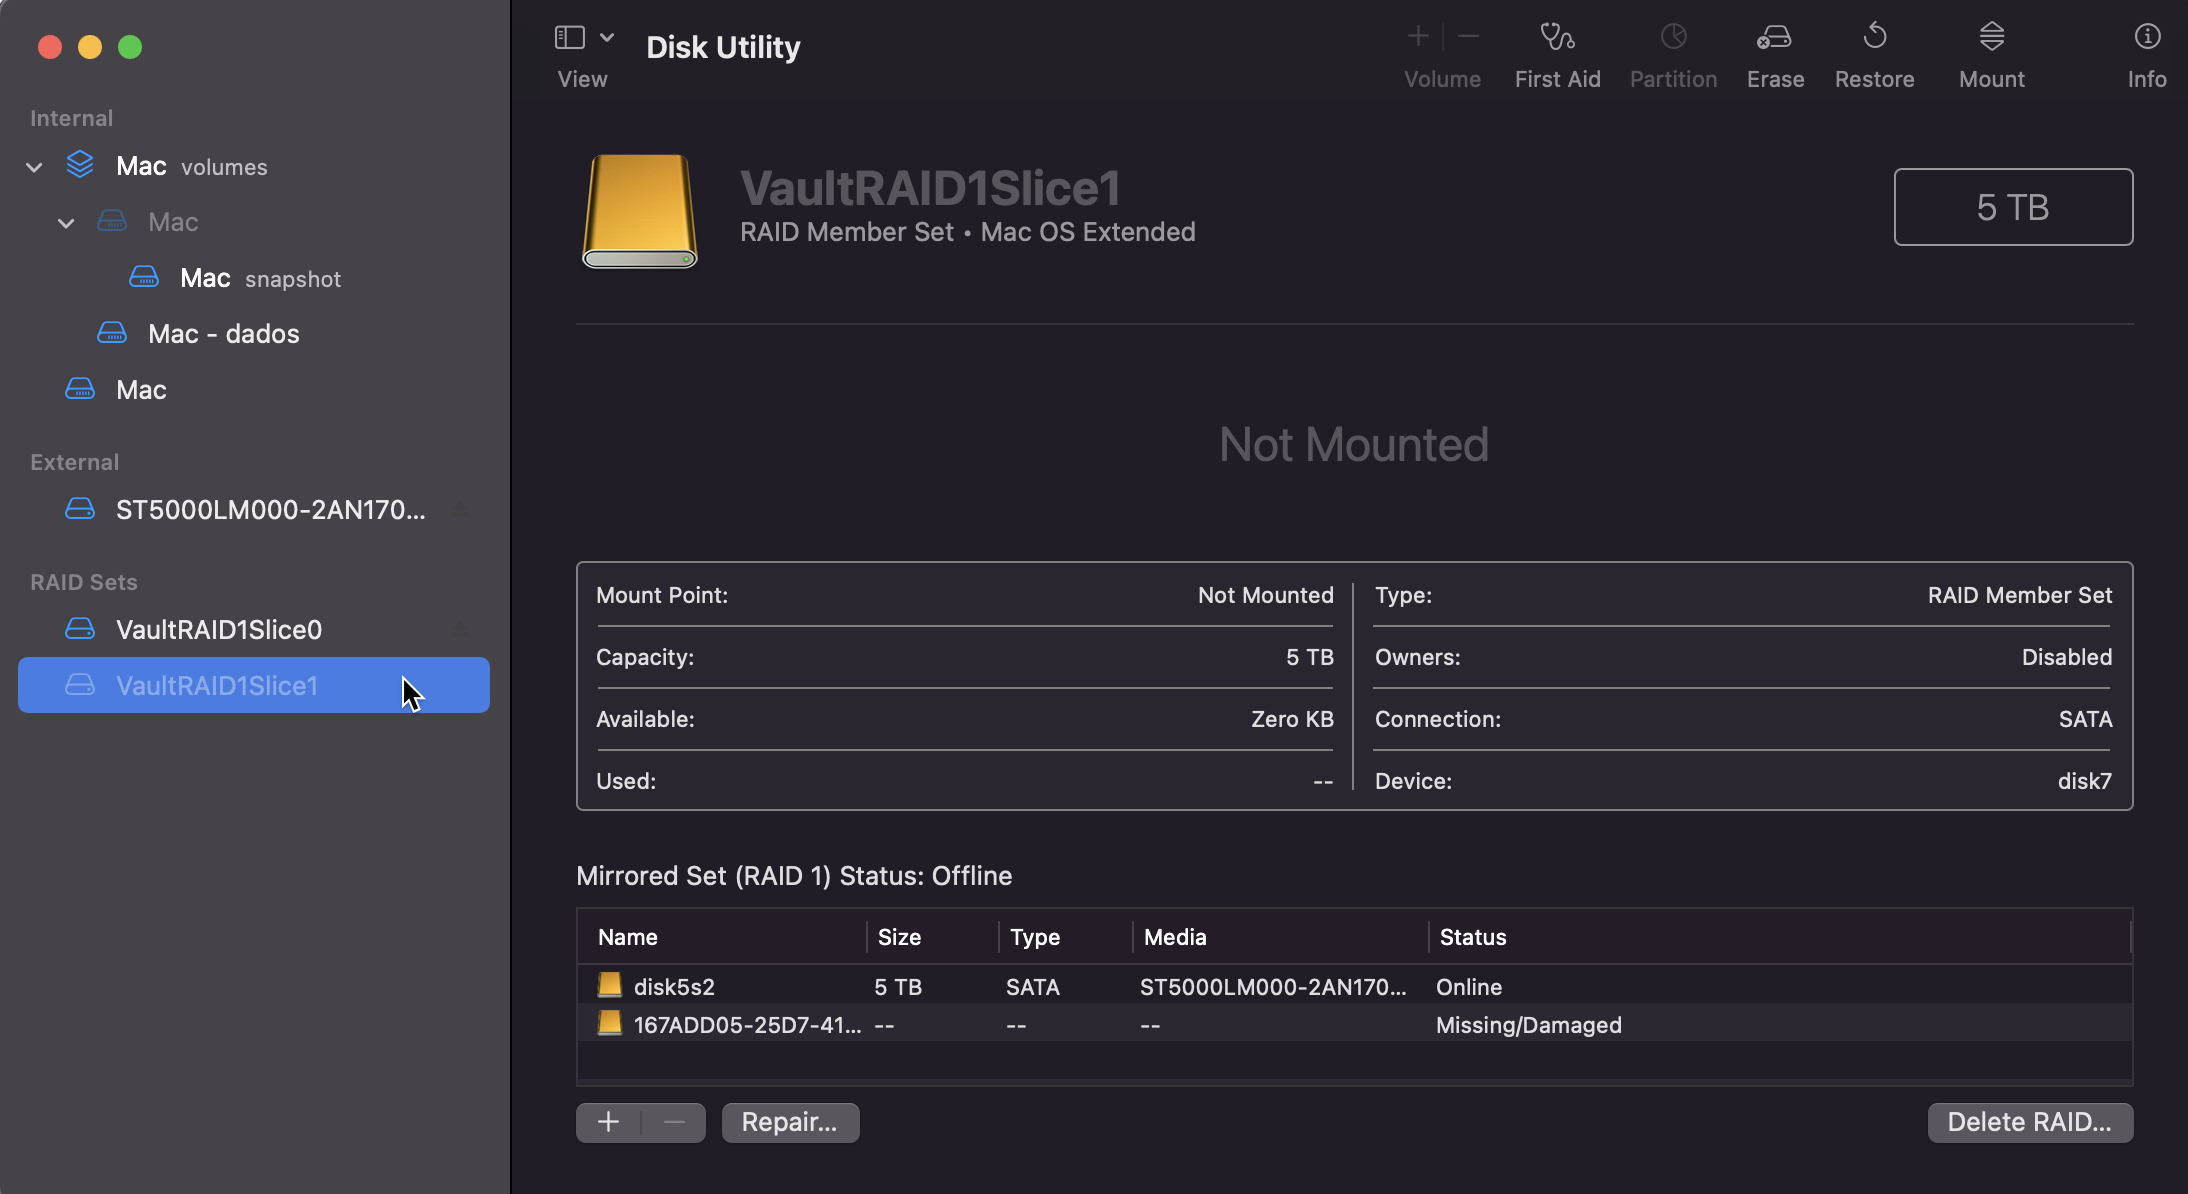
Notice the letters VaultRAID1Slice1 in the name of the go from grayed out to black (array online):

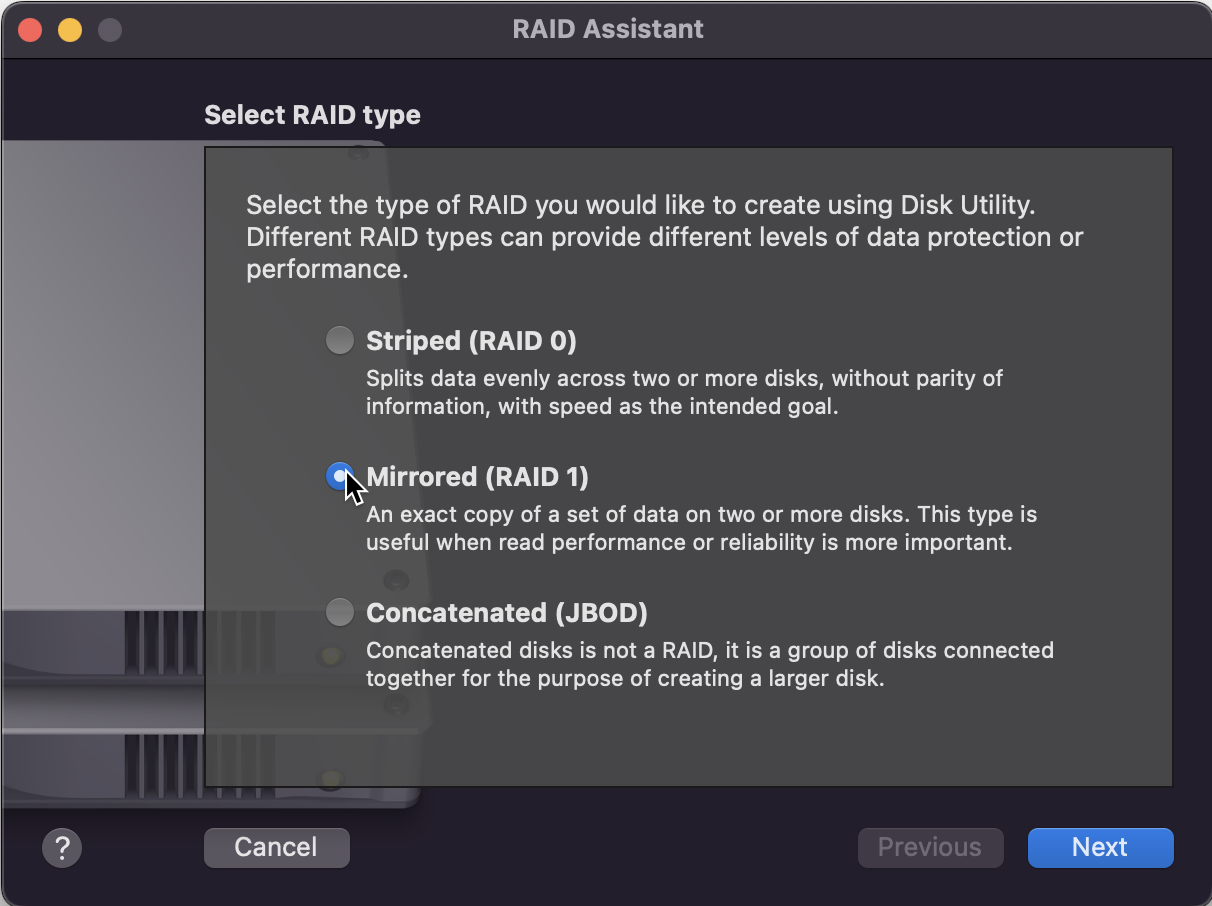
Set up the RAID 0 with the two nested RAID 1 arrays
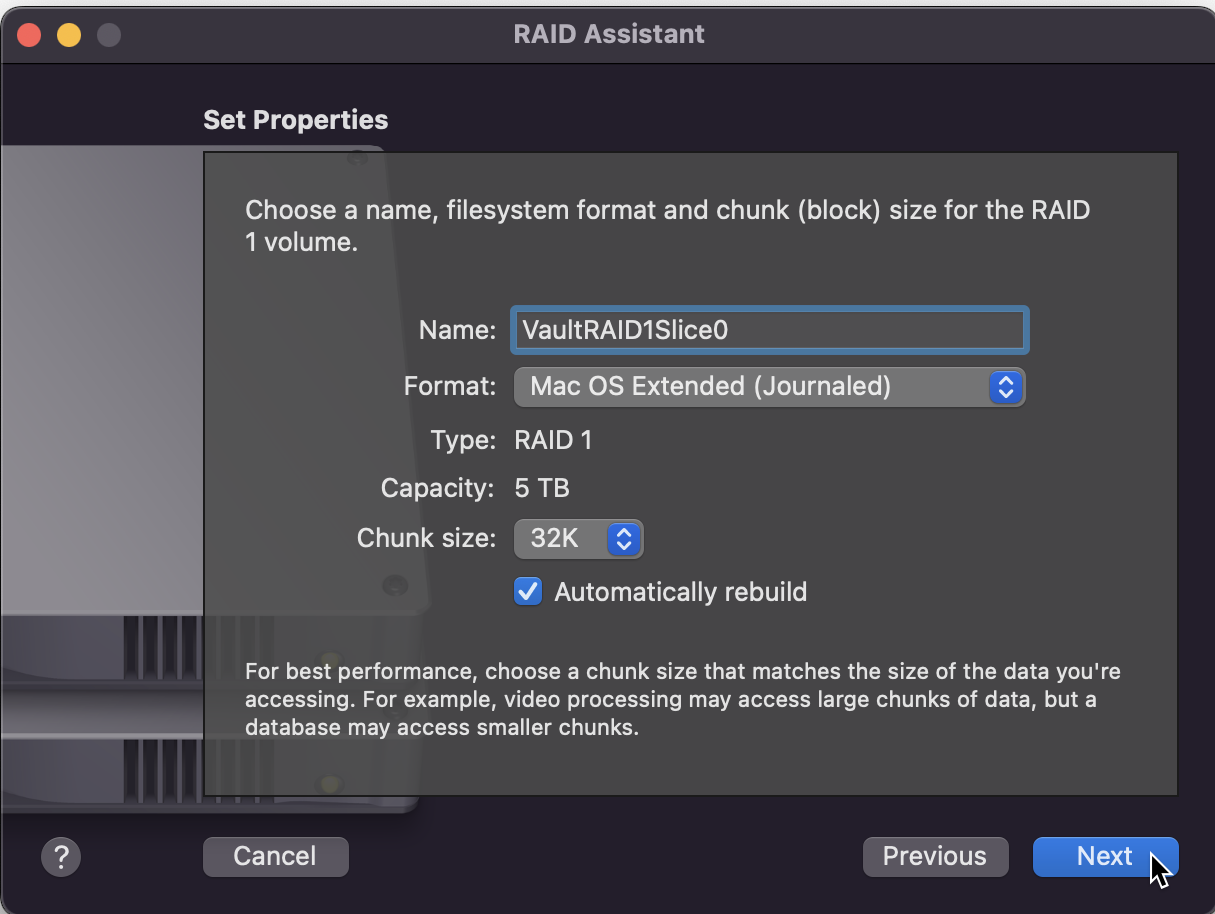
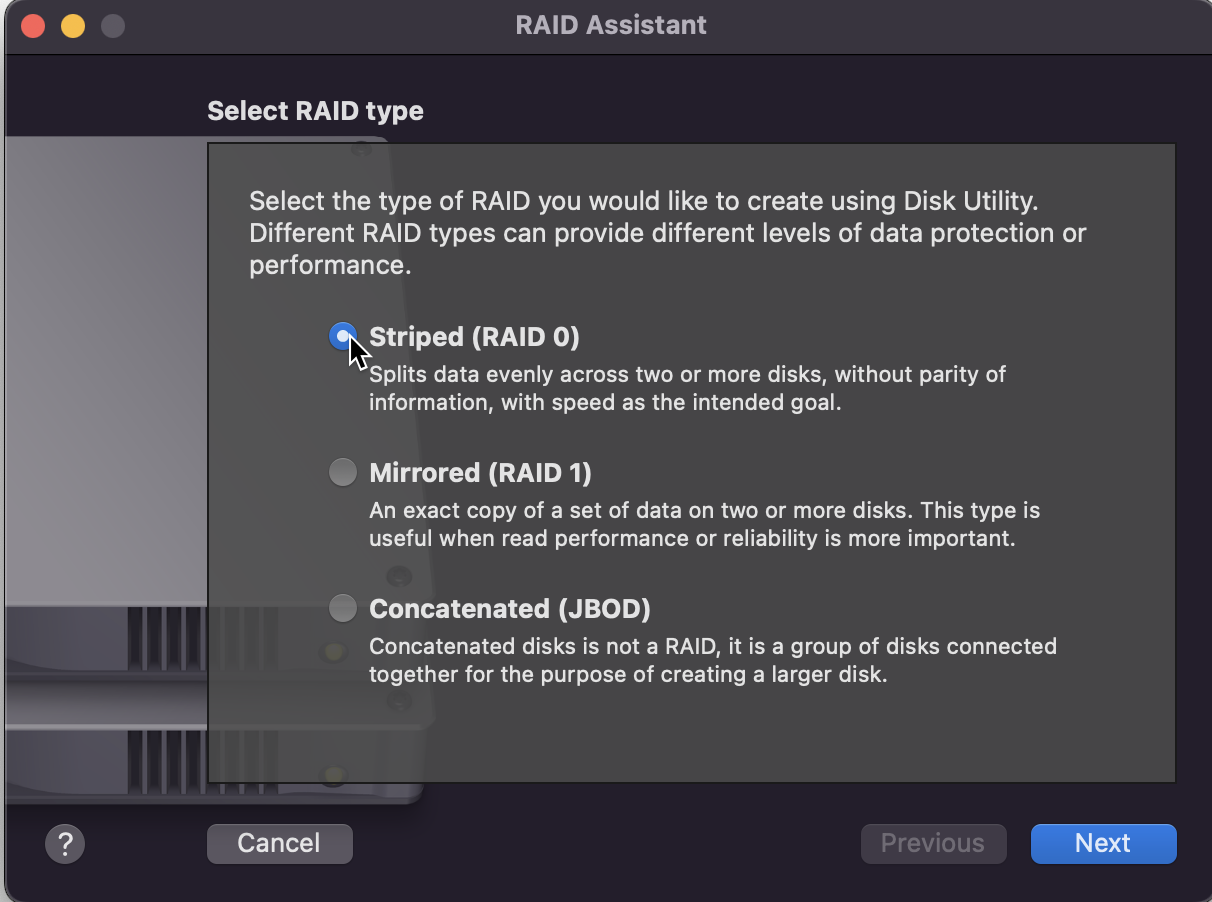
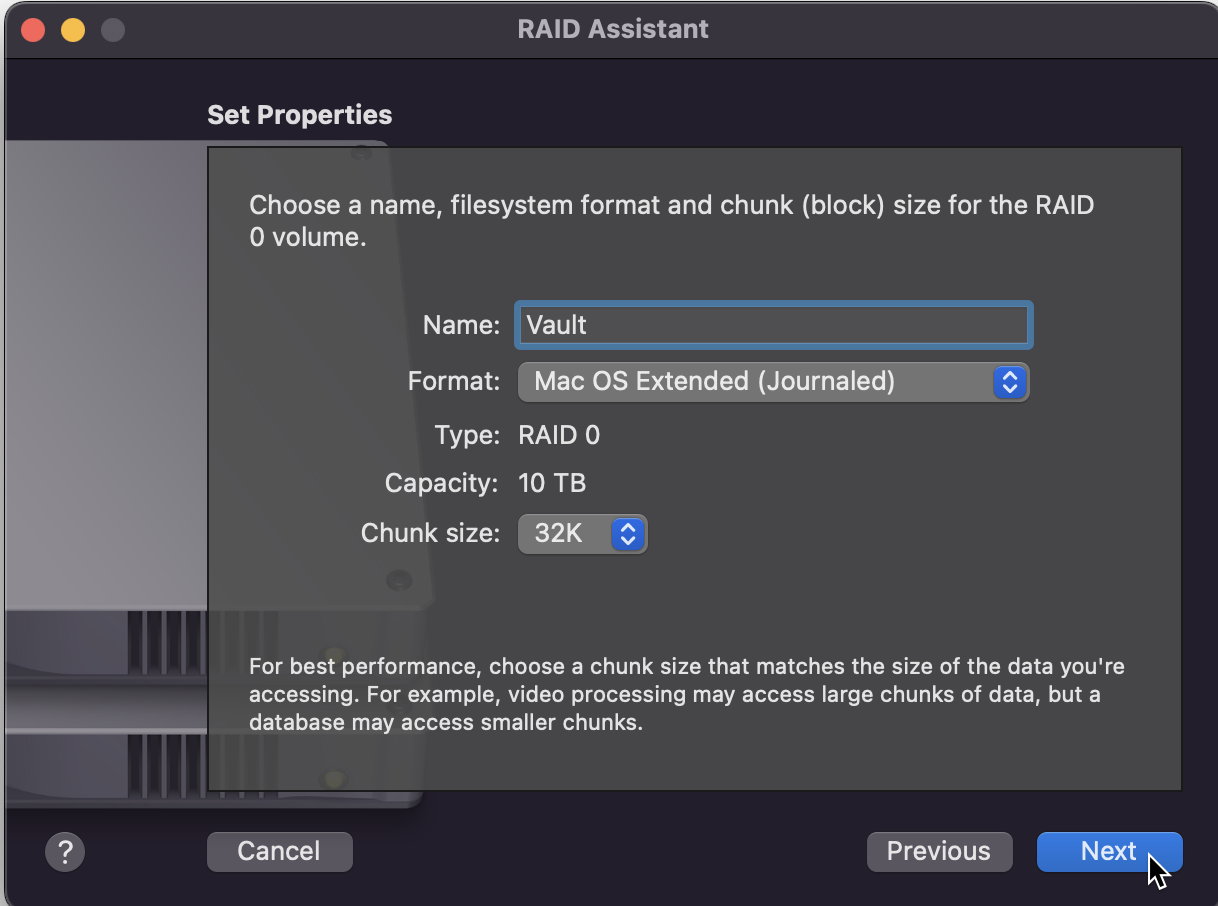
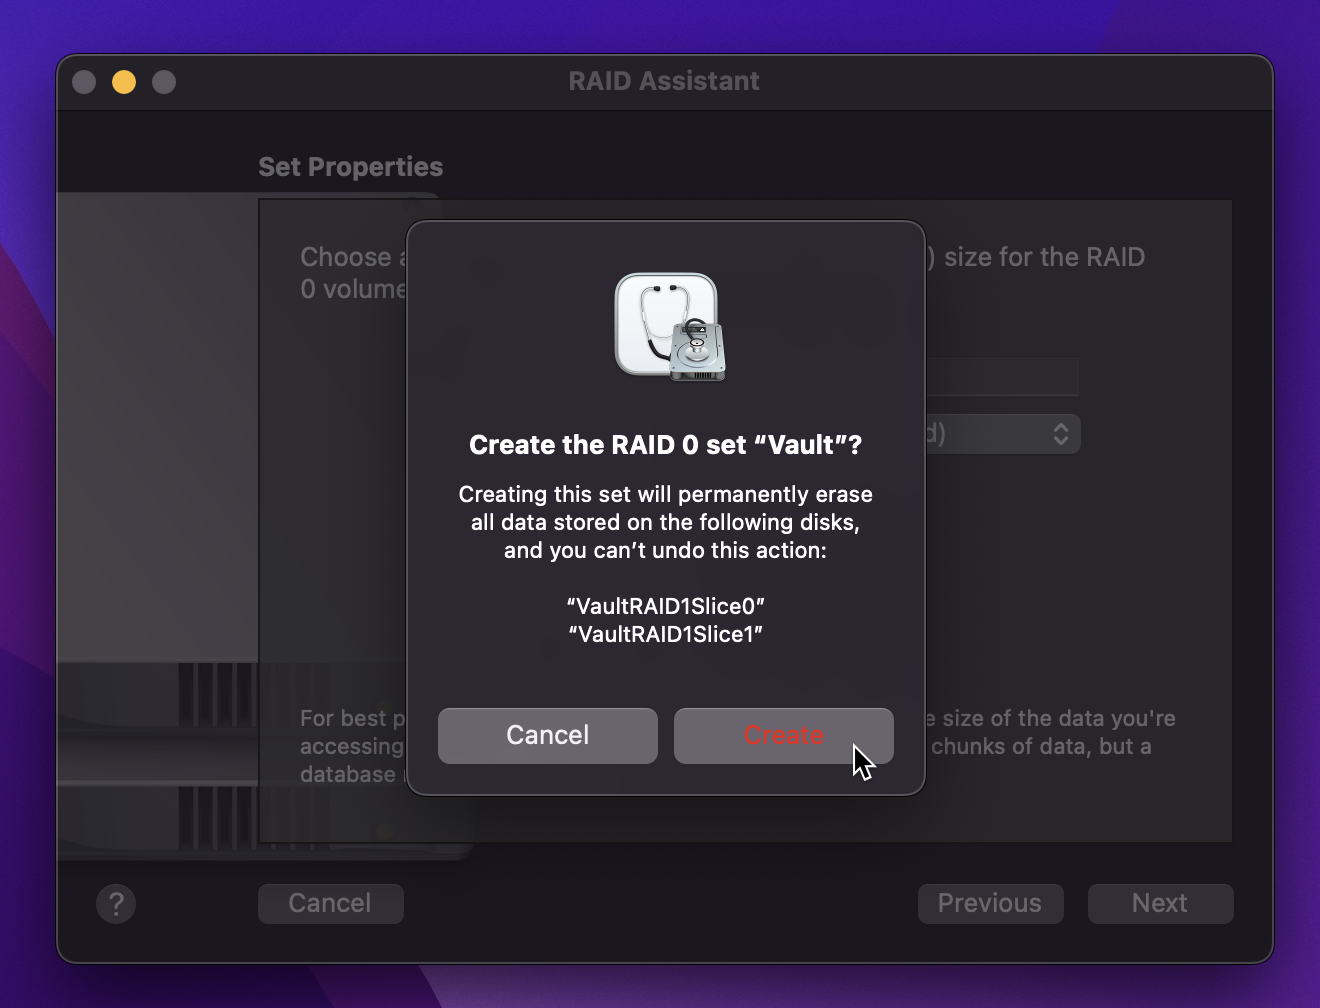
This time, select RAID 0 instead of RAID 1:
Choose the final name of your complete array. Here I will be using Vault, which will represent the complete set of 4 drives in our RAID 10 form.
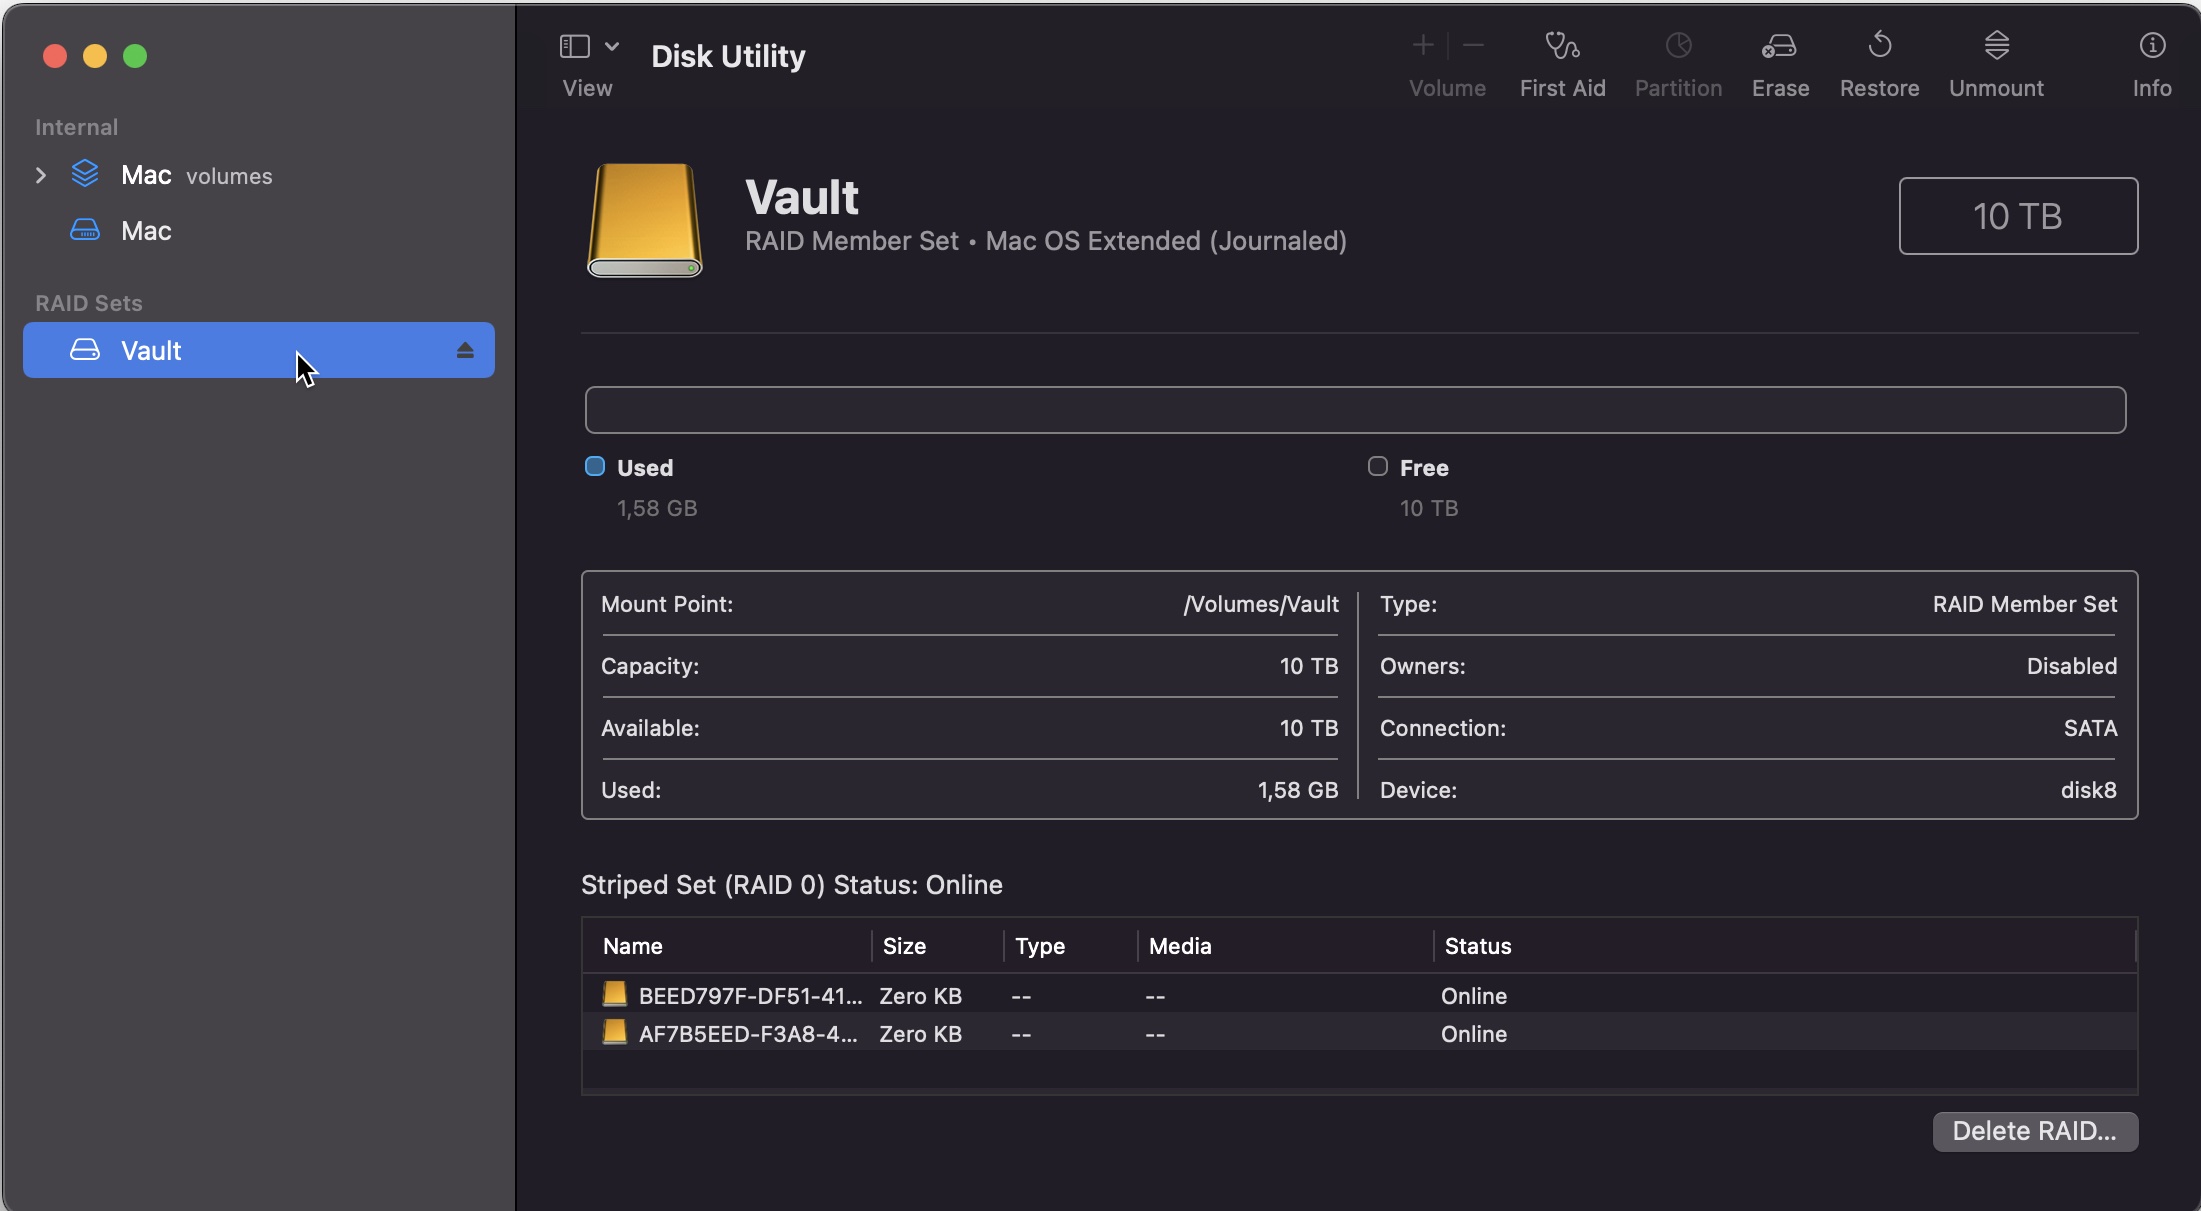
Final Result - 10TB in RAID 10!
Performance
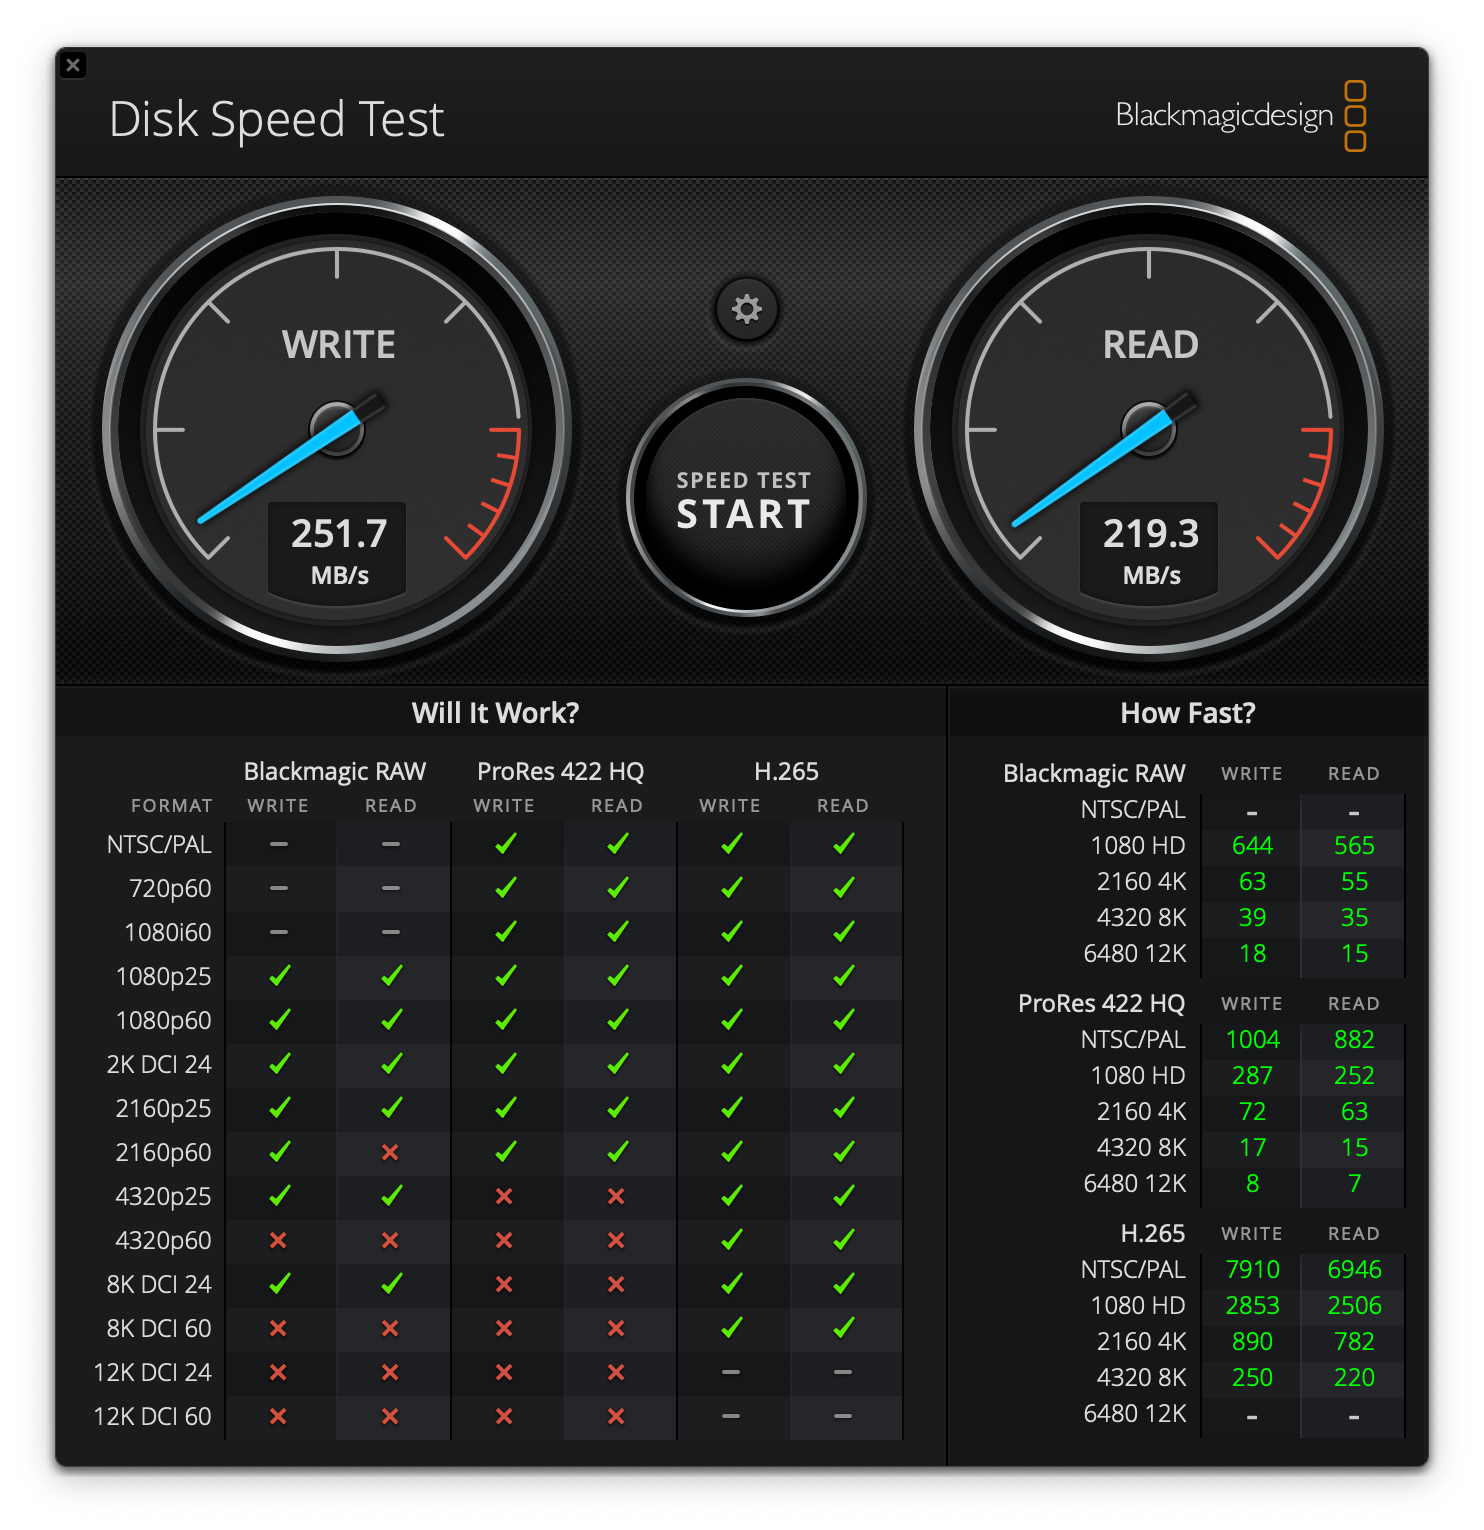
With this configuration (RAID 10) I got these numbers in BlackMagic Disk Speed Test. Not anywhere near SSD levels, but more than enough for regular media backup. However, it is good to know that I can upgrade to SSDs in the future if I ever need it and prices allow, as the Thunderbolt connection will always allow me to take advantage of their speed.
Comments
Post comment